kellysHeros
Grenadier Owner
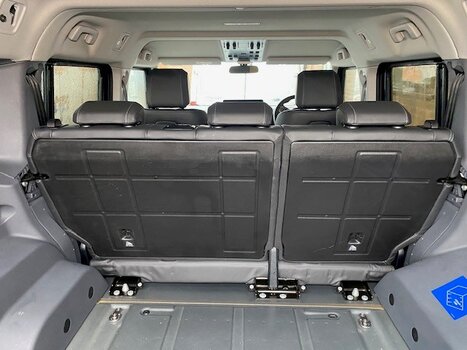
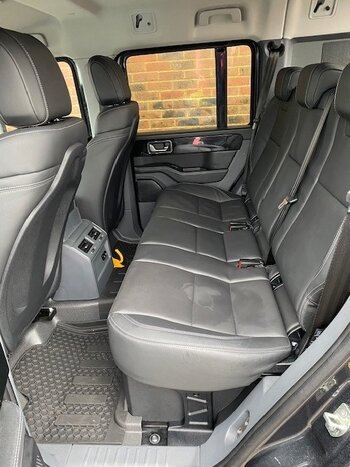
Disappointed with the legroom in the 5 Seater Commercial (UK) Grenadier. No problem, simply move the rear seat to match the location of the Trial and Fieldmaster. Passengers wont only benefit from greater leg room, but will also enjoy the more reclined rake of the seat back.
Time required: The whole job took no more than 2 hours.
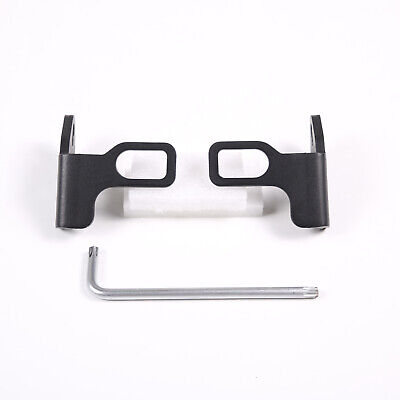
Kit required: Small Phillips screwdriver / Security Torx socket / Smaller standard Torx socket / Rachet and extension bar
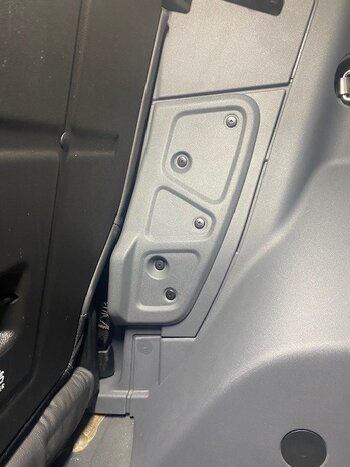
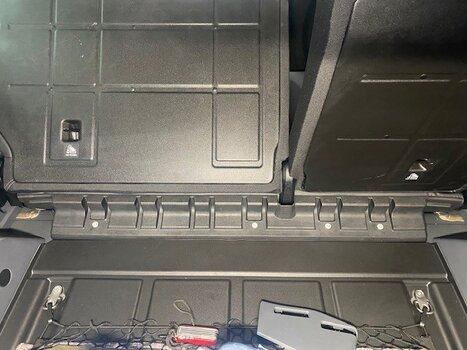
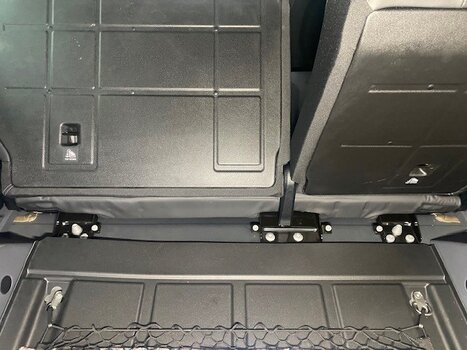
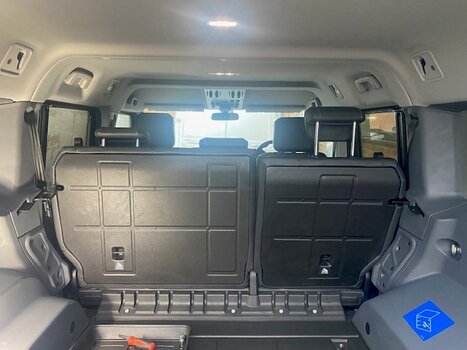
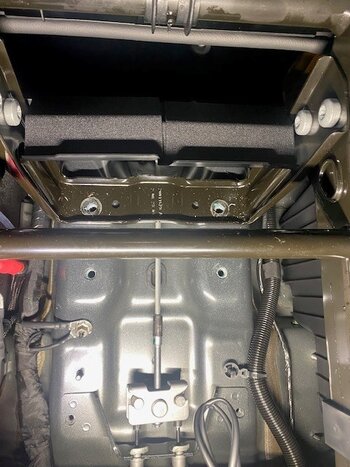
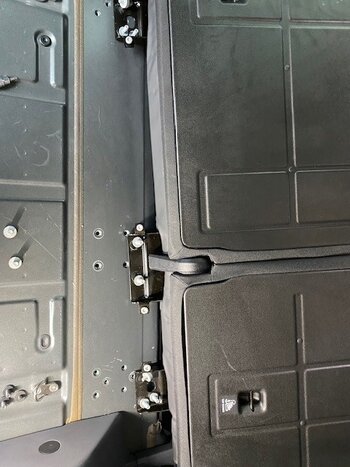
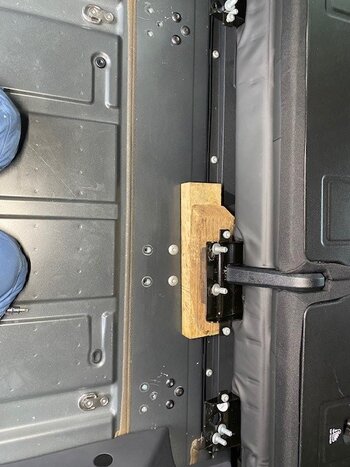
Step 1 - Remove caged bulkhead from the rear load space. Pic 1 shows the top fixing mount in the headlining (Torx bolt) and the bottom fixing mount (Torx bolt), just behind the seatback retaining bracket. Pic 2 shows the mounts with caged bulkhead removed.
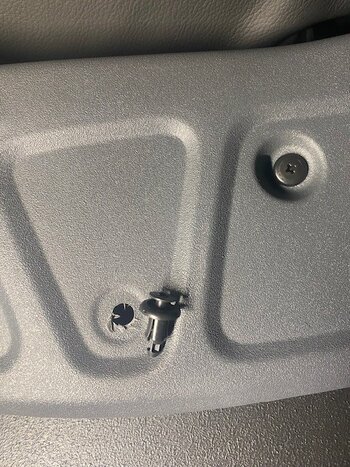
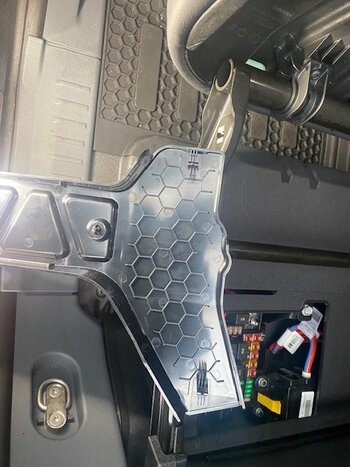
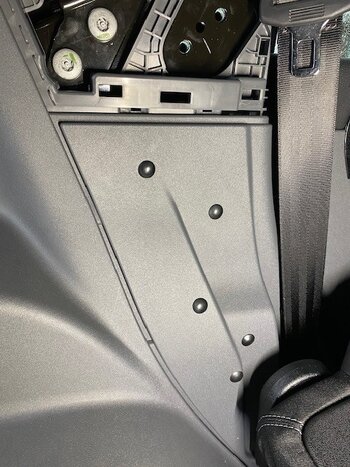
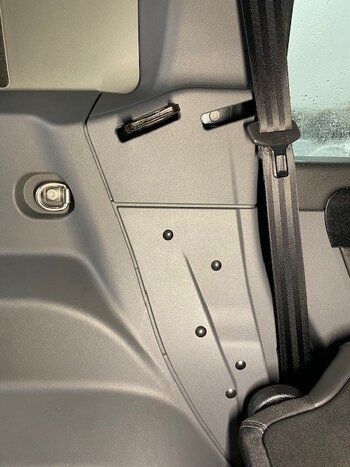
Step 2 - Remove the additional trim cover plates as shown in Pic 3. These trims are held in place by 5 x plastic press clips. Use the small Philips screwdriver to release the clips. Clips can be seen in Pic 4
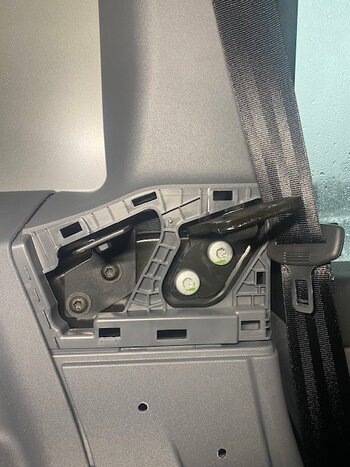
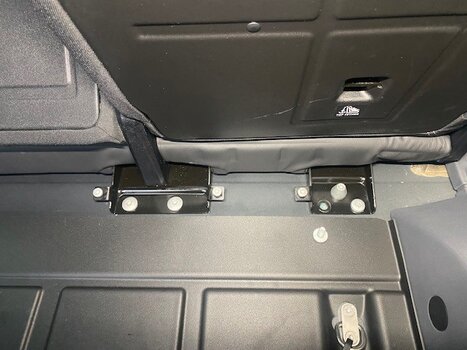
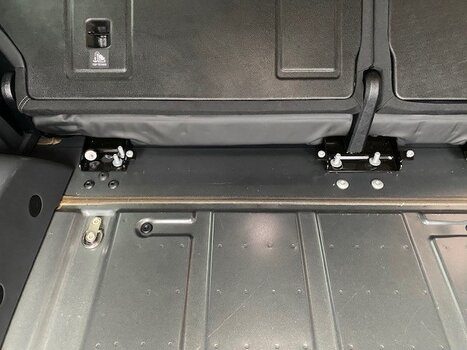
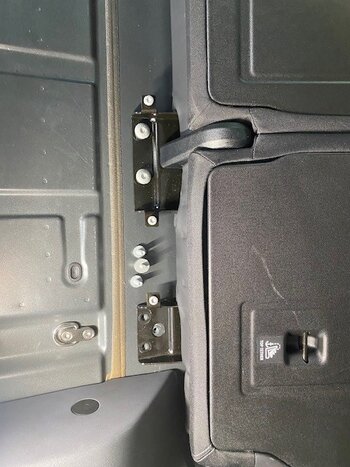
Step 3 - Remove, both the rear seatback retaining mount and caged bulkhead mount (both sides), shown in Pic 5
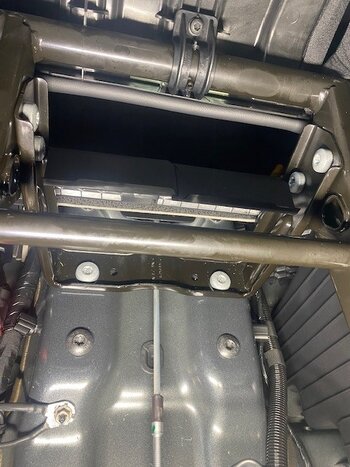
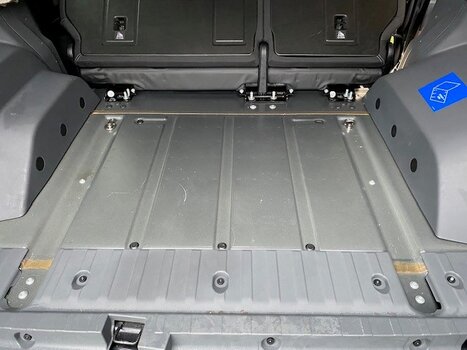
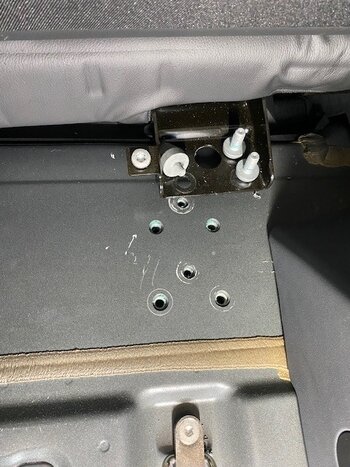
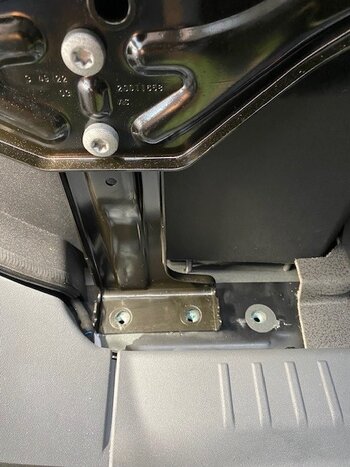
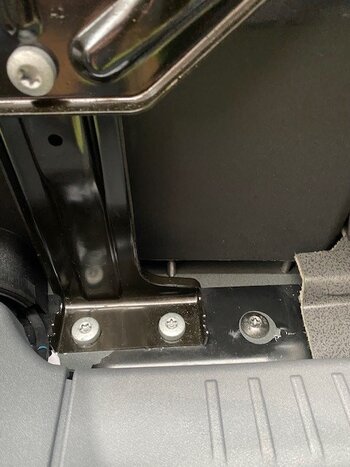
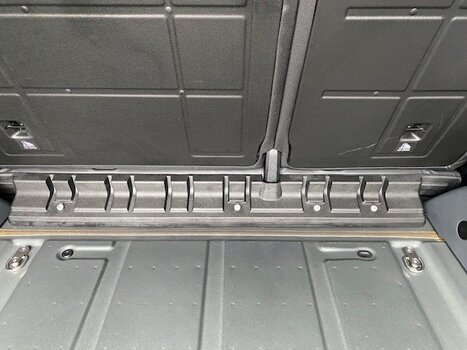
Step 4 - Remove the rear seat bottom trim as seen in Pic 6. Pics 7 & 8 show the torx bolts under the trim panel. These torx bolts will also need removing (Zoom in on pics for detail)
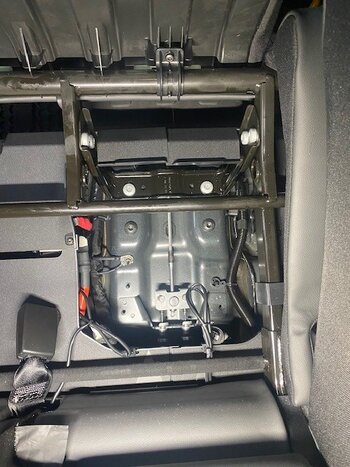
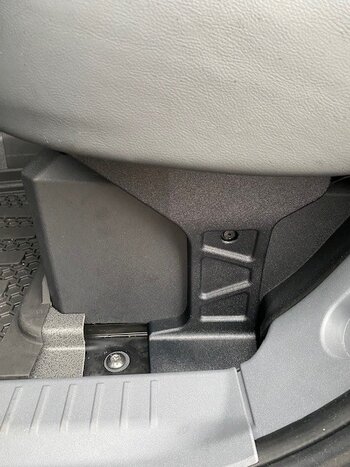
Step 5 - Go around to the side of the car and remove the rear seat leg mount trims, shown in Pic 9 (this is held in place by the top 2 x clips and a centre plastic press clip. The top two clips simply ease out however, the centre clip is the same used on the additional trim removed in Step 2. Once the trims are removed, remove the mounting bolts as seen in Pic 10. Repeat on other side.
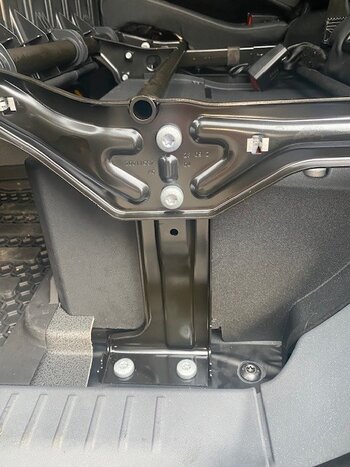
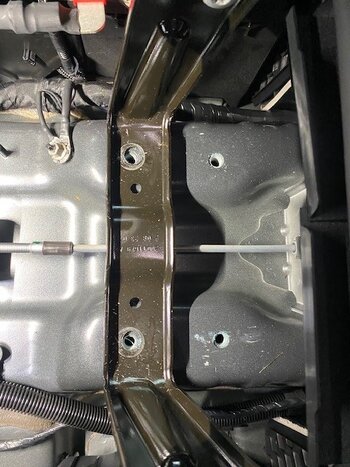
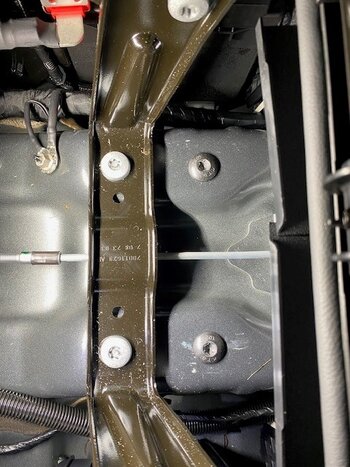
Step 6 - Remove the centre seat base mount bolts and the second dark grey (non security torx) bolts also. You can identify both sets of bolts clearly in Pic 11 & 12. Pic 13 shows both sets of bolts removed.
Step 7 - As mentioned in Step 4, remove the torx bolts from the backrest base as shown in Pics 14, 15, 16 & 17. Refit the additional bolts (second/spare set) into the threads the backrest was originally bolted too. Then using the original backrest bolts, position and tighten in the second set of threads. These are the thread sets that are positioned the furthest to the rear of the vehicle and had the additional/spare bolts secured in them. Seen in Pic 18 & 19.
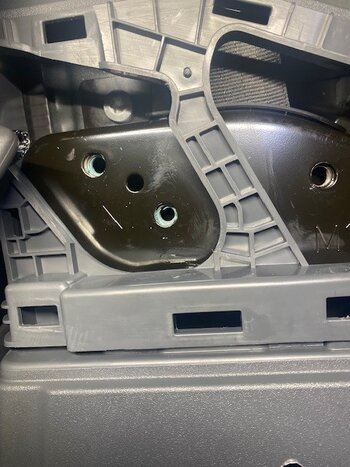
Step 8 - Refit the backrest mounting bracket to the two threads marked M1 or the furthest set to the rear of the vehicle, see Pic 20. Interestingly, I noted these mounts were originally positioned in a location stamped N1 and wonder if this is deliberate to match its N1 Commercial classification. Note, you wont be using the bracket that was used as the bottom mount for the bulkhead. This can be seen in Pic 21. Pic 22 shows the backrest mount in place with the trim refitted. I also used some rubber bungs to fill in the previously used holes, for a more complete finish.
Step 9 - Secure the seat base mount to the new fixings, using the original security torx. Use the second grey set of bolts to fill the previously used threads. Both seen in Pics 23 & 24
Step 10 - Now the seat is in its new position, Secure the seat base legs in the new position. Seen in Pic 25 & 26. Refit leg trim as seen in Pic 27
Step 11 - Refit seat back trim as seen in Pic 28 & 29
Step 12 - Pat yourself on the back for a job well done. Seen in Pic 30
Time required: The whole job took no more than 2 hours.
Kit required: Small Phillips screwdriver / Security Torx socket / Smaller standard Torx socket / Rachet and extension bar
Step 1 - Remove caged bulkhead from the rear load space. Pic 1 shows the top fixing mount in the headlining (Torx bolt) and the bottom fixing mount (Torx bolt), just behind the seatback retaining bracket. Pic 2 shows the mounts with caged bulkhead removed.
Step 2 - Remove the additional trim cover plates as shown in Pic 3. These trims are held in place by 5 x plastic press clips. Use the small Philips screwdriver to release the clips. Clips can be seen in Pic 4
Step 3 - Remove, both the rear seatback retaining mount and caged bulkhead mount (both sides), shown in Pic 5
Step 4 - Remove the rear seat bottom trim as seen in Pic 6. Pics 7 & 8 show the torx bolts under the trim panel. These torx bolts will also need removing (Zoom in on pics for detail)
Step 5 - Go around to the side of the car and remove the rear seat leg mount trims, shown in Pic 9 (this is held in place by the top 2 x clips and a centre plastic press clip. The top two clips simply ease out however, the centre clip is the same used on the additional trim removed in Step 2. Once the trims are removed, remove the mounting bolts as seen in Pic 10. Repeat on other side.
Step 6 - Remove the centre seat base mount bolts and the second dark grey (non security torx) bolts also. You can identify both sets of bolts clearly in Pic 11 & 12. Pic 13 shows both sets of bolts removed.
Step 7 - As mentioned in Step 4, remove the torx bolts from the backrest base as shown in Pics 14, 15, 16 & 17. Refit the additional bolts (second/spare set) into the threads the backrest was originally bolted too. Then using the original backrest bolts, position and tighten in the second set of threads. These are the thread sets that are positioned the furthest to the rear of the vehicle and had the additional/spare bolts secured in them. Seen in Pic 18 & 19.
Step 8 - Refit the backrest mounting bracket to the two threads marked M1 or the furthest set to the rear of the vehicle, see Pic 20. Interestingly, I noted these mounts were originally positioned in a location stamped N1 and wonder if this is deliberate to match its N1 Commercial classification. Note, you wont be using the bracket that was used as the bottom mount for the bulkhead. This can be seen in Pic 21. Pic 22 shows the backrest mount in place with the trim refitted. I also used some rubber bungs to fill in the previously used holes, for a more complete finish.
Step 9 - Secure the seat base mount to the new fixings, using the original security torx. Use the second grey set of bolts to fill the previously used threads. Both seen in Pics 23 & 24
Step 10 - Now the seat is in its new position, Secure the seat base legs in the new position. Seen in Pic 25 & 26. Refit leg trim as seen in Pic 27
Step 11 - Refit seat back trim as seen in Pic 28 & 29
Step 12 - Pat yourself on the back for a job well done. Seen in Pic 30
Attachments
-
 Pic 1 - Removed Bulkhead.jpg81.5 KB · Views: 149
 -
 Pic 2 - Removed Bulkhead p2.jpg66.6 KB · Views: 143
 -
 Pic 3 - Spare Trim Panel.jpg72.9 KB · Views: 142
 -
 Pic 4 - Spare Trim Panel Clips.jpg141.7 KB · Views: 141
 -
 Pic 5 - Bulkhead and Rear Seat Mounts.jpg101.1 KB · Views: 138
 -
 Pic 6 - Rear Seat Bottom Trim.jpg85.4 KB · Views: 139
 -
 Pic 7 - Rear Seat Bottom Trim Removed.jpg87.7 KB · Views: 140
 -
 Pic 9 - Rear Seat Leg Trim.jpg87.9 KB · Views: 136
 -
 Pic 8 - Rear Seat Bottom Trim Bolts.jpg78.6 KB · Views: 131
 -
 Pic 10 - Rear Seat Leg with Trim Removed.jpg94.8 KB · Views: 154

")