The Grenadier Forum

Register a free account today to become a member! Once signed in, you'll be able to contribute to the community by adding your own topics, posts, and connect with other members through your own private inbox! INEOS Agents, Dealers or Commercial vendors please contact admin@theineosforum.com for a commercial account.

Show us your mods.

Simple ideas are often the best. I might steal your idea. What are you doing with the remaining 8 metres on the roll? 😁

I had some clear ppf put over the raised door section between the 1st and 2nd rungs. It's cut out around the Lambda. I made a note to do this after seeing boot scratches on the doors of some of the test fleet that toured Australia.
Ha, I need to find an application for the rest of the roll! High on the list is to put two strips along 2 sides of the 'viewing platform' that I've put onto the roof to minimise slippages while sitting up there watching the world go by 😂

PPF on the rear door is another good idea. The cuts around the Lambda look very precise - are you very good at wrapping or was it an aftermarket purchase (and if yes, where did you buy it?).
A few owners have put skateboard deck tape over the tread areas of their doorsills to add further protection over the vulnerable corners. A strip of anti-slip would do the same if you're looking for places to use it.

It's not my handiwork. My local sign shop does a lot of vinyl cut work and did the Lambda and clear ppf for not a lot of money. Far superior skills for the job. Coloured Lambda infills for Grenadier are available on Etsy and I think a US forum member was doing some sets a while back.
 
I am still going thru all the post on mods etc. I have been looking for a pad for the rear cargo area. I was looking for a bedrug to cut to find since I really like their products and
have them in my trucks and jeep. Since I haven't lucked out find one I bought this one
from amazon.

Cargo Mat Compatible with INEOS Grenadier 2020-2024 Accessories, Customized Specialized Trunk Mat, All Weather Protector Rear Cargo Mat, Waterproof Cargo Liner Trunk Mat, Non Slip Backing​


it actually work good but I still wanted a bedrug. I saw this cut down in some other website and went to lowe's and it is sort of close to the bed rug and cheap so I bought one and am trying
it out to see if I like it.
 

Attachments

  • thumbnail (25).jpg
    thumbnail (25).jpg
    836.4 KB · Views: 35
  • thumbnail (2).jpg
    thumbnail (2).jpg
    270.8 KB · Views: 38
It's a very simple 'modification', but very effective at helping to avoid any slippage on the rear ladder. I bought a roll of 50mm x 10m anti-slip abrasive tape on ebay for £13, cut individual pieces to size, and stuck them on. I've used this on rock sliders on my other 4x4 and it's hard wearing and lasts for ages. As/when it wears down to the point that you want to replace it, it's easy to simply peel off and renew.

View attachment 7894407
View attachment 7894408
View attachment 7894409
Do you have the eBay seller name or listing? I was looking at some tape from the marina but it's possibly the same .
 
Do you have the eBay seller name or listing? I was looking at some tape from the marina but it's possibly the same .
 
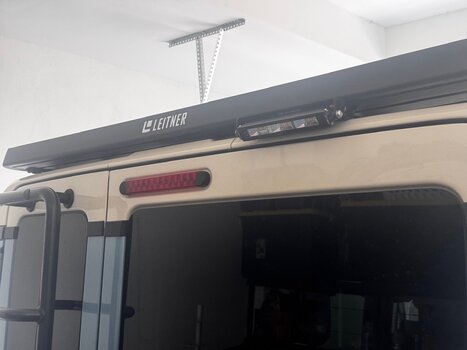
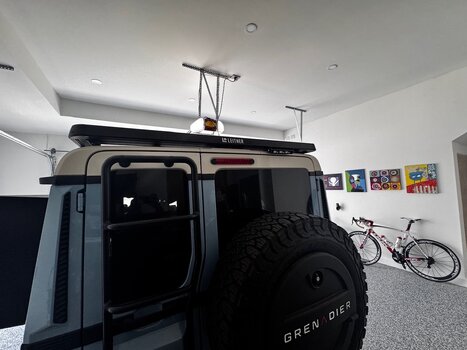
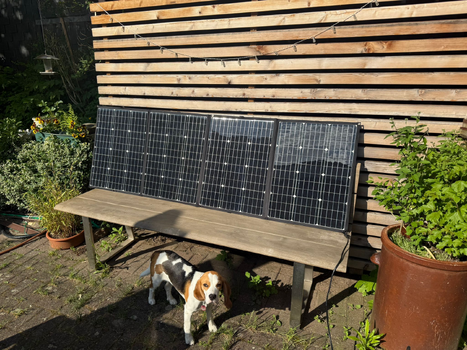
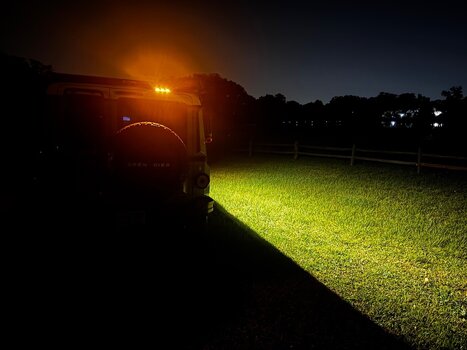
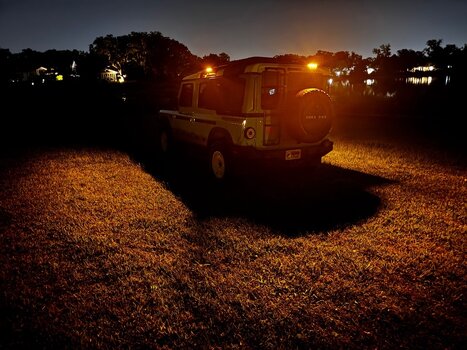
I am in the process of installing Stedi work flights on my Leither rack. They are made in Australia. I've been looking at many different options and these did everything I wanted: Strong light for setting up camp, dimmable with a very soft / low light feature keeping bugs away, white and/or amber color, stealth install, high quality/long lasting, reputable brand.

I chose the Micro touch v2 7.8" model. They have a set of white and orange LEDs embedded. You can turn them both on, just one or just the other. The colors are individually dimmable, and they remember their last setting. Stedi USA does not carry these versions in the US for some reason so I ordered from stedi UK website. No problems and arrived in the US in a few days via DHL. Paired them with steed steel roof rack brackets.

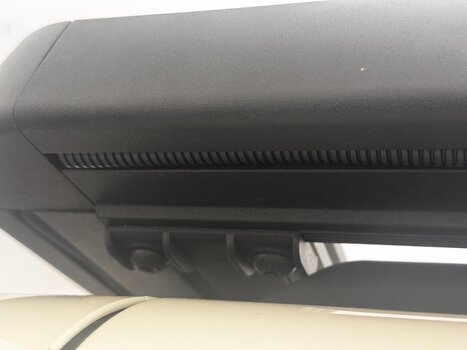
The lights are very well made, they feel solid, casing is metal, and the brackets are super solid steel. I had a hard time cutting through them with a metal bit on the drummer as I needed to modify the depth for the side of the Leitner rack.

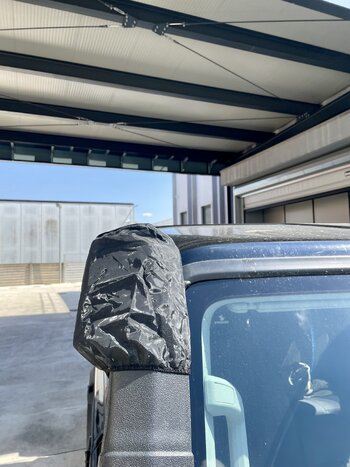
I used Leitner bolts to mount to the underside of the rack. That is absolutely the way to go, and much easier to manage than the tabs that come with the lights themselves. Super easy to install and super secure. The lights from pre-wired with deutsch plugs, and I zip tied that to the underside of the bracket behind the light so you cannot see it. The wires then route up into the track in the rack, inside a 1/2" plastic sheathing that pops in and stays stuck. Very neat and tidy finish.

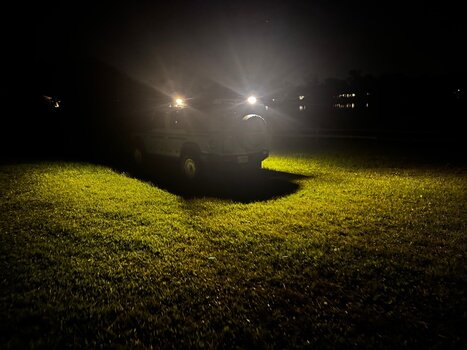
I mounted the side lights today after some head scratching and planning. Tomorrow, when my second set of brackets come, I will mount the third / rear light and tie them all together and terminate at one of the rear deutsch plugs in the roof of the grenadier (I order some connectors from Agile off-road as we'll as a crimping tool). the lights will be operated from inside. I will follow up when complete. I am very happy with the quality, value and install process so far. the lights are are about $70 each and the brackets are 2-for-$55 or so.

View: https://www.youtube.com/watch?v=VNN7bfDz438


Finished up the install. Wires all routed in the internal tracks in the leitner rack. Used 3/8” plastic conduit and it fits perfect.

Happy with the outcome. Lights are awesome I keep the rear on high /white+orange for reversing and sides low orange only.

Switched via overhead panel.
 

Attachments

  • IMG_4675.jpeg
    IMG_4675.jpeg
    340.7 KB · Views: 33
  • IMG_4673.jpeg
    IMG_4673.jpeg
    333.1 KB · Views: 33
  • IMG_4674.jpeg
    IMG_4674.jpeg
    459.6 KB · Views: 27
  • IMG_4672.jpeg
    IMG_4672.jpeg
    379.5 KB · Views: 26
  • IMG_4670.jpeg
    IMG_4670.jpeg
    343.9 KB · Views: 26
  • IMG_4668.jpeg
    IMG_4668.jpeg
    389.7 KB · Views: 25
Finished up the install. Wires all routed in the internal tracks in the leitner rack. Used 3/8” plastic conduit and it fits perfect.

Happy with the outcome. Lights are awesome I keep the rear on high /white+orange for reversing and sides low orange only.

Switched via overhead panel.
That's very tidy. Nicely done 🍻
 
Back
Top Bottom