The Grenadier Forum

Register a free account today to become a member! Once signed in, you'll be able to contribute to the community by adding your own topics, posts, and connect with other members through your own private inbox! INEOS Agents, Dealers or Commercial vendors please use the contact us link at the bottom of the page.

Grenadier plug and play Soundsystem How we do it

I do agree it was expensive but I also live in an expensive area. There is an elevated price in goods and services. I do have say they did a great job.
Can you reveal anything about this connector? I want to install an amp but would rather use that plug than trying to splice anything.
IMG_6595.jpeg
 
Can you reveal anything about this connector? I want to install an amp but would rather use that plug than trying to splice anything.View attachment 7901514
I got nothing for you man, have you tried a audio shop to provide direction? The shop I was at was trying to get me to buy the Pico 6/8 DSP amp. Very expensive but super small. 160mm x150mmx 46mm basically 6x6x1 inches.
 
Going with a Kicker 200.4 which has a nice, small footprint and will go under the driver seat (my little subwoofer is under the passenger one). I’ve combed through every car electronics page I can find (including some sketchy ones in China) and I cannot find the male end to that input.
 
Going with a Kicker 200.4 which has a nice, small footprint and will go under the driver seat (my little subwoofer is under the passenger one). I’ve combed through every car electronics page I can find (including some sketchy ones in China) and I cannot find the male end to that input.
May want to try Elias at Technic PnP - he focuses on BMW but is pretty good with general knowledge across car audio. In addition to his stock offerings he's built a few custom harnesses for me over the years when I was trying to get cute with upgrading amps but keeping OEM installed in parallel for SW updates.

 
Firstable. The following text is Google translated. My english is way better. ;-) But because of less time which I normally have I used translate.
After another significantly longer break (longer than planned), I finally found time today for the third and final part of the plug and play sound system series.
In the first two parts, we already covered speakers and insulation, as well as a large part of the installation. If you have any general questions, feel free to send me a private message or an email to bs@car-u-audio.de.

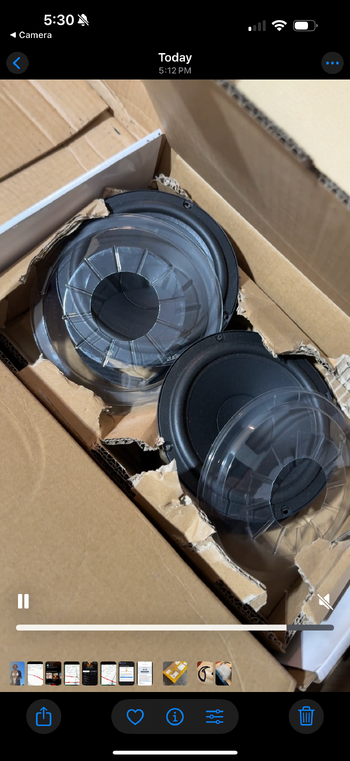
Let's first talk about the subwoofer. Since we are well aware that most of you need the space in the trunk, a solution that sits in the trunk was out of the question for us. Also considering that all Quartermaster and Utility Cabs would have been out of the question. A solution below the back seat is also out of the question due to the dual battery system that many vehicles have. All of these factors led us to take a closer look at the space below the passenger seat. The space we found here is tight, but with a few tricks it is just enough. Since the area gets wider from bottom to top, with each one being less than 8 inches at the bottom, the enclosure needs to get gradually larger towards the top. This is because the subwoofer we are going to use has a total diameter of 8,8 inches. A cuboid enclosure would therefore be out of the question. A smaller woofer would also be impossible, as decent performance simply cannot be achieved here. Furthermore, it is not possible to remove the black screwed metal support, although others claim otherwise. This is part of the vehicle's stiffening concept and is essential! It's not without reason that the device is so solidly built. The solution is a casing that builds up layer by layer, following the frame principle.

IMG_9315.JPG

IMG_9320.JPG


The finished result is a very sturdy 6-liter subwoofer enclosure that takes up virtually no space in the vehicle. The bottom layer is constructed of multiplex for maximum resistance to standing water.

IMG_0001.jpg

IMG_9912.JPG

IMG_9914.JPG


Now let's move on to the final part: the amplifier. The V3 system uses a 4-channel processor amplifier that drives the new front speakers and subwoofer. The V4 Masterpack, on the other hand, uses an 8-channel processor amplifier that also drives the rear speakers and provides the subwoofer with 50% more power. Why do all our solutions have integrated signal processors? Because it's simply the only way to produce a truly targeted result by eliminating the decentralized positioning of the driver, influencing the phase positions of the individual speakers, and shaping the frequency response as desired or as required by the Grenadier. It's a game changer for a sound system!

Let's take a look back. This is the input measurement with the original speakers on the stock radio.

Forum-6.jpg


And this is the new measurement with new speakers, insulation, subwoofer and 8-channel processor amplifier!

Forum-8.jpg


You can clearly see how smooth the entire frequency response is between 200 Hz and 20 kHz. There are only minimal outliers here. We've retained the peak above 150 Hz because that's what most people prefer, and because it's significantly smaller when driving, so tire noise overwhelms the system. Between 60 Hz and 80 Hz, it's now clearly visible that a subwoofer is present.
The red line shows the woofer at +5 dB extra boost, if desired. This can be adjusted using the DRC controller. We recommend installing it in the roof console.
IMG_9909.JPG


Before the question arises: Yes, the controller can also be mounted on top if the additional switches are present. The controller not only controls the subwoofer but also the master volume. Why is that important? The Grenadier radio only has 14 control levels and is already very coarse in its standard state. We all know the feeling. Level 3 is too quiet and level 4 is already too loud. Installing an amplifier doesn't really make things any better. The controller itself has 50 (!) control levels. This means that it allows for very sensitive presetting, so that in everyday life you can always control the radio or steering wheel the way you want. The stand-alone kit can also be controlled using this.
What is the stand alone function? The Grenadier has no way of leaving the radio on when the ignition is off. This is bad if, for example, you want to sleep in the vehicle and want to listen to some music in the evening. Or if the hunter is in the hunting area at night and would like to have some quiet music.
The stand-alone function can be activated by the audio system using the INT1 switch. You can now stream music directly from your smartphone to the amplifier via Bluetooth 24/7! The volume can be controlled on your smartphone as well as on the roof controller. Another great feature is a free app that you can use to control the system,
including a battery voltage display. This way you can quickly check whether the battery is still in good condition.
Forum-9.jpg


The amplifier itself is located below the driver's seat. This location represents a very good compromise for us, considering space requirements, cable lengths, installation time, etc. However, if necessary, we can also assemble a longer wiring harness for installation under the rear seat between the batteries. No problem.

IMG_9629.JPG

IMG_9628.JPG

IMG_0025.jpg


The end result is a truly extremely well-functioning sound system that doesn't have to shy away from systems in premium vehicles like BMW or Mercedes. Quite the opposite: In many respects, the system is superior! For the largest V4 Masterpack, you should expect installation time to be approximately 10-12 hours. We install it at our locations in Wunstorf near Hanover and Wesel in 8 hours. So, we're talking about a one-day appointment. For all DIY installers, there's a very well-written PDF manual that leaves no questions unanswered.
By now, well over 60 people worldwide have purchased and installed the set. Everyone was thrilled. And we're thrilled with the overwhelming response to our idea. A huge thank you to all of you.

I hope this little series has given you an insight into our work and the development phase of such a product and I hope you enjoyed it.
IMG_0005.jpg
 
I’m going to create a new post about this system but wanted to leave people some info so they didn’t have this happen to them.

I ordered the v4 system from simsound (Bjorn at car & audio) and I would recommend purchasing elsewhere. First, there were some good things about the system, the cables were good and all worked for the most part. The directions were adequate and the insulation kit was good. The bad: The shipping, packing, customer service and tuning of the system was all horrible. Also this is just a basic Audison system you can buy all the parts for. The only thing custom is the little tiny sub and the cables. And the tuning file which you shouldn’t even use.

My system took 27 days to arrive to the US from Germany. For over $3000 spent you’d probably like to select a better shopping option. He argued with me and said no, too expensive. And told me DHL only delivers in the US with USPS which isn’t true. They have a DHL option that is express as well as FedEx which has an express international option. All too expensive he said but I’m sure the client would pay. Very rigid, not open to discussion which is the case on every discussion with this guy. Broken pieces in shipping included the subwoofer driver, subwoofer grille, 3d printed spacer, and the front woofers were all beat up with no packing material. Everything was single boxed.

So my packages all came with USPS which is always a disaster. First thing that arrived is the sub which was heavily damaged and had literally no packing material. I thought it was just the grille dented at first so I just asked for a replacement grille. I later realized that the whole basket of the speaker itself was bent over a 1/2” and was distorting badly. You can see how one side of the magnet is bent way up in the picture.

I contacted him about covering the cost for a replacement woofer. I could order one locally to get here in 2 days for $277 including shipping. He wouldn’t hear of it because he could get the parts cheaper. He insisted on shipping me another woofer from Germany. This would maybe take another 27 days? This is just super bad customer service in my opinion. In the end he offered to send me 100 euro because he said that’s all that this would cost him. Since the packing was so bad with multiple damaged pieces I thought he should cover the expense of a replacement woofer locally. It was $277 including shipping. I later found one on amazing for $249 shipped.

Tuning: this is a DSP system and based on some other reviews I was expecting it to be great. I work in music so I’m a pretty experienced engineer. After a little digging I got a test mic and retuned the system. The tuning from Bjorn at Car & Audio in my opinion is way off. Like I’m not even sure how they got it so off. Even the phase and time alignment numbers are way off the mark.

If anybody wants my tuning config file you can have it. Just send me a message and your system will sound so much better. With the pc software you can easy switch back and forth between the two. Night and day.

The sub: It is insuffienft in this conflig because the caninet is so tiny. Doing a larger cabinet somewhere in the back and small mid bass drivers in the front under the seats would be better. This works but it’s not great.

In the end I would recommend ordering elsewhere. If you want Audison there is a dealer that Audison recommends for the Grenadier in their site who is not this dealer. In the US if I had it to do over I’d probably go with a different manufacturer. Although the tuning software for Audison is pretty cool, the eqs and amps don’t sound amazing. Keep in mind this is kind of a consumer system using high level outputs from thr Grenedier head unit. Meaning you’re getting amp distortion from the head unit and the Audison. Not ideal but easier install with smaller footprint. With a better sub solution and additional tweaking I think it could be a lot better.


IMG_1611.jpeg
IMG_1612.jpeg
IMG_2028.jpeg
IMG_1834.jpeg
IMG_1984.jpeg
IMG_1986.jpeg
 

Attachments

  • IMG_1986.png
    IMG_1986.png
    4.1 MB · Views: 0
Back
Top Bottom