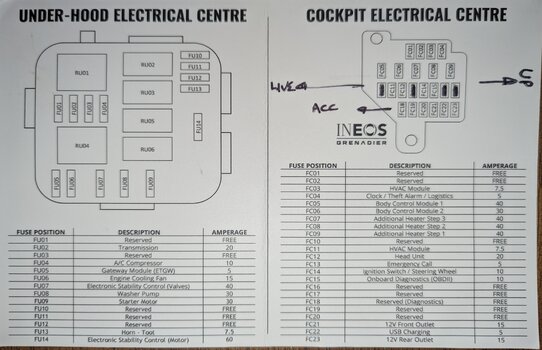
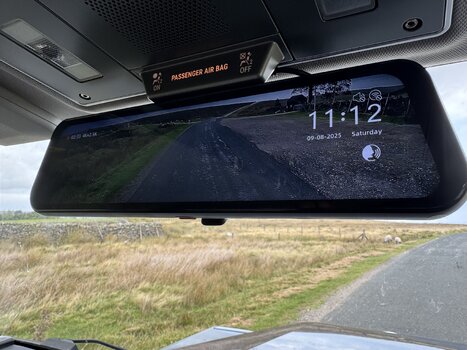
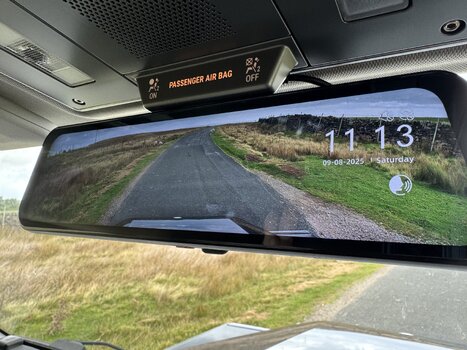
Here I installed a new Wolfbox 900 pro... I did the installation in a less conventional way. Ran it under the truck...
I figured if I needed to go under the truck with the front camera, I would do the rear camera the same.
Notes- I used alien tape to secure the cameras-
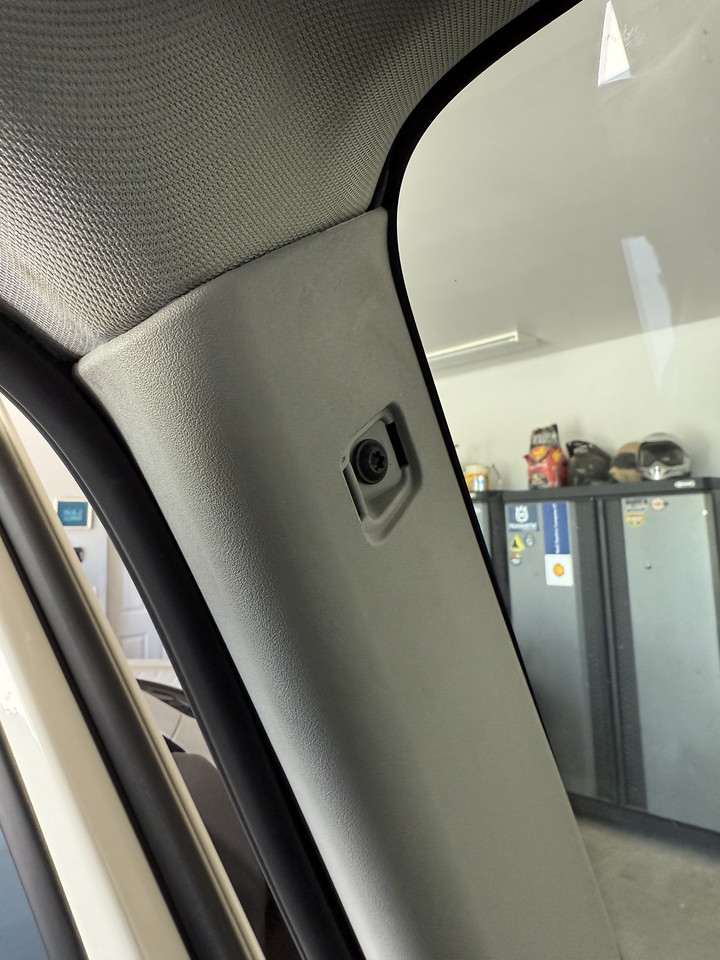
I mounted the 3rd camera on the front grill (camera 1 in the mirror, camera 2 inside the top of the rear window)
I did not use the red power trigger that pops up the reverse camera with the hatch lines.
The unit has voice recognition. "Show rear camera." crazy cool
A few people on YouTube mentioned the first upgrades one needs. I agree on this one!
It has a WIFI high-speed app where one can connect and record to their phone, another super cool feature.
Ok lets start.....
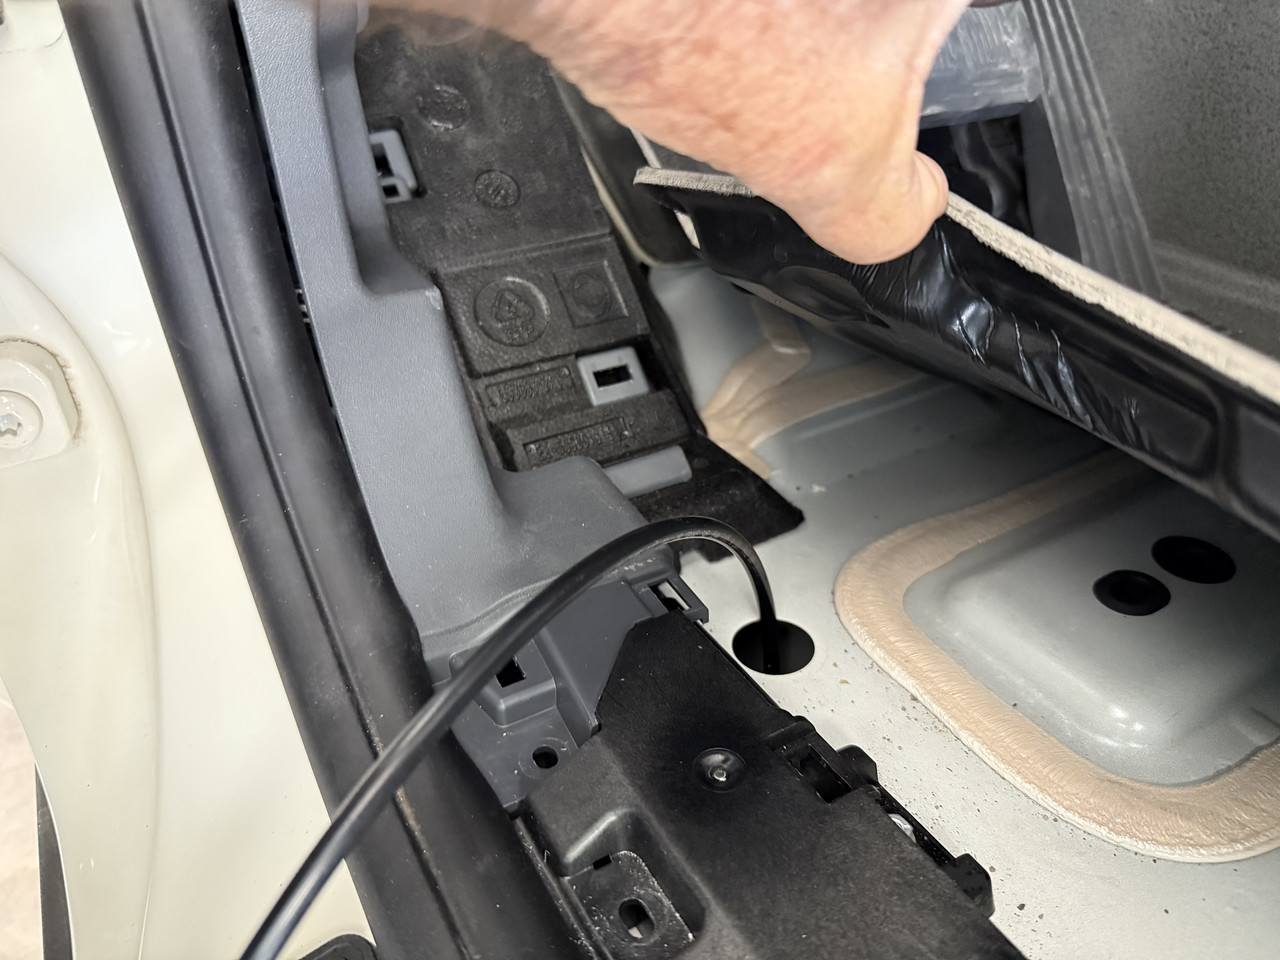
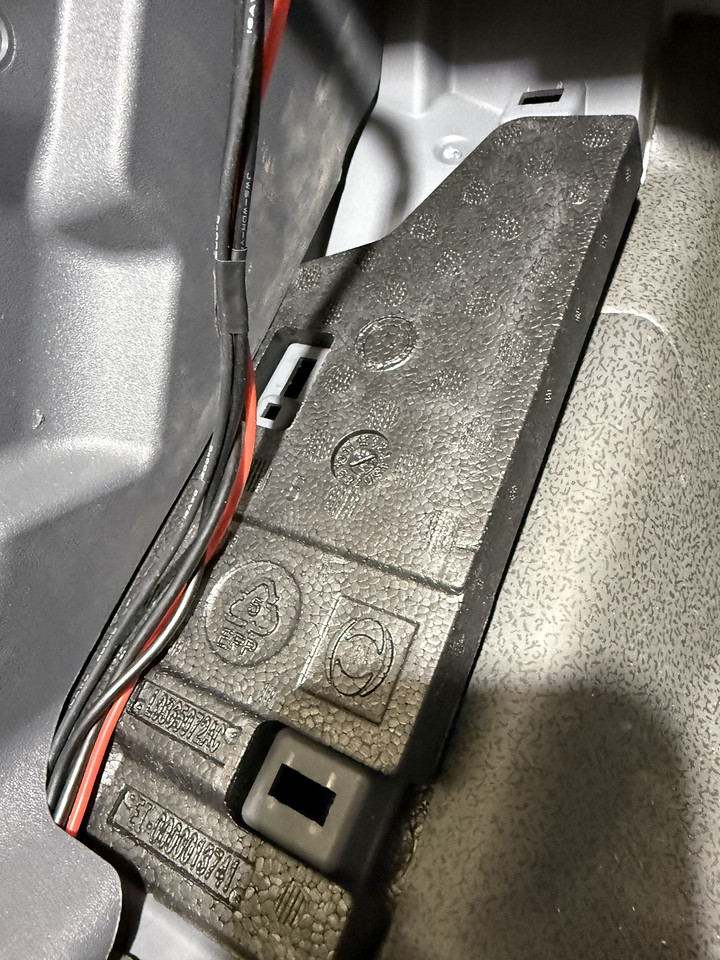
I saw a guy on an Owl Overland video run power to his electric running boards via the hole in the floorboard under the pad. That port exits right under it TO A SECOND PLUG near the driver's body mount. So I drilled holes through the two rubber plugs for my wiring.
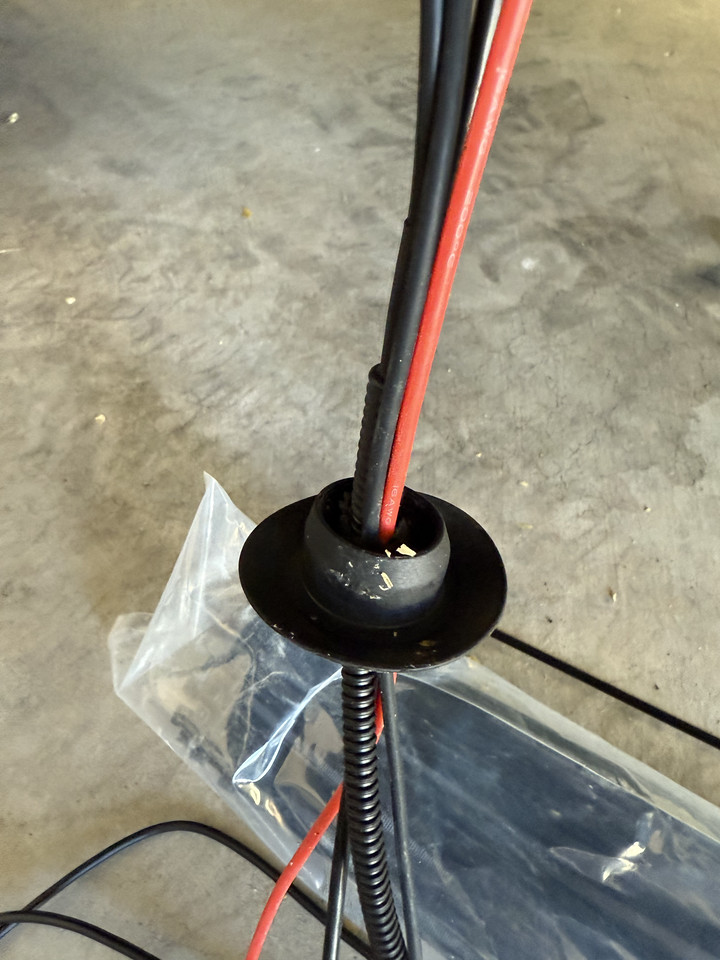
I use a 1/4 plastic tubing as a fish tape...
See here, I pushed the tubing through the floor plugs and used it as a fish tape.
Here is the plug on the other side....
Here the wire is ran through the plug ... While I was running wires, I added a red and black for future lights.
First pull the jam plate up (no screws) and the foot rest plate (no screws just pull up)
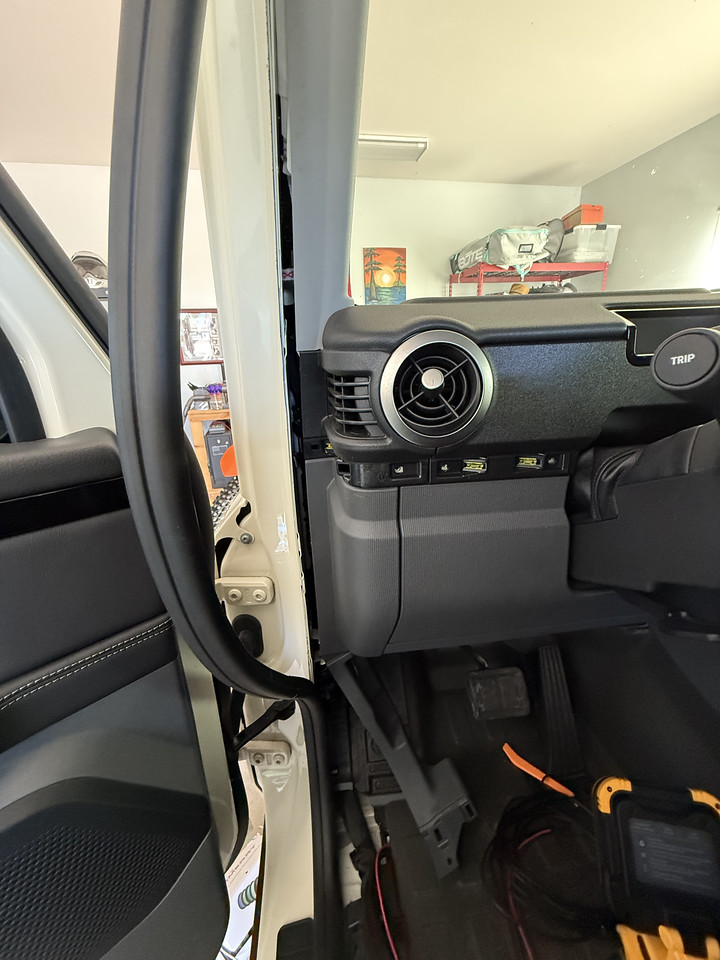
I then pulled the kick plate on the left, removed two screws (black wood screw for the hood lever, grey wood screw holds the panel on), one 10 mm nut on the fire wall, and one 10 mm bolt on bottom near the jam plate.
I ran the wire under the factory harness (not shown), and then next to the hood latch, then up the crack.
(I removed the door seal rubber and installed the wire through the crack)
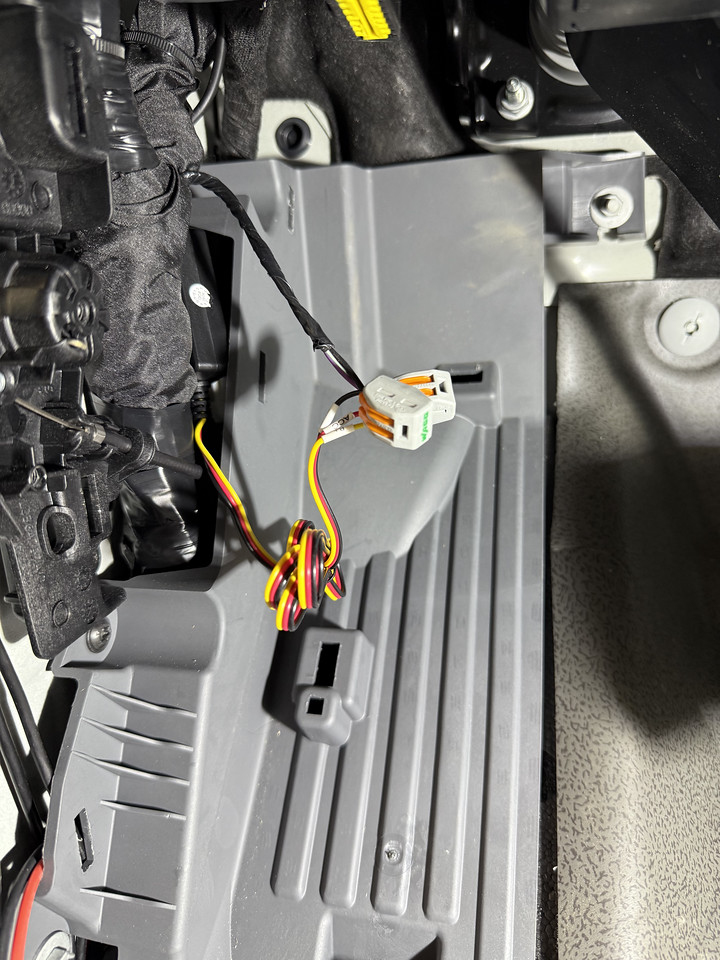
I tied the power into the Aux switch 1 wires that were taped to the main harness using lever nuts.
(I used the USBC power module instead of the lighter scocket plug)

Here you can see the power module tucked behind the plate (white dot QC sticker on it)
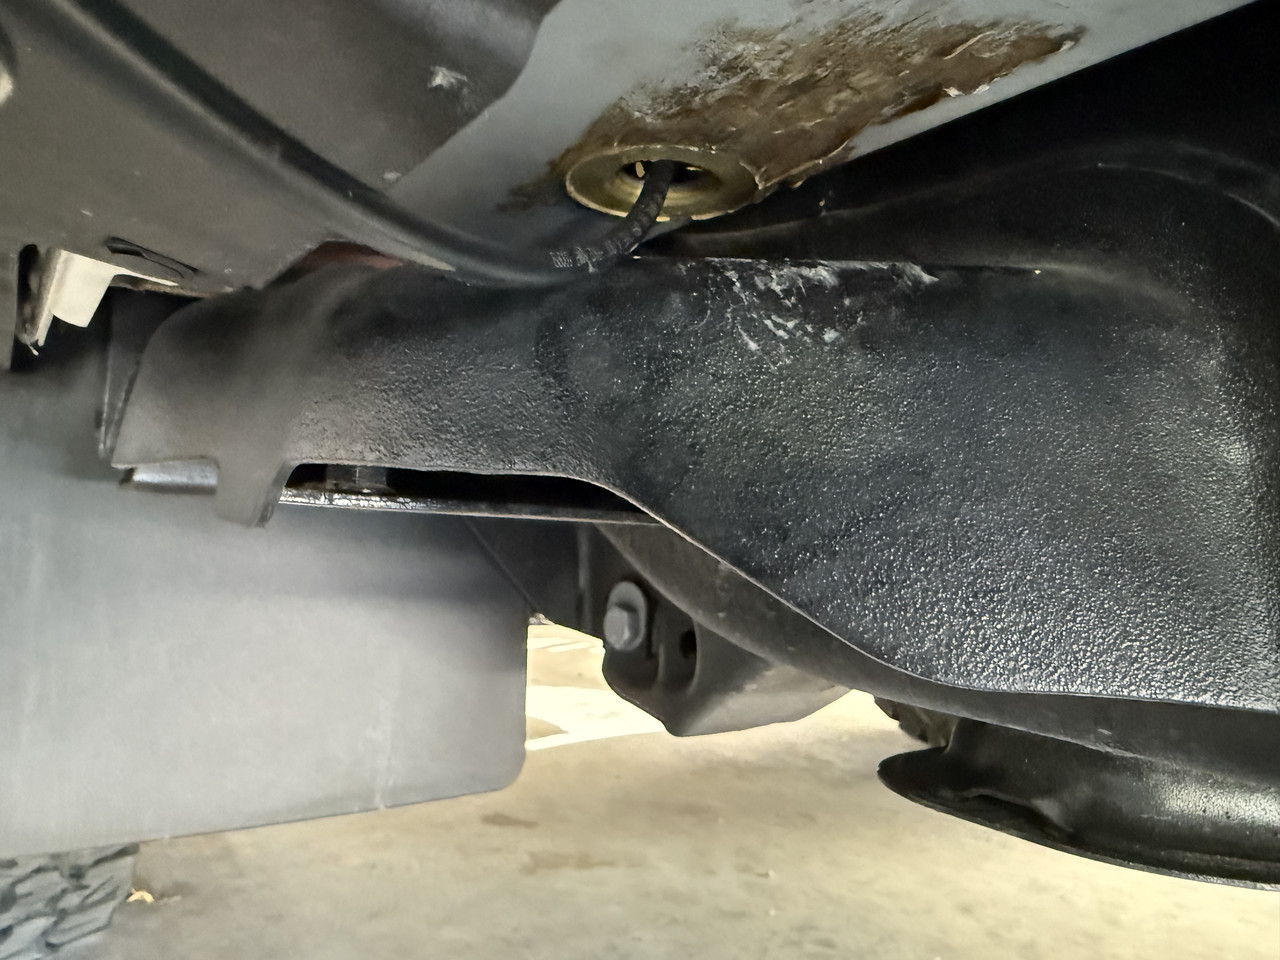
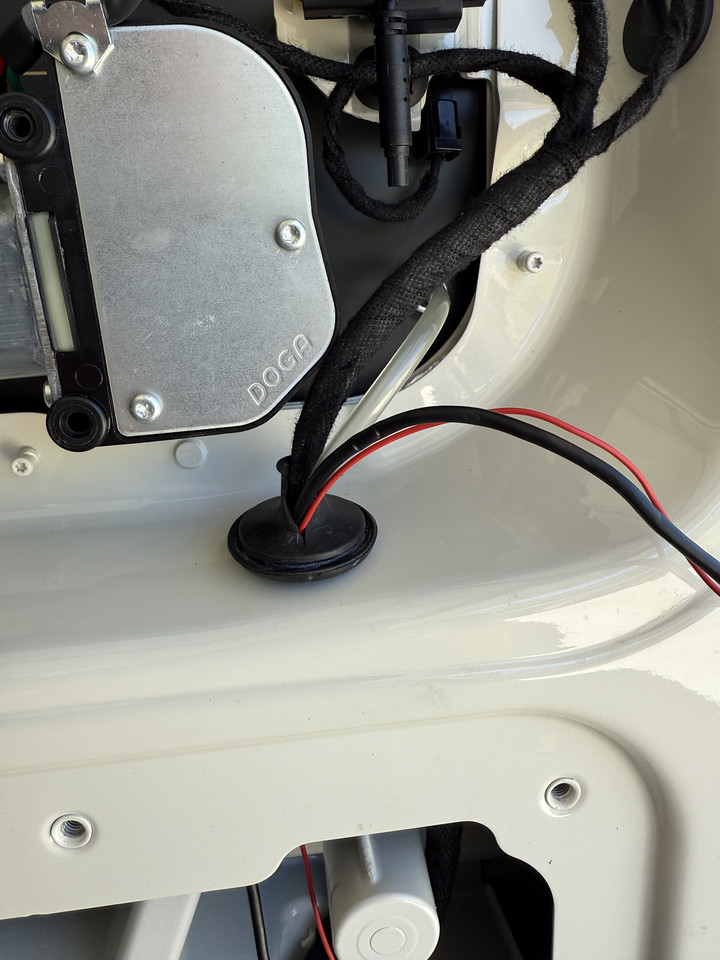
Once I got to the back it the truck, I went through the same rubber plug that I wired my boat trailer module through....
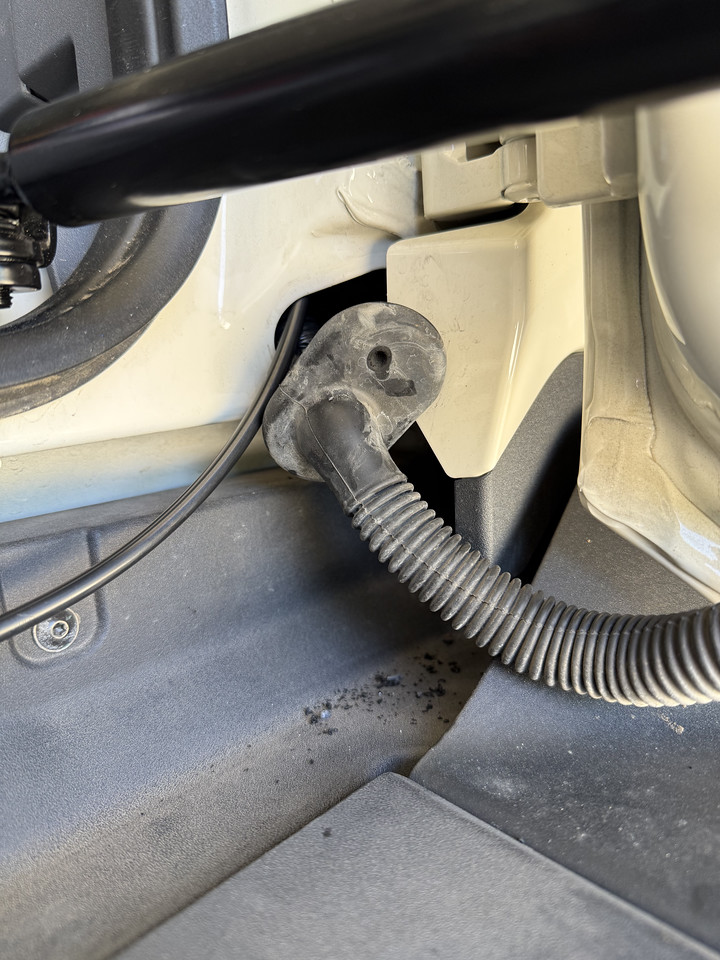
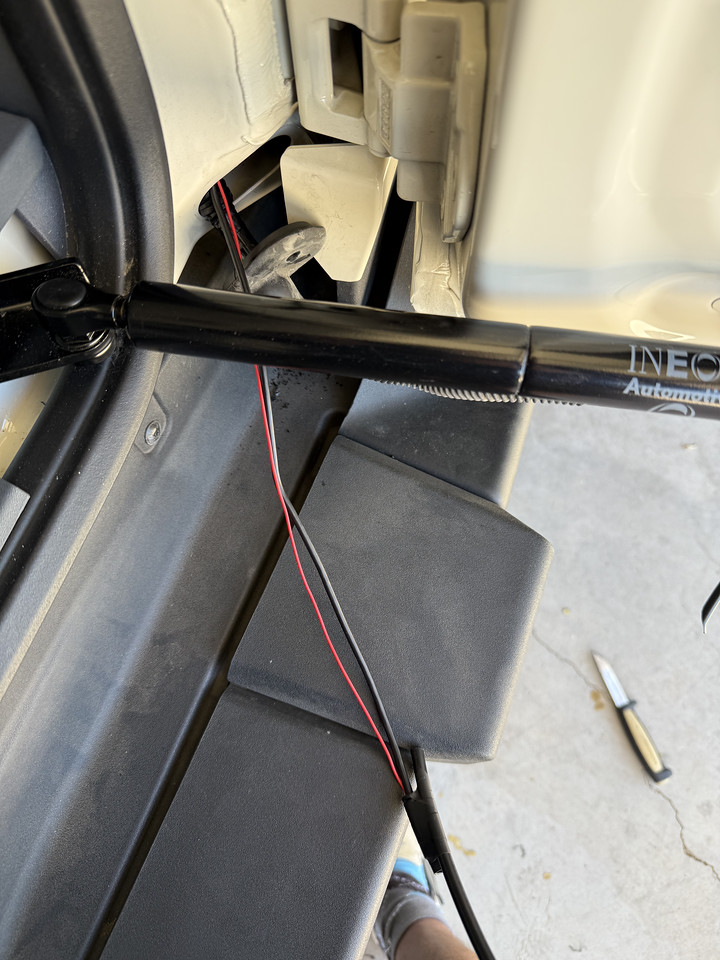
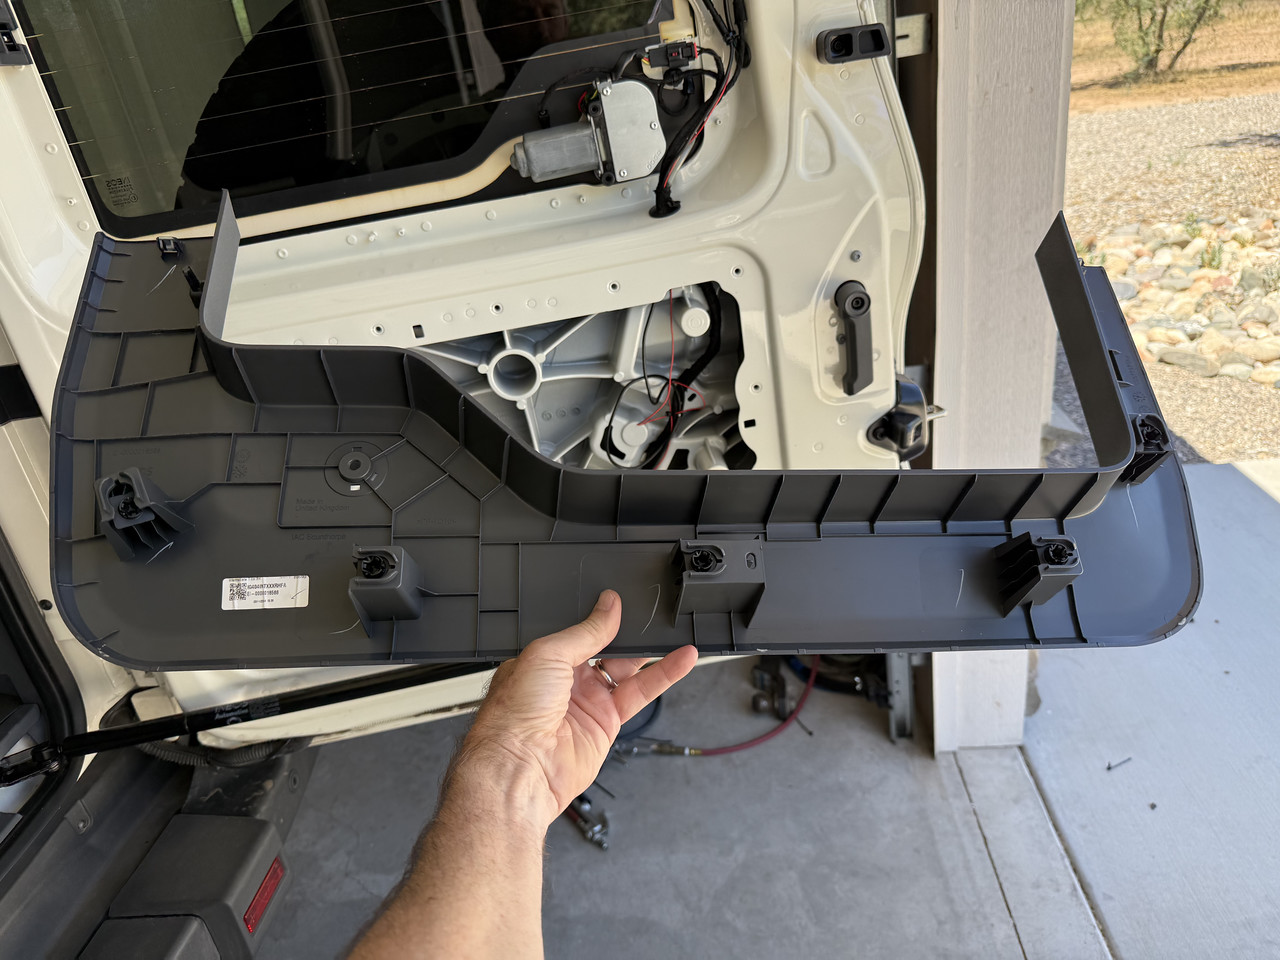
Once in the truck, I ran a wire through the hole behind the light and then to the bottom rear door rubber hose interconnect.
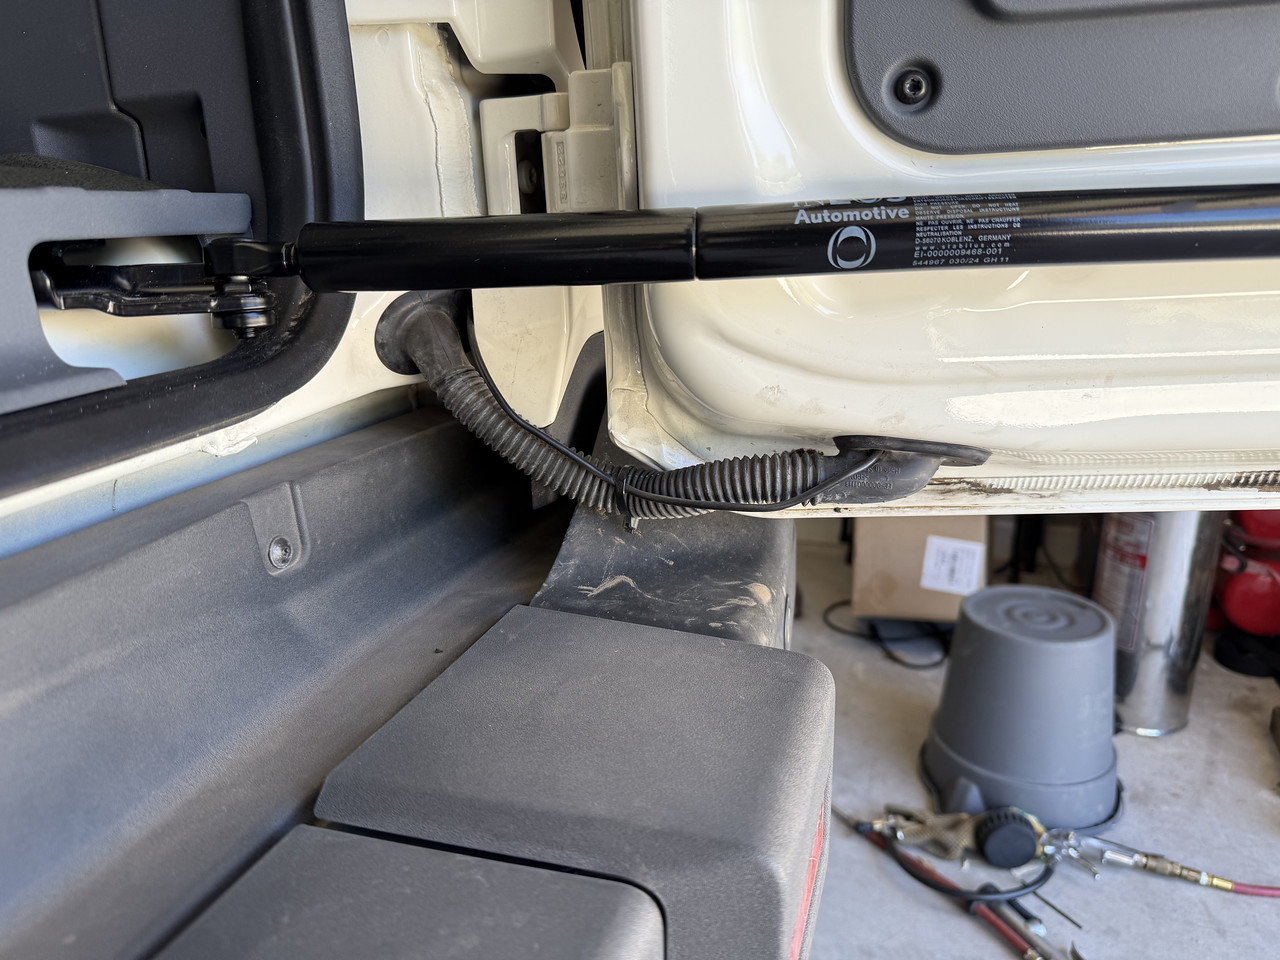
You can see the hole I made... I ran the cable on the outside. Is it possible to run it existing rubber hose, but it is really , really tight so I went aroung the outside.
I used a little soap to reinstall the grommets (super easy)
I later realized there was no need to power the red. I did not want the reverse trigger to show the back reference marker on the screen.
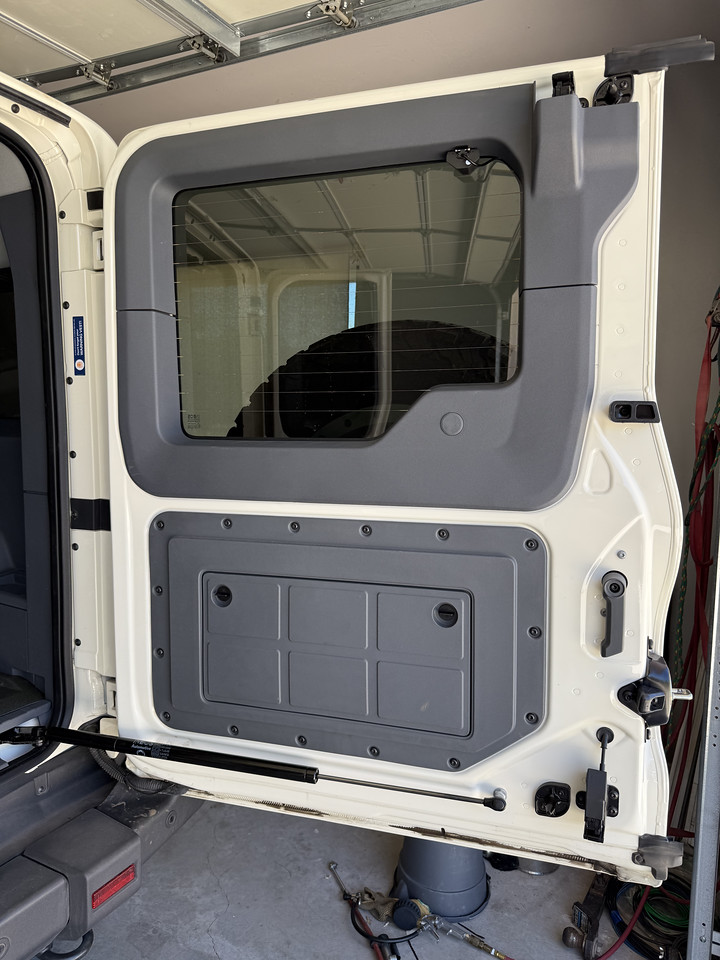
Just for now, I jumped over the lower to upper door grommet and ran the wire on the outside. I will fix this this week when I have a little more time.

Jumping back to the front, I removed cap, then the screw here to run the 3 wires behind the A piller trim piece. (front camera, rear camera via USB-C, and USB-C power module feed cable)
I figured if I needed to go under the truck with the front camera, I would do the rear camera the same.
Notes- I used alien tape to secure the cameras-
I mounted the 3rd camera on the front grill (camera 1 in the mirror, camera 2 inside the top of the rear window)
I did not use the red power trigger that pops up the reverse camera with the hatch lines.
The unit has voice recognition. "Show rear camera." crazy cool
A few people on YouTube mentioned the first upgrades one needs. I agree on this one!
It has a WIFI high-speed app where one can connect and record to their phone, another super cool feature.
Ok lets start.....
I saw a guy on an Owl Overland video run power to his electric running boards via the hole in the floorboard under the pad. That port exits right under it TO A SECOND PLUG near the driver's body mount. So I drilled holes through the two rubber plugs for my wiring.
I use a 1/4 plastic tubing as a fish tape...
See here, I pushed the tubing through the floor plugs and used it as a fish tape.
Here is the plug on the other side....
Here the wire is ran through the plug ... While I was running wires, I added a red and black for future lights.
First pull the jam plate up (no screws) and the foot rest plate (no screws just pull up)
I then pulled the kick plate on the left, removed two screws (black wood screw for the hood lever, grey wood screw holds the panel on), one 10 mm nut on the fire wall, and one 10 mm bolt on bottom near the jam plate.
I ran the wire under the factory harness (not shown), and then next to the hood latch, then up the crack.
(I removed the door seal rubber and installed the wire through the crack)
I tied the power into the Aux switch 1 wires that were taped to the main harness using lever nuts.
(I used the USBC power module instead of the lighter scocket plug)
Here you can see the power module tucked behind the plate (white dot QC sticker on it)
Once I got to the back it the truck, I went through the same rubber plug that I wired my boat trailer module through....
Once in the truck, I ran a wire through the hole behind the light and then to the bottom rear door rubber hose interconnect.
You can see the hole I made... I ran the cable on the outside. Is it possible to run it existing rubber hose, but it is really , really tight so I went aroung the outside.
I used a little soap to reinstall the grommets (super easy)
I later realized there was no need to power the red. I did not want the reverse trigger to show the back reference marker on the screen.
Just for now, I jumped over the lower to upper door grommet and ran the wire on the outside. I will fix this this week when I have a little more time.
Jumping back to the front, I removed cap, then the screw here to run the 3 wires behind the A piller trim piece. (front camera, rear camera via USB-C, and USB-C power module feed cable)
Last edited:


 Time will tell.