The box is self-made to maintain a flat surface with the rear seat folded down. On the right side there is space for 2 x 2 liter water bottles for the dogs, rain gear or similar fits under the lid.
I built it myself because, in my opinion, the ones on the market are too expensive and I was happy to take on the challenge of finding a solution that exactly meets my requirements. The whole thing weighs a little under 32kg.
As you can see by the different colors, it was a step by step project. There will definitely be changes...
View attachment 7848768
Shame you are in Germany as I would like to have had a good look at that. I am about to start a rear shelf like yours but without the draws. I want to put guns under it without have to break them down, so I won’t be able to have draws.
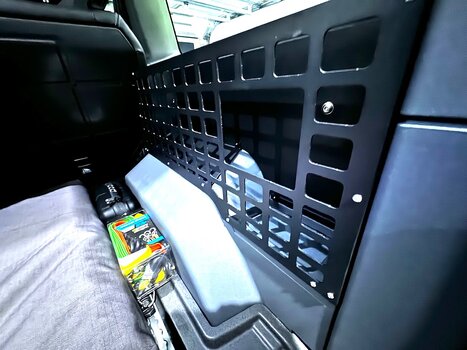
The right hand side material interests me as it looks like plastic or something I can’t make my mind up.
If you can supply some information on the materials used I would be abliged, including the shelf covering.
Cheers Shaky

")