My Rear Seat Delete
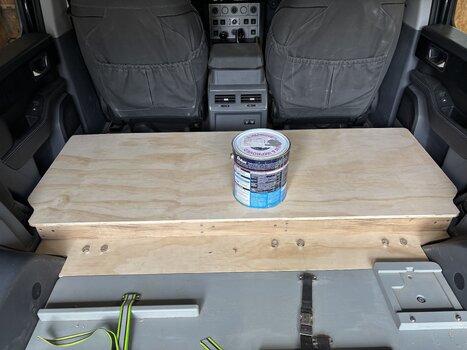
This is the way that I went about building a seat delete platform. I want to be able to remove and replace the seat easily, so the simpler the better. I was not worried about getting a platform that was the same height as the rear. I was just interested in removing the weight of the seat and having space where I can securely stow camping gear.
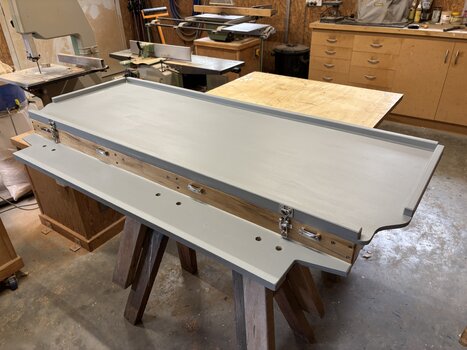
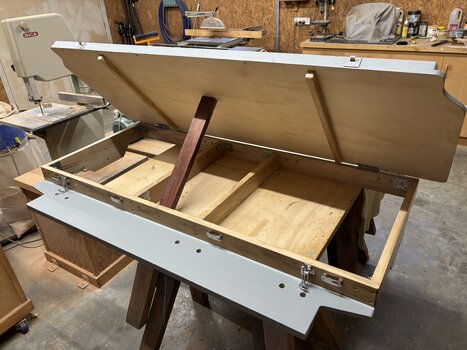
I therefore chose to leave the seat brackets and the plastic trim around the electrics in place. I used the seat brackets to support the base, which required raising it 70mm above the rear platform. This was done with 70 x 20mm hardwood framing, with deeper sections to use both bolts on each of the two outer brackets. Starting the raised base in front of the wheel arches enabled the frame to be rectangular for the simplest and strongest solution. The platform is hinged at the front, with over-centre catches at the rear, so complete access to the electrics, with no hatches required. Front and rear platforms are both 12mm exterior grade plywood.
The total cost of the seat delete was just under $A100; I had the solid timber already. I think this is slightly cheaper than commercially available options and weighs 13kg, so a big weight saving.