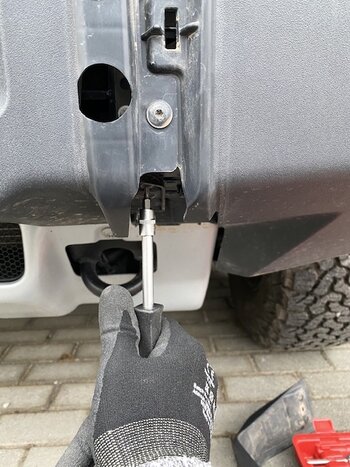
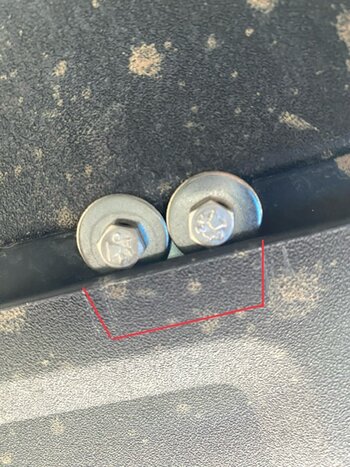
A better picture of the screws of the removable winch cover:

Register a free account today to become a member! Once signed in, you'll be able to contribute to the community by adding your own topics, posts, and connect with other members through your own private inbox! INEOS Agents, Dealers or Commercial vendors please use the contact us link at the bottom of the page.
With such cheap solutions, they immediately ruin their reputation. The rest can be as good as it wants. The attention to detail is missing. If more of this crap is posted here, then they can keep the car immediately. It reminds me a lot of the Defender. Good thing I didn't order a winch.The engineers were just fed up with designing the winch bumper and took the next screws that they could find on their cad-monitor. Man, is there a cheaper solution to find?
Again thank you, Jean.
Velcro tape.Man, is there a cheaper solution to find?
That looks really professional.
")
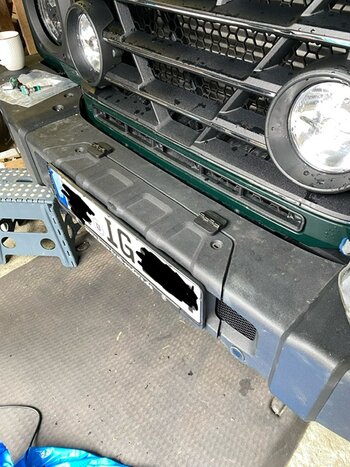
Just push the license plate to the left about 20mm and flip it up
")
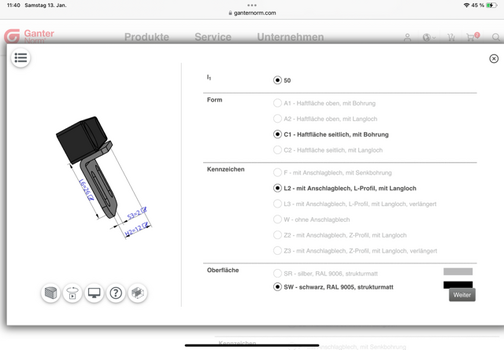
Hi emax the company for the magnetic catches and hinges makes a great impression, Swabian workmanship. Take a look at the homepage and look at the 3D animation of the parts. Well done. I would take photos of the bumper to show the problem that you can't simply insert bolts/screws without dismantling it. But it's cold and uncomfortable outside. Maybe I'll go out again soon...Hi Barney,
I can't tell you anything about the dismantling. However, you should make sure that the magnets are water-resistant and can be used outdoors for a long time. And if I think of anything else, I'll let you know.
The problem is that you always have to have the whole picture of the solution.
Otherwise interesting project. Keep us informed.
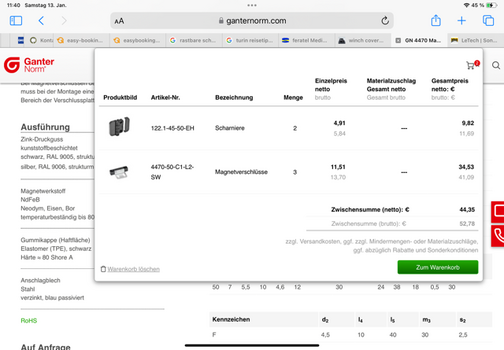
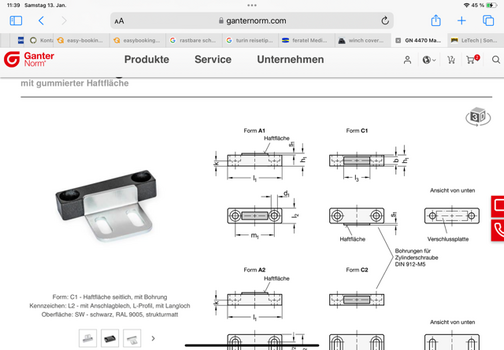
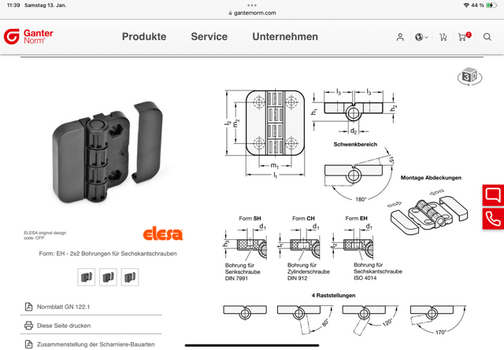
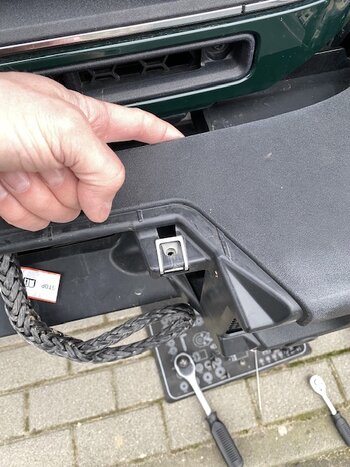
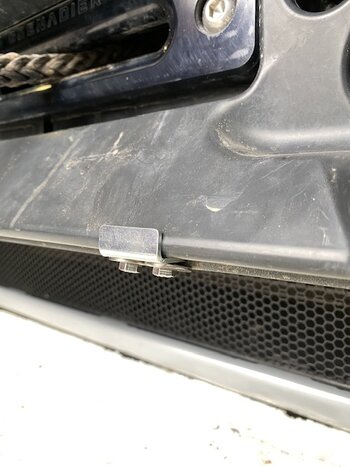
 So we used countersunk screws. It looks a bit adventurous below because the magnets have to be located far inside and the plastic of the license plate holder is not flat in this section. Therefore we had to cut a little further than originally planned. But it works with the snap-in top hinges, doesn't rattle and is an inexpensive alternative to LeTech. Le Tech was the fallback solution.
  :kichern:
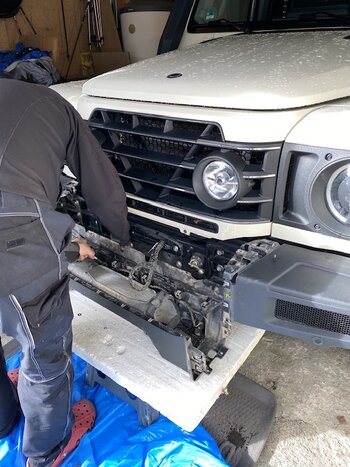
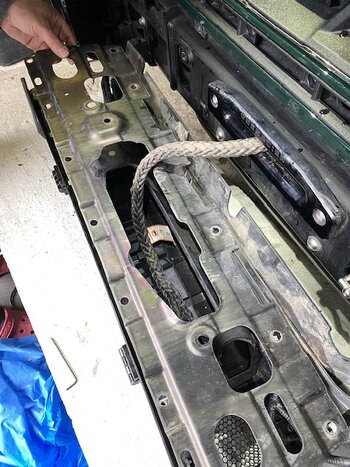
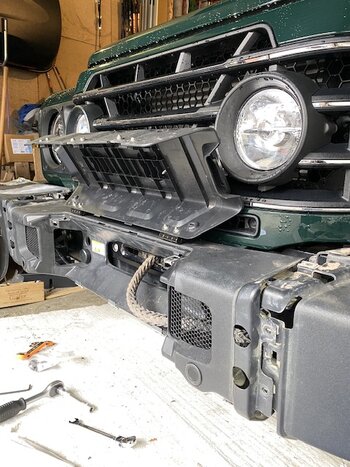
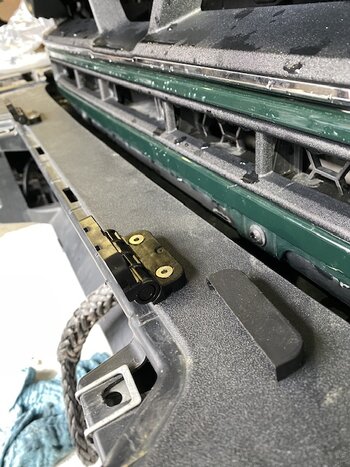
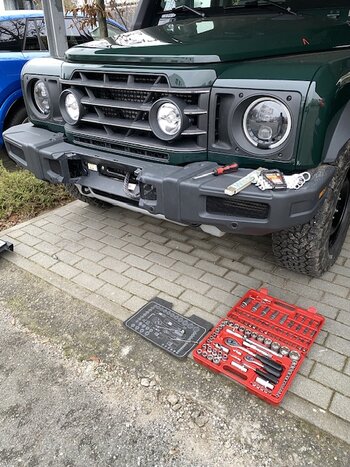
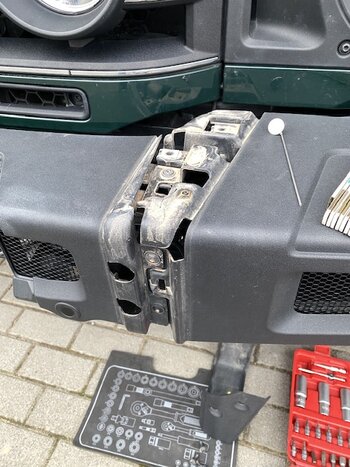
Much easier here.@Lollo050966 and I implemented the plan together last weekend. To try it and have fun crafting together. Admittedly it looks a bit complicated in the photos, but it's not. The middle part of the bumper is very easy to remove, but the cables prevent you from placing it on the floor, so you need a base with a box and, for example, Styrofoam. The metal plate behind the plastic middle part must be removed. Then you can drill, cut and process the plastic with the Dremel. We planned to use 6 square nuts on top, but both of us only had 5s instead of 4s.
I put black dummy screws in the empty screw holes.
We applied screw glue to all screws.
Now it's just one move and we can use the winch.
Thank you Lolo050966 for your hospitality.
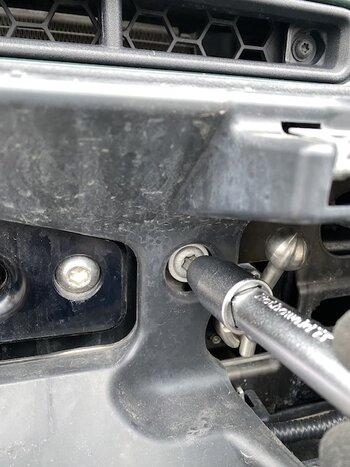
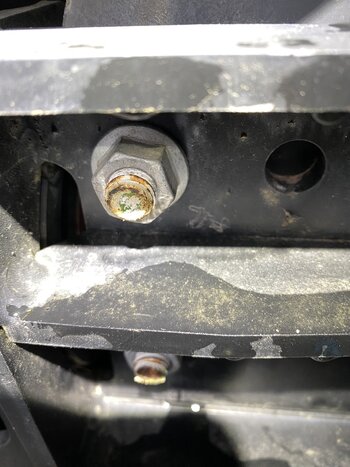
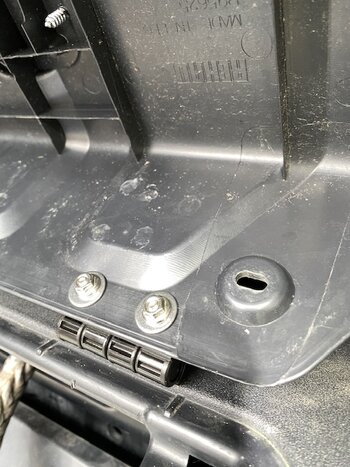
That looks like the galvanised layer has been rubbed off by the rattle gun socket as it hit bottom.I found the slightly rusty screws here less attractive. I have to treat her. But now I can reach them with spray.
Congratulations to both of you. This was also something that was on my "to do" list. Now it will be easy "copy paste".@Lollo050966 and I implemented the plan together last weekend. To try it and have fun crafting together. Admittedly it looks a bit complicated in the photos, but it's not. The middle part of the bumper is very easy to remove, but the cables prevent you from placing it on the floor, so you need a base with a box and, for example, Styrofoam. The metal plate behind the plastic middle part must be removed. Then you can drill, cut and process the plastic with the Dremel. We planned to use 6 square nuts on top, but both of us only had 5s instead of 4s.
I put black dummy screws in the empty screw holes.
We applied screw glue to all screws.
Now it's just one move and we can use the winch.
Thank you Lolo050966 for your hospitality.
„My“ screws, same place, had the same look. I will use some sand paper and marine grease…..and check again in a few monthThat looks like the galvanised layer has been rubbed off by the rattle gun socket as it hit bottom.
Normally ou use a socket which ensures the nut hits required torque before the socket grounds out.
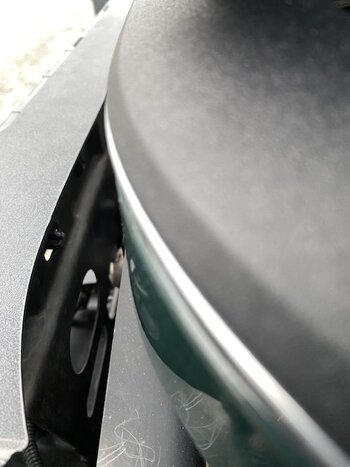
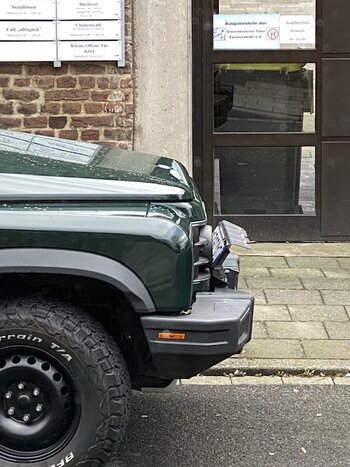
I have a flip up plate holder (USA) - push to left to "release", flip up and slider to right - reverse process to secure in "down/locked" position. But it exposes everything to road grim etc. Think I would prefer to protect the "contents".My understanding is USA and AU get the flip up license plate cover. There might be a hack when comes to make one for EU spec bumpers.
Yes! Saw those rusted screws todayI found the slightly rusty screws here less attractive. I have to treat her. But now I can reach them with spray.
 -gobsmacked those were allowed to leave the factory!
Our solution changes nothing of the protection. The EU bumper design protects really good the tow and the winch of environmental influence, was dry and not really dirty.And we had bad weather the last week and Barney traveled more than 200km motorway to me.I have a flip up plate holder - push to left to "release", flip up and slider to right - reverse process to secure in "down/locked" position. But it exposes everything to road grim etc. Think I would prefer to protect the "contents".