I picked up my Trialmaster this past July and could not be happier with it. With that being said I have been tweaking and improving this thing constantly, most notably is the stereo performance. I fully admit its a truck that I take offroad and beat on and that an audiophile quality stereo is a bit mad. My journey will be broken down into 3 phases:
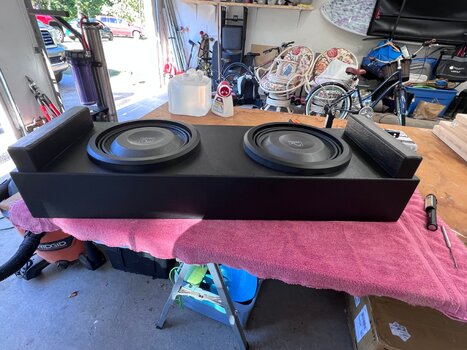
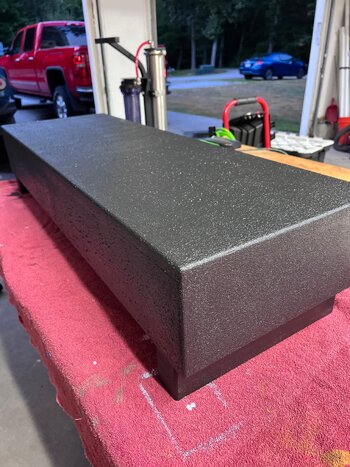
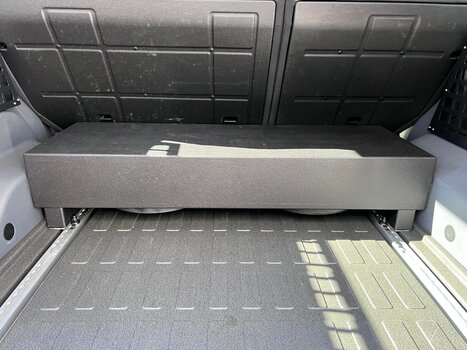
*Sub box dimensions are 39" wide x 6" high and 13" deep. The attached photos show down firing with legs. I have since then removed the legs and now it fires up with much better response.
* The sub box is held in place with 1" L track bolts I picked up from Amazon and some L brackets. If I need to take it out, it 4 screws and done!
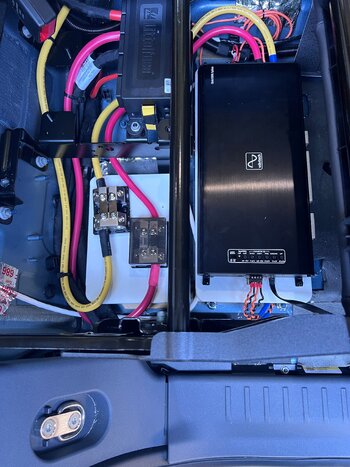
* For the amp turn on lead, I tapped into the backseat fuse panel and used the switched circuit that controls power to the headlight leveling option. I can post a photo to help others.
Gear:
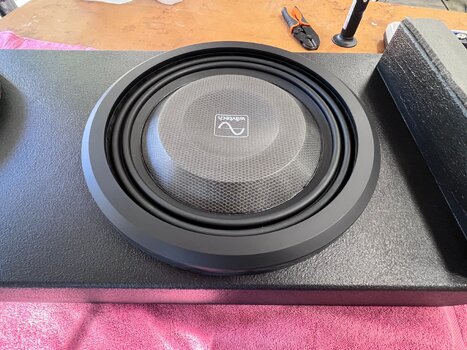
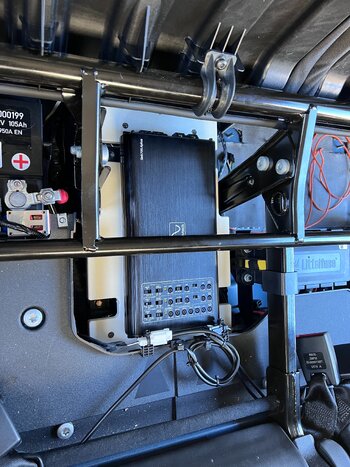
Wavtech ThinPro 12"
Wavtech 1500.1 amp
Sound deadening:
I went with Siles Max purchased from Amazon. One box did all of the floor, wheel arches etc. A full day of stripping out the 2 front seats, floor trays and the 2 back panels in the way back. Just this step alone made the whole car much quieter and more refined.
Siles Max
Options:
This first phase is done! If you just want to add Bass to your Grenadier here is how I did it without breaking the bank, getting top of line gear and had a lot of fun in the process. If you have any questions, please reach out to me!
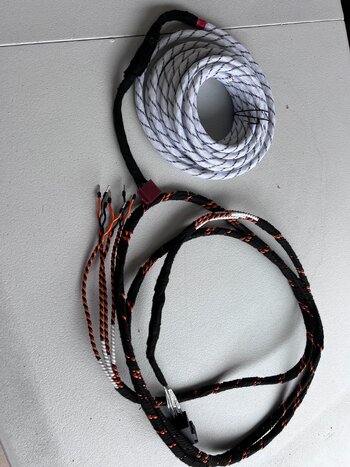
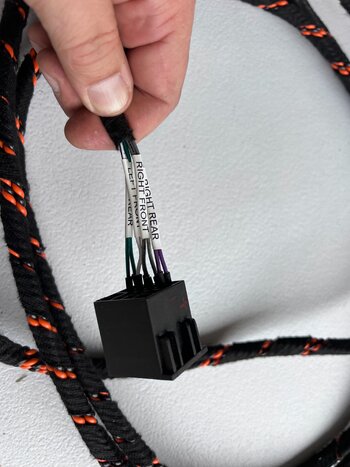
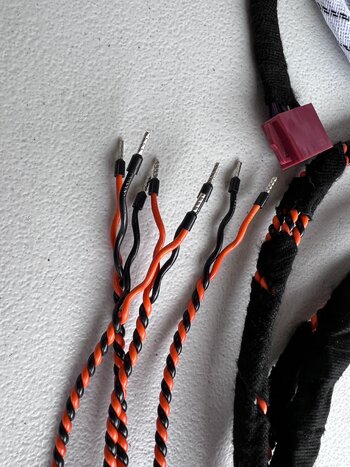
Also, I now offering wiring harnesses for sale. A few different options but have mastered how to make everything plug'n without cutting anything!
-Eric
- Better Bass & sound deadening
- Upgraded speakers
- Amps & wiring
*Sub box dimensions are 39" wide x 6" high and 13" deep. The attached photos show down firing with legs. I have since then removed the legs and now it fires up with much better response.
* The sub box is held in place with 1" L track bolts I picked up from Amazon and some L brackets. If I need to take it out, it 4 screws and done!
* For the amp turn on lead, I tapped into the backseat fuse panel and used the switched circuit that controls power to the headlight leveling option. I can post a photo to help others.
Gear:
Wavtech ThinPro 12"
Wavtech 1500.1 amp
Sound deadening:
I went with Siles Max purchased from Amazon. One box did all of the floor, wheel arches etc. A full day of stripping out the 2 front seats, floor trays and the 2 back panels in the way back. Just this step alone made the whole car much quieter and more refined.
Siles Max
Options:
- If space were more of a concern I would have stepped it down to 1 Wavtech 10" sub and Wavtech 500 watt amp. My original plan was to put a single 10" under each front seat, fiberglass enclosures etc. Its a great option but I need that space for a compressor and some other junk.
This first phase is done! If you just want to add Bass to your Grenadier here is how I did it without breaking the bank, getting top of line gear and had a lot of fun in the process. If you have any questions, please reach out to me!
Also, I now offering wiring harnesses for sale. A few different options but have mastered how to make everything plug'n without cutting anything!
-Eric