The Grenadier Forum
Register a free account today to become a member! Once signed in, you'll be able to contribute to the community by adding your own topics, posts, and connect with other members through your own private inbox! INEOS Agents, Dealers or Commercial vendors please use the contact us link at the bottom of the page.
-
Guest submit your best shot for a chance to win the December Photo Contest. Photo Contest Click Here
You are using an out of date browser. It may not display this or other websites correctly.
You should upgrade or use an alternative browser.
You should upgrade or use an alternative browser.
Raised air intake installation
- Thread starter JVB
- Start date
-
- Tags
- air air intake installation
I got it! Never mind.
This should help:Hi,
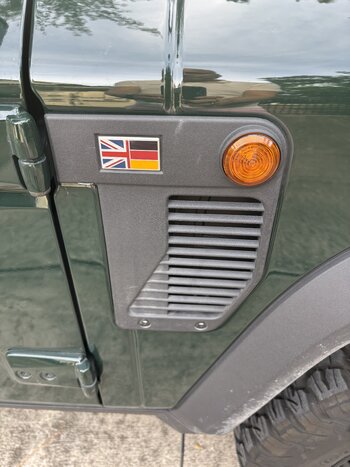
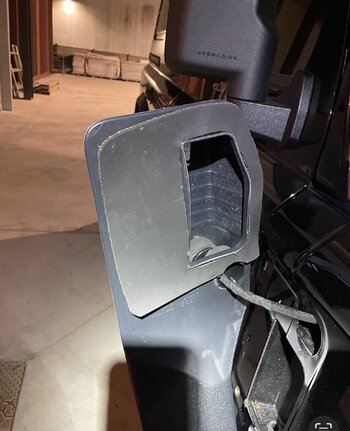
I am swapping my standard air intake with a friend who has a raised air intake. I am having trouble removing the orange light from the standard side plate. Any advice?
do you know how to disassemble the RAI light?
Thanks
Thanks
- ORSO
- rai
- Replies: 2
- Forum: Exterior, bodywork, glazing & accessories
I recommend two things:
- when installing and removing the light, wet it first with a little soap and water to loosen the gasket on the back, otherwise it can be quite stiff to move.
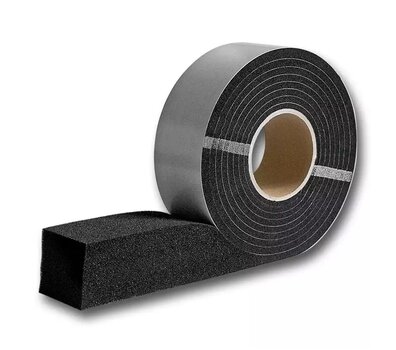
- In the new Rai, I added 2 mm adhesive foam to prevent it from rubbing against the bodywork. I'm attaching the first draft of how I prepared it.
Attachments
I need to refix mine when I get the vehicle back. It kept coming off on rough roads and I bodged a fix with some silicone. You’ve just reminded my I need to do a proper fix.I recommend two things:
- when installing and removing the light, wet it first with a little soap and water to loosen the gasket on the back, otherwise it can be quite stiff to move.
- In the new Rai, I added 2 mm adhesive foam to prevent it from rubbing against the bodywork. I'm attaching the first draft of how I prepared it.
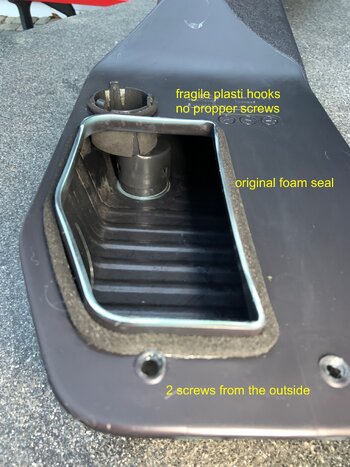
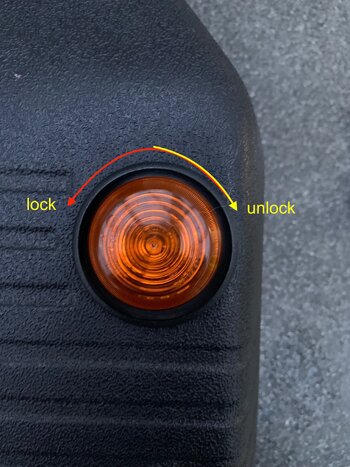
The first picture shows how to unlock the indicator. I always use instead water cheap silicone spray for this (€1.80 / 400g can). The problem with the RAI from Ineos is that it doesn't have a proper flange to connect the outer and inner housings and properly press the seal.
Instead, the outer housing is only pressed on at the bottom with two screws. At the top, it is only attached with the fragile hooks of the indicator. This isn't enough to press the foam seal firmly in place.
A Defender's BRAVO snorkel, for example, has several screws all around it to firmly screw the outer part to the inner part.
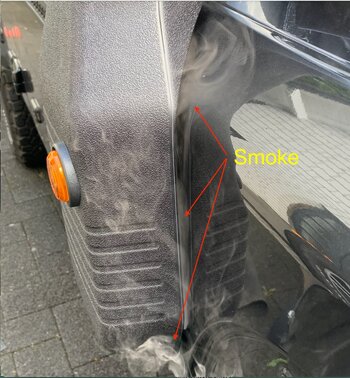
If you pull on the RAI, you can see how a gap opens up above the indicator between the housing and the body, through which dirt and, of course, water can get in. You can demonstrate this well with smoke.
I used a so-called expansion seal as a seal. This seal starts out very thin, but expands over time and presses firmly against the body. Probably not ideal, but initially better than the original seal.
Attachments
Last edited:
Great info 
Similar threads
- Replies
- 11
- Views
- 1K
- Replies
- 187
- Views
- 8K
- Replies
- 0
- Views
- 224
- Replies
- 1
- Views
- 396

