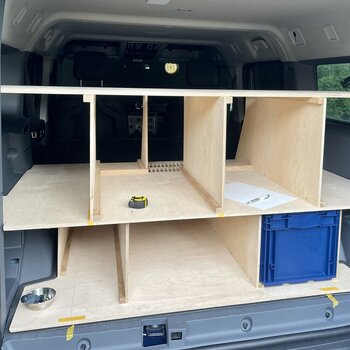
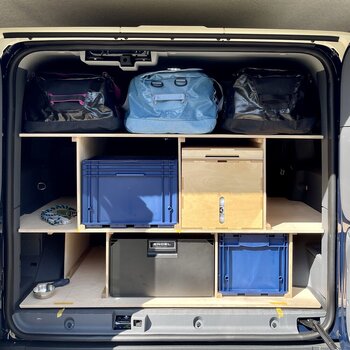
Great job, by chance would you have a link to the track nuts thank you?I use these fittings, put a 6-7mm spacer between them and the floor board and screw from top. The commercial one ordered without airline has 4 connections points. The ones the airline rails use. So same thing. Longer screw. Larger spacers.
View attachment 7813851
The Grenadier Forum
Register a free account today to become a member! Once signed in, you'll be able to contribute to the community by adding your own topics, posts, and connect with other members through your own private inbox! INEOS Agents, Dealers or Commercial vendors please use the contact us link at the bottom of the page.
-
Guest submit your best shot for a chance to win the December Photo Contest. Photo Contest Click Here
You are using an out of date browser. It may not display this or other websites correctly.
You should upgrade or use an alternative browser.
You should upgrade or use an alternative browser.
Custom Camper Works
- Thread starter das mo
- Start date
-
- Tags
- camper custom utility rail
Is that a shaper CNC router in the background? That also explains why you choose the domino pattern as design
Nice work.
You can buy them everywhere here. Did not find what they are called in English. Search forGreat job, by chance would you have a link to the track nuts thank you?
Zurrschienenmutter M8
@bakepl Hi ! see you are in Bris. Try the "Nut&Bolt Factory" Deshon St Woolloongabba. 'caged nuts' are the item required. Also, serrated flanged M8 nuts ..$4 pack of 10 from Bunnings might also work...I'll have to check the "fit".Great job, by chance would you have a link to the track nuts thank you?
I use these fittings, put a 6-7mm spacer between them and the floor board and screw from top. The commercial one ordered without airline has 4 connections points. The ones the airline rails use. So same thing. Longer screw. Larger spacers.
View attachment 7813851
I might be misunderstanding here ...but I think the cage nut is the wrong way "up". If the only means of securing the nut into position is via the "wings" which compress to fit between the parallel edges of the slot, then under heavy braking/accident they are likely to deform and detach from the rail. I studied several illustrations on how to install a cage nut and it looks to me that the cage nut should be "upside down" from the illustration so that the edges of the nut are actually recessed under the parallel straight sections so that the bar has to deform in order for the cage nut to detach from the slot. If the nut is just sitting between the straight edges of the slot, held in place by the cage, then that is not really satisfactory. To test my theory, I installed a cage nut as illustrated, then inserted a bolt sufficiently for it to touch the rail floor and place slight pressure on the cage nut. I secured the rail in a vise. I then gave the bolt a 'medium' "wack" diagonal to the direction of the rail with a 300mm length of 50mm x50mm wood. The nut and bolt popped out of the rail. The nut was too thick to mount upside down. A better approach might be the rectangular nuts which are used in cross bars...I use these fittings, put a 6-7mm spacer between them and the floor board and screw from top. The commercial one ordered without airline has 4 connections points. The ones the airline rails use. So same thing. Longer screw. Larger spacers.
View attachment 7813851
"Sorry"!
Last edited:
Thanks for your concern.I might be misunderstanding here ...but I think the cage nut is the wrong way "up". If the only means of securing the nut into position is via the "wings" which compress to fit between the parallel edges of the slot, then under heavy braking/accident they are likely to deform and detach from the rail. I studied several illustrations on how to install a cage nut and it looks to me that the cage nut should be "upside down" from the illustration so that the edges of the nut are actually recessed under the parallel straight sections so that the bar has to deform in order for the cage nut to detach from the slot. If the nut is just sitting between the straight edges of the slot, held in place by the cage, then that is not really satisfactory.
"Sorry"!
I am using them for the first time, so might be wrong here, but put it the way how all images online tell me to.
Will check again though.
But to be honest. This thing is going nowhere, even without fixing it.
Ok !! ExcellentThanks for your concern.
I am using them for the first time, so might be wrong here, but put it the way how all images online tell me to.
Will check again though.
But to be honest. This thing is going nowhere, even without fixing it.
All fears allayed! Carry on the good work!
I'll need to source those particular cage nuts !
Last edited:
Looks great.
Is this made for the back of the rear seat to be in the normal upright position?
Is this the station wagon and not the 5 seater van?
If so, could I trouble you for the below measurements please. Green being the length (I suspect this will be hard up against the seat back?) and red from the floor to top of ply. cheers
Not sure what you expect to learn from this as this is all very specific to my build.
Depth of that floor is 830mm. There is space to the seats to not have things rubbing against eachother whilst driving. I also left space to the doors as I plan to hang jackets, towels, … there.
Loading height of lower level is 290mm.
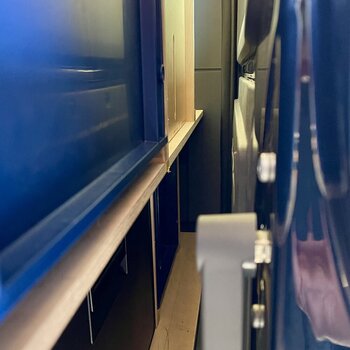
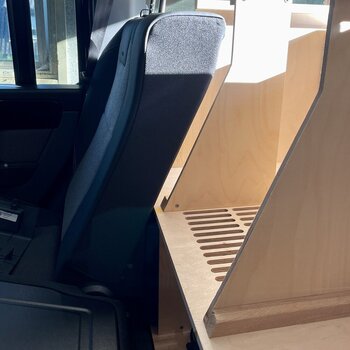
Depth of that floor is 830mm. There is space to the seats to not have things rubbing against eachother whilst driving. I also left space to the doors as I plan to hang jackets, towels, … there.
Loading height of lower level is 290mm.


Perfect thanks. Knowing the measurements gives me options to either transfer my current drawers (as I know they'll now fit) or make new ones. You have the station wagon and not the 5 seat utility wagon?Not sure what you expect to learn from this as this is all very specific to my build.
Depth of that floor is 830mm. There is space to the seats to not have things rubbing against eachother whilst driving. I also left space to the doors as I plan to hang jackets, towels, … there.
Loading height of lower level is 290mm.
StationPerfect thanks. Knowing the measurements gives me options to either transfer my current drawers (as I know they'll now fit) or make new ones. You have the station wagon and not the 5 seat utility wagon?
Lot of work, little progress to show.
I have been sanding, breaking corners and applying wood oil to the 34 pieces.
Moving pieces between basement and garden daily and during rainfall.
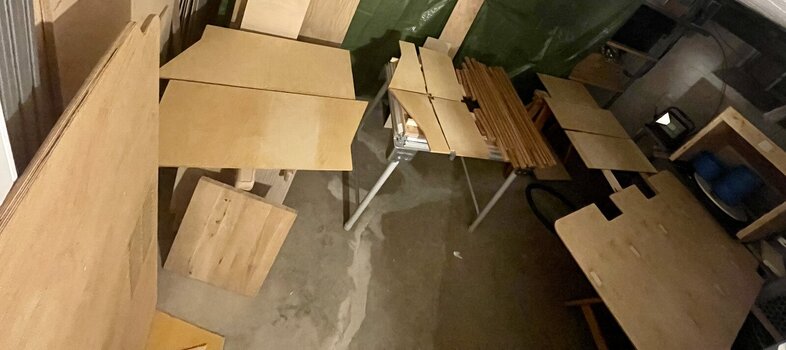
Plan to take exact measurements before putting it all together and happy to share those.
I am sure nobody will build exactly that, but base plates is a really nice fit and the upper level are using the space quite well on the height I put them. Been cutting them mm by mm and rounding corers bit by bit to finally being able to manoeuvre them in without losing too much size.
A wooden drawer to fit the bottom left space is next.
I have been sanding, breaking corners and applying wood oil to the 34 pieces.
Moving pieces between basement and garden daily and during rainfall.

Plan to take exact measurements before putting it all together and happy to share those.
I am sure nobody will build exactly that, but base plates is a really nice fit and the upper level are using the space quite well on the height I put them. Been cutting them mm by mm and rounding corers bit by bit to finally being able to manoeuvre them in without losing too much size.
A wooden drawer to fit the bottom left space is next.
Here we go -> svg vector file with all my parts. Can not upload svg files here, so hope this works.
Looking forward what ideas you come up with based on my first attempt.
Final touch after mounting it in the Gren will be some wooden triangles in the back corners for additional side support, some foam protection on those corners that sit close to car elements, some sort of pins to stop the toilet and boxes to slide backwards. The wooden drawer bottom left for our kitchen stuff is next.
Future post first trip additions will be a table in the back door with some shelfs inside. Saw a very nice one on the Abenteuer & Allrad this week that was very close to my plans, but at 650€, I chose to build it on my own. Might even be able to make some more and offer them here. At least if they turn out great and cheaper than the ones hitting market…
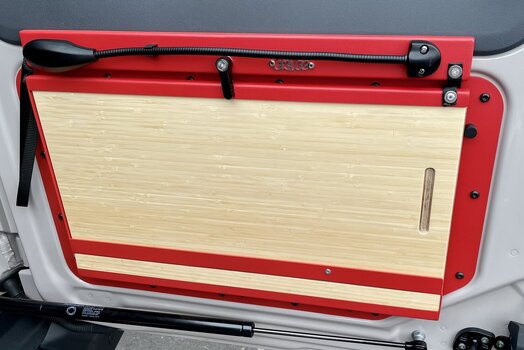
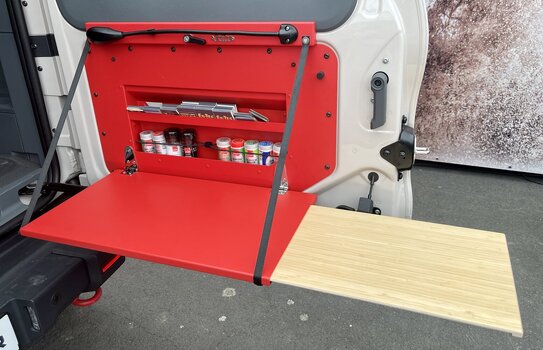
Greetings!
- The oak sliders and connectors are all 20x20mm and not listed here.
- I rounded most corners when sanding, but only captured the big ones with 50mm radius here.
- Levels are 12mm. Walls are 9mm.
Total weight, wood and screws, is 40kg so far. - Drawer and boxes excluded.
- Still have not made up my mind on milling pockets. Need to run numbers to understand of saving that few kg makes a difference.
Looking forward what ideas you come up with based on my first attempt.
Final touch after mounting it in the Gren will be some wooden triangles in the back corners for additional side support, some foam protection on those corners that sit close to car elements, some sort of pins to stop the toilet and boxes to slide backwards. The wooden drawer bottom left for our kitchen stuff is next.
Future post first trip additions will be a table in the back door with some shelfs inside. Saw a very nice one on the Abenteuer & Allrad this week that was very close to my plans, but at 650€, I chose to build it on my own. Might even be able to make some more and offer them here. At least if they turn out great and cheaper than the ones hitting market…


Greetings!
Magnificent work @das mo Your attention to detail on the picnic table with the contrasting colours is first class!Here we go -> svg vector file with all my parts. Can not upload svg files here, so hope this works.
For clarification. I am not a professional carpenter, but just a bloke who loves working with wood after spending days at the desk. So some pros out there might find my choice of material and approach weird. I picked what I use to work with and felt confident getting it up quickly for the upcoming trip.
- The oak sliders and connectors are all 20x20mm and not listed here.
- I rounded most corners when sanding, but only captured the big ones with 50mm radius here.
- Levels are 12mm. Walls are 9mm.
Total weight, wood and screws, is 40kg so far.- Drawer and boxes excluded.
- Still have not made up my mind on milling pockets. Need to run numbers to understand of saving that few kg makes a difference.
Looking forward what ideas you come up with based on my first attempt.
Final touch after mounting it in the Gren will be some wooden triangles in the back corners for additional side support, some foam protection on those corners that sit close to car elements, some sort of pins to stop the toilet and boxes to slide backwards. The wooden drawer bottom left for our kitchen stuff is next.
Future post first trip additions will be a table in the back door with some shelfs inside. Saw a very nice one on the Abenteuer & Allrad this week that was very close to my plans, but at 650€, I chose to build it on my own. Might even be able to make some more and offer them here. At least if they turn out great and cheaper than the ones hitting market…
View attachment 7815793
View attachment 7815794
Greetings!
Nah. As mentioned that is not mine. The company making it is Ex-Tec. It was at display in the Abenteuer 4x4 booth.Magnificent work @das mo Your attention to detail on the picnic table with the contrasting colours is first class!
Ah! damn...too much red wine on a Saturday evening ...well I'm sure yours will be of equal quality... good excuse to purchase a sheet metal bender!Nah. As mentioned that is not mine. The company going to sell that one is Ex Tec. It was at display in the Abenteuer 4x4 booth.
That is a pretty nice setup though. Again, 650€ is pretty steep but f the quality is there it could be money well spent.Nah. As mentioned that is not mine. The company making it is Ex-Tec. It was at display in the Abenteuer 4x4 booth.

