The Grenadier Forum

Register a free account today to become a member! Once signed in, you'll be able to contribute to the community by adding your own topics, posts, and connect with other members through your own private inbox! INEOS Agents, Dealers or Commercial vendors please use the contact us link at the bottom of the page.

AUSTRALIA - Nato plugs Supply

5teve

Grenadier Owner
Local time
3:28 PM
Joined
Mar 12, 2026
Messages
57
Location
Perth, Australia
Hi Guys

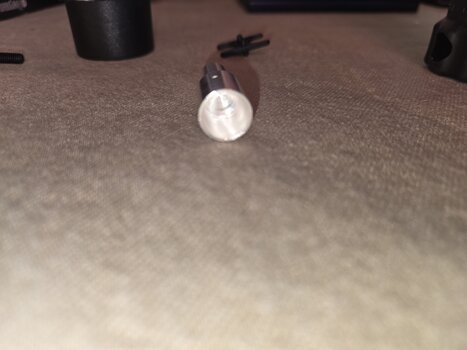
To any Aussies that are looking to buy a nato plug - I have found a source overseas that are 'economical' if I buy 5 or more.

Cost wise for 5+ they work out to 35eur each plus postage which I am waiting on. I am considering buying 5 and letting others buy the excess - I'm not looking to make any money so will be passed on at cost plus split shipping - and as i'm Perth based - I can ship at discounted aus post rates as my business has an account.

I have mentioned this also on the Aussie grenadiers facebook page too.

Steve

1774919543979.png
 
Ok so it looks like i have interest in about 10 plugs from tha facebook groups so i'm going to cap it there just in case anyone drop out

Cost wise for those interested works out to approx $90aud including shipping to me and then shipping via auspost to the final destination.

I'm not sure if any charges are going to be whacked on in the form of levies or tax etc.. but it shouldnt add too much on. still works out to be a fair bit cheaper than local.
 
I purchased the Erich Jaeger vg 96917 connecter you have pictured.

Have you found instructions on opening the connector so it can be wired?

Maybe I am just afraid of using to much force.

Thanks
 
I purchased the Erich Jaeger vg 96917 connecter you have pictured.

Have you found instructions on opening the connector so it can be wired?

Maybe I am just afraid of using to much force.

Thanks
Never mind... the answer id don't work on things without proper lighting. I see the second screw that holds it together.
 
Never mind... the answer id don't work on things without proper lighting. I see the second screw that holds it together.
Hi
At least I have a heads up of what to look for :) thanks! the details on these mysterious things are few and far between... so it's been a long haul just getting details and firming up my order. The first order went in for 7x 35mm2 and 7x 50mm2 connectors - so hopefully they are about a week away. End cost was about $70aud each for 35mm and 82aud for the 50mm2... so not too bad really.

If there is enough call for more then i'm happy to do another order.
 
These are pictures of the plug.
The screw is in the 3rd hole of the pin side. It was deep enough that I did not see it.

The next question is how to attach a wire to the pins. The pin is hollow part way in. It is not magnetic and feels heavier than aluminum.

So i assume it is stainless steel.

I am not sure if it is ment to be soldered or crimped or something else.

Any help here would be appreciated.

13459.jpg
13460.jpg
13461.jpg
13458.jpg
 

Attachments

  • 13463.jpg
    13463.jpg
    3.2 MB · Views: 0
These are pictures of the plug.
The screw is in the 3rd hole of the pin side. It was deep enough that I did not see it.

The next question is how to attach a wire to the pins. The pin is hollow part way in. It is not magnetic and feels heavier than aluminum.

So i assume it is stainless steel.

I am not sure if it is ment to be soldered or crimped or something else.

Any help here would be appreciated.

View attachment 7926329View attachment 7926330View attachment 7926331View attachment 7926328
Here's one method

Post in thread 'NATO Plug,Socket' https://www.theineosforum.com/threads/nato-plug-socket.12410957/post-1333211906
 
Thanks... I had seen your post before. It did not stick in my mind.

So you dip-soldered. What flux and solder did you use? What temperature?
  • The 6AWG cable was dip-soldered into the contacts at each end. I prefer to crimp but the NATO contacts are LARGE!
I used the resin core solder I had in my electrical toolbox.
I held each contact in wood soft jaws in my bench vice to reduce heat loss, then used a fire lighter torch on top of a butane cartridge to preheat the contact. I first dropped some coils of solder into the cold pocket. When they melted I knew I was in the right temperature range. I then filled the pocket up with a molten solder pool.
The copper wire is a massive heat sink so it takes a bit of finesse to keep the contact hot and warm the copper, without burning the insulation, while dipping the wire into the pocket.
I added a bit more heat after dipping to ensure the solder flowed through the copper to get better conductivity.
I did consider tinning the copper first but I abandoned that idea because the heat required to tin properly at this wire gauge wants to burn the insulation and wicks more solder up the wire making it prone to cracking and high resistance.

Leave yourself some extra cable length. Do the NATO contacts first. If you need to do a repeat you still have fudge room. Once you're happy with the contacts set your cable length at the other end.
 
Perfect...
Do you see any advantage to using something like Ruby's stainless steel flux and a 95/5 solder?
If you have those materials at hand it makes sense to use them. I gave the contact pockets a light scuff with a piece of nylon pad (scotchbrite) but I didn't use a flux.
The solder join is mechanical and electrical. That's the disadvantage of not crimping. After assembly be sure to check that the rubber gland is in good contact with the cable insulation for strain relief and weatherproofing.
 
Back
Top Bottom