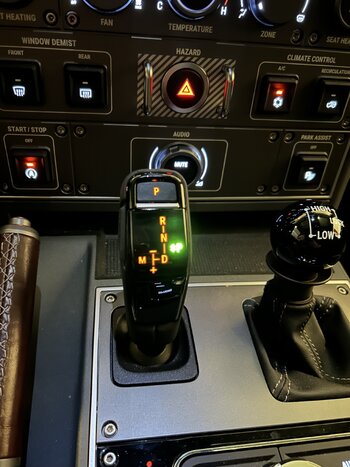
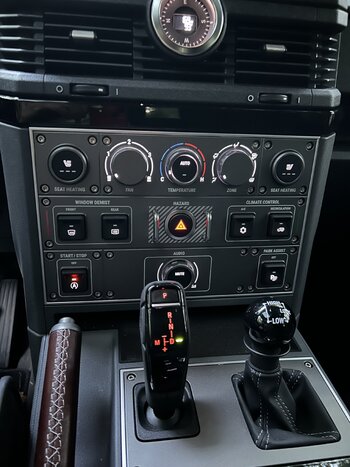
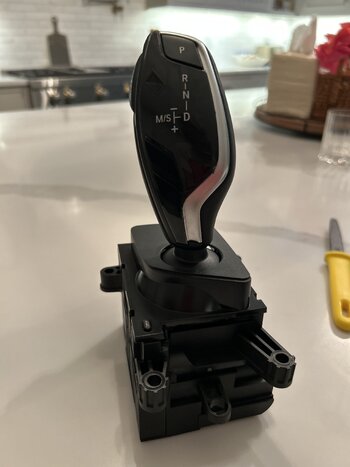
The swap itself is essentially cosmetic, so unless you booger up the install, it would be hard for INEOS to prove that the modification resulted in whatever warranty claim that was in question. And in the US, it would be INEOS who would have to prove it was the Supra shifter that caused the warranty issue….not you having to prove it wasn’t.
The only two pieces of advice I can give from my install:
1) Use gradual pressure to remove the shifter from the base to avoid an uncontrolled removal, which would most likely damage the ribbon. I used a small back/forth twisting motion and stared at the shaft to gauge how much it was moving….sounds like what she said

….
2) Suggest testing your ribbon connection BEFORE re-screwing/snapping everything back together. It saved me from having to disassemble everything because I didn’t fully insert the ribbon. When I turned on the ignition the first time, I had a gear box error warning and it would not shift to any gear. The shifter lights also did not come on. Once I got the ribbon positioned correctly, it lit up like a christmas tree and everything worked as it should.

")


 .
. 

