RAI & Side Marker Removal and Badge Grille Install
Tools Needed:
T25 and T30 Torx Bits, Channel Lock Pliers, Small Screwdriver or Angled Pick Tool
View attachment 7846705-->This is a Nifty Tool kit as a Grenadier Owner
Parts Needed:
Flag Badge Grille (Part Number Varies based on Country Flag Chosen)
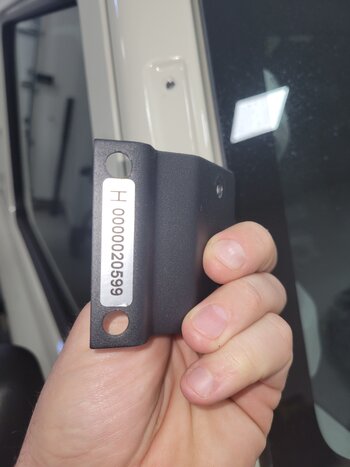
Two(2) Pillar Blanking Plates/Covers (P/N GRA-7D31-008070)
(M6x12 Screws from RAI attachment brackets can be used for the plates)
**I used the EBAY Knockoff Grille and Blanking Plates ($60)** This Resulted in a great deal of additional work and frustration, but I will show the work required to do so if one wishes to also use them as it will save you the headache.
View attachment 7846703View attachment 7846704
Lets get started...
As tempting as it is to just start unscrewing the RAI from the vehicle, DONT! Start with the side marker amber light (ask me how I know

)
View attachment 7846695
-I was able to do this part by hand with some effort, but using Channel Locks while gripping the rim of the amber light as gently as possible will also suffice.
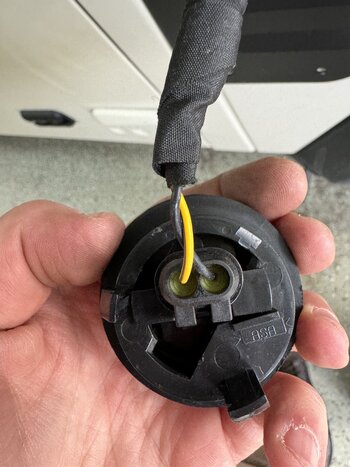
-Unplug the side marker light
View attachment 7846696 View attachment 7846697
-Remove the (4)T30 Screws and (2)T25 Screws holding the RAI to the vehicle.
View attachment 7846700View attachment 7846701
-Remove the (4)T30 Screws Holding the RAI brackets to the A-Pillar
View attachment 7846702View attachment 7846706
**You have now reached the point where you would install the factory Badge Grille and Pillar Plates**
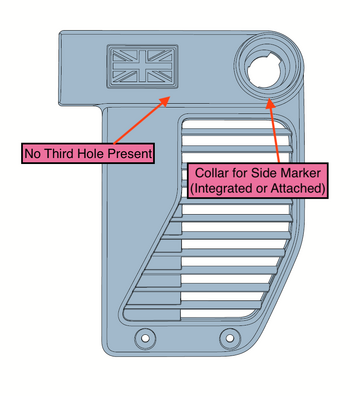
My EBAY Knockoff was immediately found to differ from the OEM in a couple ways, so this is how I dealt with it...
View attachment 7846712View attachment 7846713
The amber side marker would fit right through the hole on the Knockoff grille, therefore I needed to remove the plastic collar from the RAI and use it to mount the side marker to the new grille.
View attachment 7846714View attachment 7846715View attachment 7846716View attachment 7846717
View attachment 7846718View attachment 7846720
View attachment 7846721View attachment 7846722
View attachment 7846723View attachment 7846724
I Ended up using a black silicone to secure/seal the collar to the knockoff Grille. Since it takes hours for the silicone to firm up, I used a small dab of hot glue to hold it in place while the silicone dried.
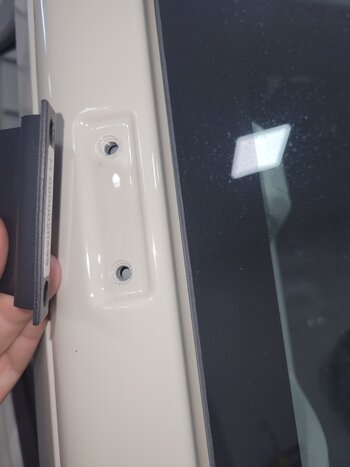
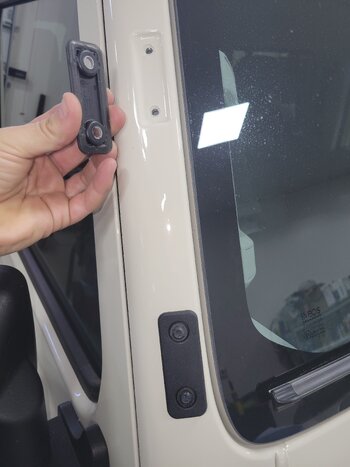
Next, simply install the A-pillar cover plates with the screws that were originally holding the RAI mounting brackets.
View attachment 7846729
The final result is as follows...
View attachment 7846727View attachment 7846728
Conclusion:
All in all I am happy with the end result, however I would NOT recommend using this knockoff Ebay product due to the difficulty and janky attachment of the collar/side marker.