the place to upload your MOAB images for the community
The Grenadier Forum

Register a free account today to become a member! Once signed in, you'll be able to contribute to the community by adding your own topics, posts, and connect with other members through your own private inbox! INEOS Agents, Dealers or Commercial vendors please contact admin@theineosforum.com for a commercial account.

Build Thread Pluffmud Grenny

Brock63

Grenadier Owner
Local time
2:59 PM
Joined
Apr 5, 2025
Messages
33
Location
South Carolina , USA
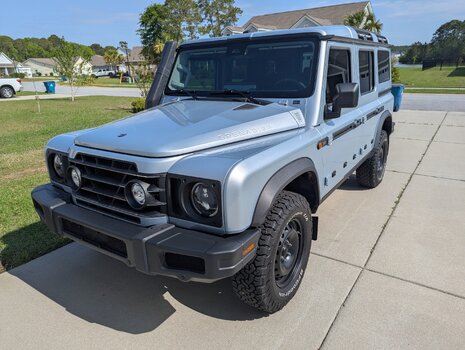
Well, guess will start build thread here just as I have on the Mudforum for LandCruisers in past. LOL First off...my Grenny is a slightly used soccer mom vehicle assuming as only 11k miles, no scuffs, no scratches, no wear, no stains, and the underneath was as shiny and fresh as day driven off assembly line. No hazing from road spray on heat shields or anything...pristine. Trialmaster edition nothing extra that I can tell other than TOW PACKAGE which was mandatory for me on a purchase (along with frt/rear lockers and elect expansion switches).

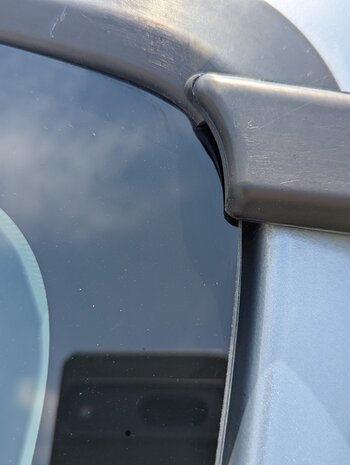
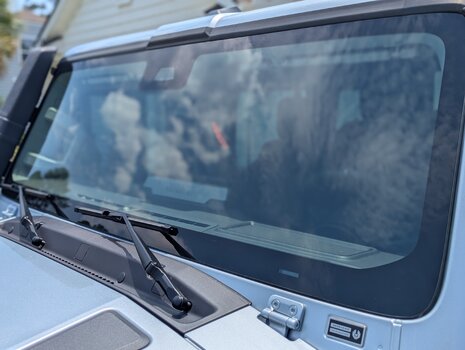
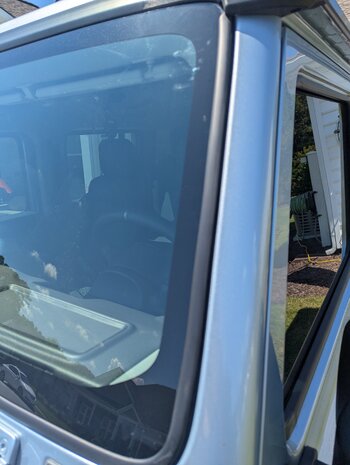
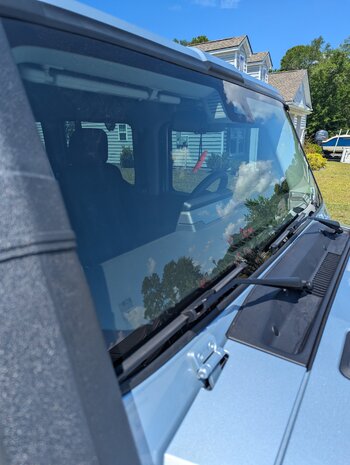
First upgrade was ceramic tint (25%) and made huge difference in ability to see backup camera video in sunlight...and got rid of fishbowl effect while driving. CHECK.

Second upgrade was swapping out OEM steering stabiizer with Fox OEM stabilizer shock offered on Agile Offroad website. Dramatic difference though the OEM did not bother me after decades of straight front axles, manual steering, etc on farm tractor, school bus in highschool back in 80/81, and old Land Cruisers. But does make more relaxing to drive on highway and for wife.

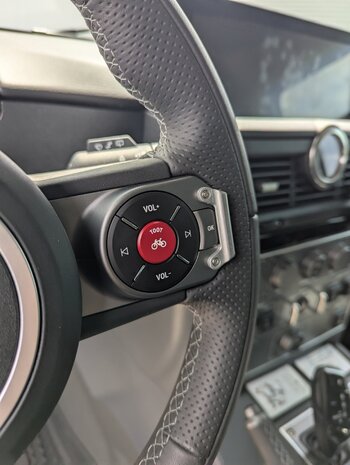
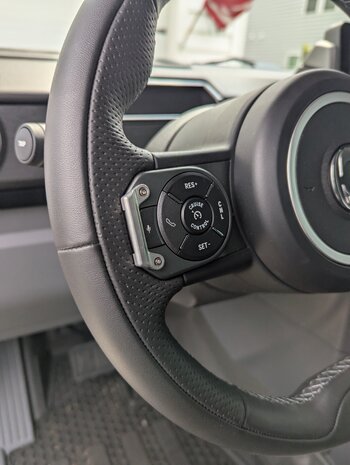
The obligatory Lambda vinyl insert stickers was next...not sure if will keep or not but so far are remaining... I also installed bump guards on either side of steering wheel to keep my meat hooks from accidently activating microphone or OK buttons when driving.

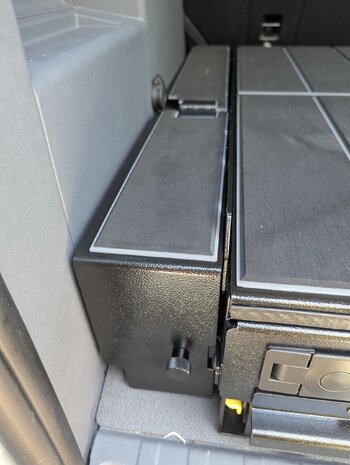
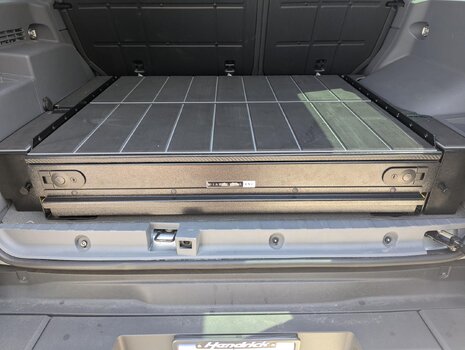
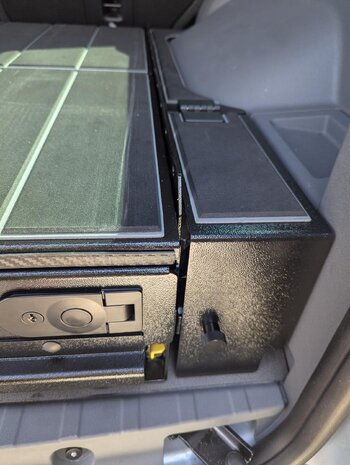
Next on deck will be sliders (Owl, WKOF, or AgileOffroad), rear cargo storage drawer (Ineos or Diabolical), stealth LED lightbar in grill (Owl), larger Cup Holder insert (GrenadierUSA), rear cargo area side baskets (Bison or whomever else is making them), and do a diff breather upgrade to get them higher in body.

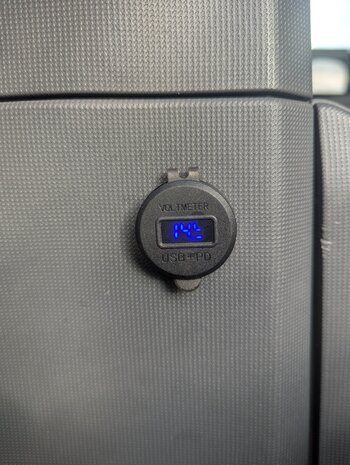
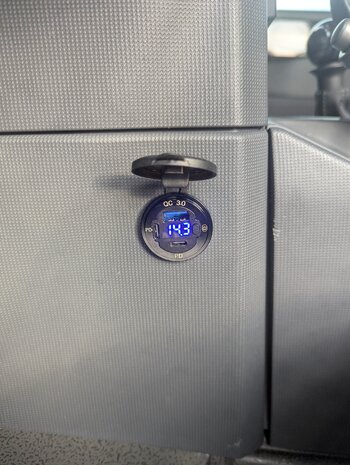
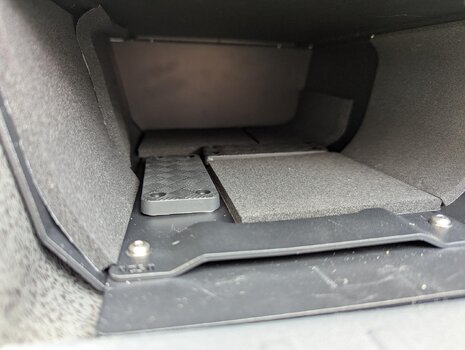
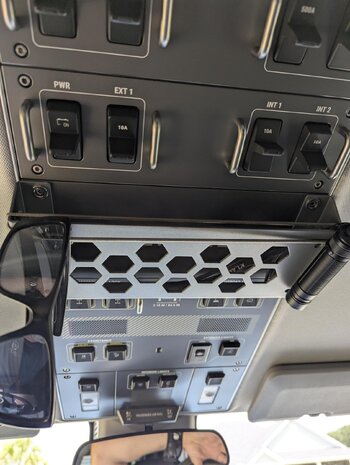
I am also eager to tap into either footwell leads or somewhere to install one or two USB chargers on either side of the center console dash. Any input for items used successfully and whether using up the INT switch is best option?

Last plans (as of now) when tires need replacing.... go with slightly larger tires (either 285/75x17 or 255/85x17...I like tall skinnies usually), aftermarket Bull Bar, low profile 3/4 rack, winch insert (GP Designs), and diff armor...

I do a lot of hunting and offroad driving on my property and when I go chase birds out west from east coast...so interested to see how going to work out compared to prior vehicles.

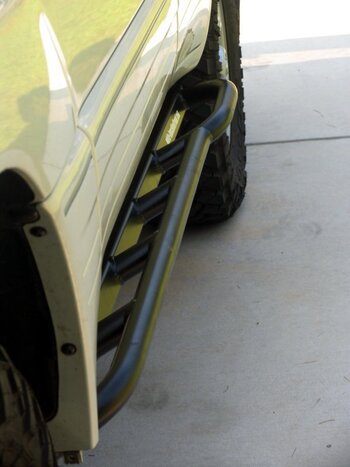
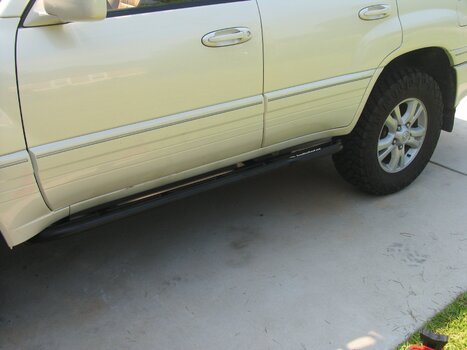
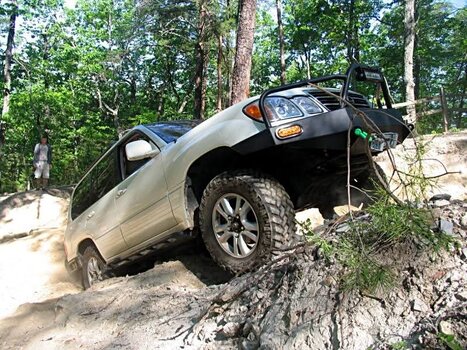
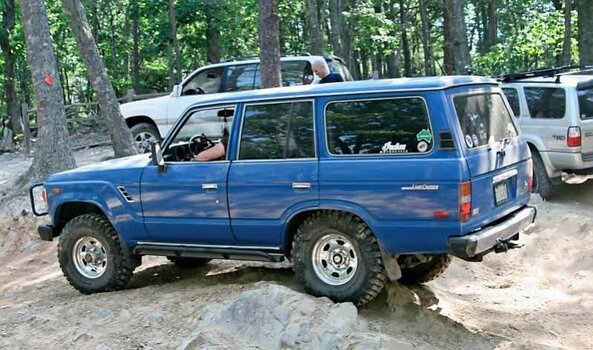
Also added a couple of my prior offroad vehicles...

More to come.....
 

Attachments

  • 1000008583.jpg
    1000008583.jpg
    4.8 MB · Views: 57
  • 1000008570.jpg
    1000008570.jpg
    298.8 KB · Views: 41
  • 1000008569.jpg
    1000008569.jpg
    173.9 KB · Views: 38
  • 1000008567.jpg
    1000008567.jpg
    220.1 KB · Views: 37
  • 1000008588.jpg
    1000008588.jpg
    3.5 MB · Views: 36
  • 1000008619.jpg
    1000008619.jpg
    3 MB · Views: 37
  • 1000008618.jpg
    1000008618.jpg
    3.5 MB · Views: 37
  • 1000008616.jpg
    1000008616.jpg
    4 MB · Views: 38
  • 1000008615.jpg
    1000008615.jpg
    2.8 MB · Views: 35
  • 1000008585.jpg
    1000008585.jpg
    4.9 MB · Views: 33
  • 1000008584.jpg
    1000008584.jpg
    5.2 MB · Views: 31
A minor update...and a couple of orders.
1. Got in the under seat security box..fits perfect under driver seat (LHD)...has foam strips to prevent vibration and is solid. I may replace the lock mechanism if not specific to box and a regular cylinder lock...as the one they have is hard to read numbers and not very precise. May go with one from ConsoleVault or a barrel key on to make easier in dark. Adding high density foam padding with sticky sides...and also cutting out area for a rare earth magnet with plastic coating for securing my pew pew when traveling and not wearing....or when I cant in school or airport.
1000008672.jpg1000008673.jpg
2. Ordered drawer system from Diabolical....will be adding some type of adhesive backed foam padding for sound deadining and to help keep items from sliding inside drawer.

3. Ordered sliders from Agile Offroad. I was going to go with WKOR as I have had them on two vehicles (FJC and UZJ100) and they were beefy, strong, and have used hi-lift with adapter to lift off obstructions and for tire changes. Just didnt want to wait so long for them....and I dont do the rock crawling thing anymore so not sure worth wait. Went with AO version...more sleek, IN STOCK, slightly more expensive but hopefully can have within a week or two.

Pics will follow.....

Still working on getting the enlarged cupholder plate from GrenadierUSA.....rear cargo area side baskets to allow use of the dead space between wheel arches and side of cargo area. Also a USB solution for dash mount soon.

***UPDATE: Bought some small squares of dense foam padding with 2 sided tape on them...placed two of my magnets on bottom of vault floor...one parallel and one perpindicular...then placed padding in open spots on sides and bottom. Works good to hold heavy (or light) ferrous metal items of value or consequence secure in a locked container for times when you do not want to carry them on your person.... I might find a better cylinder lock but so far so good. No rattles, no creaking, and is out of sight completely unless door opened.
 

Attachments

  • UTF-81000008695.jpg
    UTF-81000008695.jpg
    819.1 KB · Views: 24
Last edited:
Today added a couple things...not priority but something while I wait on sliders and drawers to arrive. ;) These two things both came from GrenadierUSA

First was the bottle opener...had one on both steel bumpers of my FJC and LX470 on front so could pop cold "root beer" while camping after long day of wheeling. so has a place on utility rail back by rear door.

The other is the overhead tray...I added the additional bungee provided for underneath and it holds my sunglasses while the other will stay to keep items from slipping out of tray itself. Easy installs, both.

I also am on waiting list for oversized cup/phone holder also from GrenadierUSA...
 

Attachments

  • UTF-81000008692.jpg
    UTF-81000008692.jpg
    782 KB · Views: 38
  • UTF-81000008693.jpg
    UTF-81000008693.jpg
    798.7 KB · Views: 25
  • UTF-81000008694.jpg
    UTF-81000008694.jpg
    691.8 KB · Views: 28
Couple things pending..... AO Sliders have arrived...had to get a centering punch that was larger and I was missing one of the needed torx sockets....so hopefully will get installed this coming weekend. Diabolical drawer system received one of the two boxes....2nd hasnt been seen since Salt Lake...so hopefully just incompetent scanners and arrives today or while gone for work this week. Notified Alana so he can track on his end as shipper.
I did receive the outsized cupholder from @GrenadierUSA ....awesome product. Expensive....but everything is until we have more competition here in USA for aftermarket solutions. Until then you either pay the price, make your own, or wait. I couldnt wait. LOL 5 minute install...hardest part was removing old cupholder section haha. I have Google Pixel in UAG case...wife has Samsung in a thick case with a ring holder on rear...both fit great. My large Pelican cup (similar to Yeti) fit great too for a 700 mile trip over weekend.
Great product, fits perfect.
 

Attachments

  • 1000008770.jpg
    1000008770.jpg
    971.8 KB · Views: 27
  • 1000008769.jpg
    1000008769.jpg
    914.8 KB · Views: 30
AO Sliders have arrived...had to get a centering punch that was larger and I was missing one of the needed torx sockets....so hopefully will get installed this coming weekend.
I'll be keeping an eye on how you get along. Mine also arrived but won't be mounting them for a couple weeks.
 
Two more items off the list....and all for now (I think) until I do some hunting trips, camping trips, and daily driving for next 6-8 months and get better feel for what is possible or needed.

Recently, I added the drawer system from #Diabolical as it had a single drawer rather than two narrow drawers. I do a lot of hunting so was hoping my sxs shotgun would fit in soft case diagonal. Not checked yet but if so that is how I prefer to carry both in transit out west from east coast as well as between locations and back to camp/lodging. Just makes it easy to remove vest, gloves and place in drawer...insert shotgun into soft case and zip mostly shut and move to the next. Also have my dog collar bag handy for charging or storing collars. Shotgun shells along front edge and first aid kit. Dog boots, dog chest protector, extra gloves, stocking cap and some snacks (crackers, Vienna sausage, etc)...round it out. I just find the single drawer better for me given the size of the cargo area not being larger.
It is well made, well powder coated, all areas fit as described...only had to flex tray slightly to get L-brackets in corners correctly. Alan also includes high density foam pad for bottom of drawer....and boat decking on top of the drawer lid as well as the leveling kits pieces on side. I also chose to install the tie down mounts as I left my aluminum utility rails under the drawer so would not be lost and available when needed and bolts stored as well.
Driving around past few days it has not rattled or shifted. Very solid, allows access to 120v outlet and hydraulic bottle easily...and opens and locks as expected. Lots of pieces and takes a little time to assemble but if follow his video on installing (1+ hour video on YouTube)...it goes smoothly. I would have done sooner if not going every couple sections to review video in air condition...then going outside to sweat and complete another stage of install. It comes with two dividers that go side to side...and two more that go front to back...depending on preference. I am only using one from side to side near opening to put a few boxes of shotgun shells, flashlight, hand warmers, batteries, knife, etc....for quick access.
 

Attachments

  • 1000008840.jpg
    1000008840.jpg
    945.9 KB · Views: 5
  • 1000008839.jpg
    1000008839.jpg
    963.7 KB · Views: 5
  • 1000008837.jpg
    1000008837.jpg
    1 MB · Views: 4
  • 1000008836.jpg
    1000008836.jpg
    917.4 KB · Views: 4
  • 1000008835.jpg
    1000008835.jpg
    953.4 KB · Views: 4
Yesterday I installed the sliders (with help of a friend...the one I sold my mostly original 1984 FJ60 that was bought new in family and stayed with us until sold to him...much to my regret.). Once installed they are rock solid...nice foot platform to use for entering or exiting the high seating position of Grenadier. Sit up very, very tight to bottom of body sill..... They have to be the HIGHEST CLEARANCE true rock sliders I have ever seen. Very thick steel, well machined aluminum mount brackets, multiple attachment and securing points to distribute load...and a completely smooth surface other than round head bolts from front to back...one solid piece of steel wraps from lower slider to foot step. Ingenious how it attaches and what it replaces as remove the plastic rocker panel and all hardware completely.
The only part that surprised me is it does not use any of the pre threaded mount points on frame but when I say this thing is solid...it is solid. My 245# bounced on it and didnt budge. Period!!! Because there is no use of frame threaded studs...you have to drill a few holes and use a threaded insert bushing and expansion tool (included) to secure. Follow the instructions.... Also, I would buy a couple 1/8" high quality contractor grade drill bits and an extra 17/32 metal drill bit. He supplies one but found mine started to warp the last two holes and did not get as good a fit for inserts even using a lubricant profusely during drilling. The hardest part is the drilling....and installing bushing inserts. After that everything else if fairly simple and easy. When installing the final bolts, washers, nuts underneath through body tabs....they may not be aligned. Pressure on bottom of slider can help get bolt inserted and thread itself up into hole. I got one in middle threaded with nut 50%...and helped align rest easier....once tightened the sliders settle in and pop into place perfectly. Also, I had to cut a slit in both rear wheel liners/flaps as need to put behind the AO end cap....easy fix once realized..
The finished product almost looks like factory sill protector and sits very high up for maximum clearance. Nothing to snag or bump obstacles. I dont think would need anti-skid stickers on it as is perfectly flat, not angled so gives a nice purchase when climbing in/out. I am almost 6'3" and when getting in before would put leg in and go into seat in all one movement but right knee would hit steering wheel column. Now, I step up on slider, pivot into seat and then move knee over and is perfect. Love it.
I am cleaning up the plastic sill rocker protector, the three mounting bars per side, and all the body clips in case someone ruins theirs and the dealership cant get them in to fix.....
#AgileOffroad did a great job with these...and after having White Knuckle Offroad sliders for past two Landcruisers.....these were much more tedious to install....but seem to be a great and innovative design.

The instructions list all parts and tools needed...but would consider:
- extra 17/32 steel high quality drill bit...use one per side.
- heavy duty drill (wired or battery) for the 17/32 drilling...put too much stress on my DeWalt cordless. I taped a small level to top of both (Dewalt cordless for smaller holes.....Milwaukee corded for large final hole) to ensure level since going through two different panels...thin outer and a much thicker inner as well.
- If dont have a 25/64 self centering punch for marking drill locations...can wrap a layer or two of duck tape around more common 23/64 just make sure tape allows it to enter inner hole and self center...holding shaft as close to center of hole as possible when tapping with hammer to ping sheetmetal.
- when installing top flat head counter sunk bolts on step side...will need to open doors. DO NOT shut door until are flush or nearly flush with step surface. Two of the bolts are between door and jam when opened....I found a screw driver with the proper torx bit installed was easier than trying to fit a ratchet and torx socket there and possibly damaging paint.

Also, directions say 2 hours to complete. Maybe with lifts, two people that have installed it a few times, all the extra bits and tools all layed out, etc. In garage out of sun with fan blowing on us doing one side at a time....took us 4 hours almost. Plan accordingly.... I paid my help with pizza and what was left of bottle of Elijah Craig 18 year old bourbon. LOL
 

Attachments

  • 1000008842.jpg
    1000008842.jpg
    1.1 MB · Views: 4
  • 1000008843.jpg
    1000008843.jpg
    1,010.5 KB · Views: 3
  • 1000008844.jpg
    1000008844.jpg
    1,005.3 KB · Views: 3
  • 1000008845.jpg
    1000008845.jpg
    867.1 KB · Views: 2
Back
Top Bottom