
WHAT YOU NEED
FITTING
I would have saved a lot time if I had remembered Cameron had posted his setup many months ago (see image below), instead of having to work it out myself, with some wiring help from ORS.
ANOTHER OPTION: If you do not have a winch, fitting the 20-inch Viper down on the bumper would be another option. Or if you do have a winch, be very careful about drilling holes in the bumper. The end brackets could be used for mounting in this position.
Slide Mount (Source: Lightforce website)

Blue protective film still on the Viper in these images. It was the test fit up and the hex brackets are not centered precisely.

After fitting

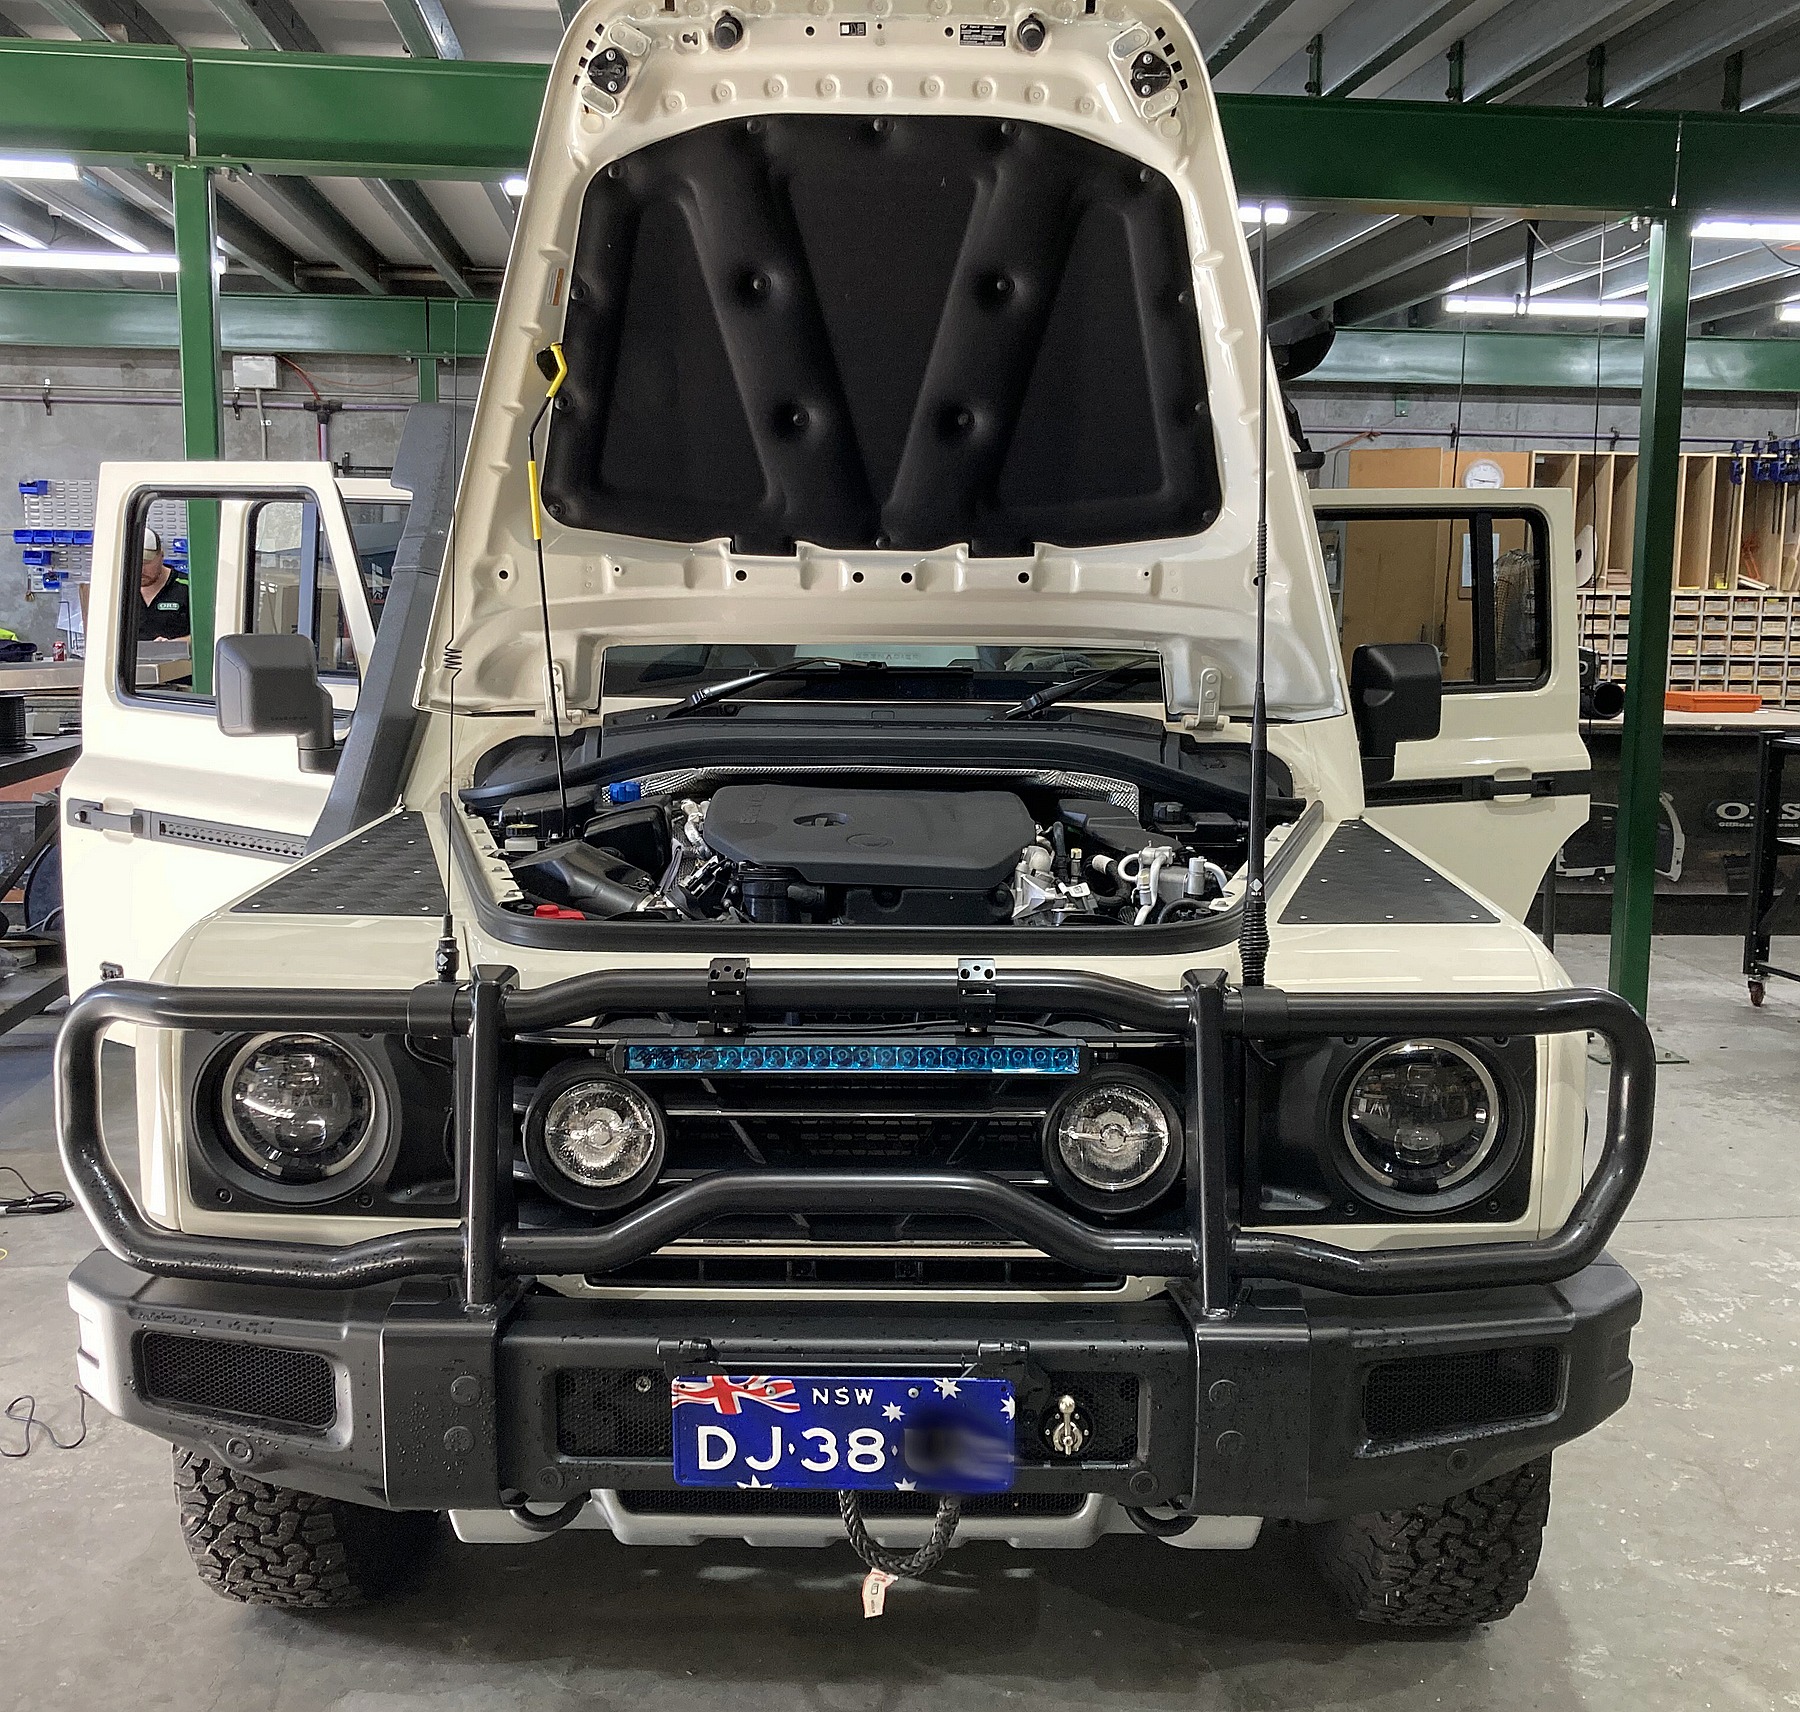
Cameron's (@CBN) double row here (the dual row 29 inch Viper draws 11.1 amps, so you cannot use the 10 amp bonnet circuit EXT1, but you could use the 25 amp bonnet circuit if you have the aux power option):

VIPER OUTBACK PERFORMANCE - OBSERVATIONS
The combination of the Grenadier’s high beam, spot lights and the 20 inch Viper bar is a powerful combination, giving a well balanced combination of spot and flood lighting. Flood lighting goes out 20-30 metres offroad, but more light is directed forward down the road.
The 4 LEDs on the each end of the Viper have reflectors to spread light and the centres LEDs use spot reflectors. The Viper compliments the lights already on the Grenadier. There is no noticeable variation in colour temperature between the Viper and the Grenadier’s lights. Both are easy on the eye for long drives.
- STEDI Hex brackets (select size 48 to 53mm). The STEDI hex bracket came with a Torx Security key to tighten the bolts in the hex bracket. Not sure of the size because I could not get my Torx Security bits to fit properly. The brackets come with three M6 bolts of different sizes and types. One pair was the correct length to use in my setup. I also used a Nord Lock washer and a flat washer on the M6 bolt. The Nord Lock washer ensures corrugations do not loosen the bolts.
- Lightforce Viper 20-inch lightbar (single or double row of LEDs). The Viper comes with side mount and slide brackets.
- Two standard M6 nuts. Only a standard M6 nut fitted into the hex bracket slot, a M6 Nylon Lock Nut was too thick. The hex bracket only came with Nylon Lock Nuts. See also point 1 below under FITTING.
- Relay, tools and wiring.
- The Viper had a 2 pin Deutsch DT plug (not DTP) attached and a wiring loom. The power came from the Grenadier's 10 amp wire ends under the bonnet (Ext1). The auto electrician changed the loom and added a relay and integrated it into the car. I never saw the modified loom. The relay turns on the lights when it senses current to the high beam on your headlights (or the driving lights which can only come on in high beam).
FITTING
- Affix with the Lightforce slide mounts that attach to the rear of the lightbar (not the ends which use brackets – the Ligthtforce comes with both options supplied). You need to reverse the way the bolts normally insert into the hex bracket. You may need to trim the bolt's length so it does not protrude pass the width of the bracket onto the Roo Bar. Adding two washers on the M6 bolt was enough so the bolt did not protrude, in my case. I used a Nord Locker washer, flat washer and a standard M6 nut.
- Affix the slide brackets to the bottom half of both hex brackets. The nut must go inside the hex bracket slot, not the bolt head as normal. The image below of the slide bracket shows the correct orientation for inserting the bolt into the hex bracket.
- Attach the slide brackets to the lightbar. Tighten bolts onto the slide brackets, after spacing the brackets correctly (I placed them 100mm in from each end of the lightbar). Just hand tighten the bolts and check the angle of the lightbar fitted under the Roo Bar, adjust position of slide brackets if needed. You do have some additional adjustment with the way you affix the hex bracket to the Roo Bar.
- Attach hex brackets to the Roo Bar, check it is centered correctly. Tighten all 8 bolts in the hex brackets. TIP: when tightening the Torx Security bolts on the hex bracket, I would tighten a bolt two turns and then go around and do the same to all the bolts. If you tighten one bolt too much, it can result in another becoming loose. The described approach minimised that effect.
- Wire up the lightbar or call ORS (Sydney based) and have then do it for you.
- My Lightforce Viper is powered from the 10 amp under bonnet circuit using circuit Ext1 (the single row Viper draws 5.8 amps). A relay is attached to the driving light circuit, so the Lightforce Viper can only come on when the driving lights are on. The driving lights only come on when high beam is active. Turning off high beam means the driving lights and the Lightforce Viper also turn off (assuming the aux power and Ext 1 switches are turned on). My options are; high beam only, high beam plus driving lights and high beam, driving lights and Lightforce Viper.
I would have saved a lot time if I had remembered Cameron had posted his setup many months ago (see image below), instead of having to work it out myself, with some wiring help from ORS.
ANOTHER OPTION: If you do not have a winch, fitting the 20-inch Viper down on the bumper would be another option. Or if you do have a winch, be very careful about drilling holes in the bumper. The end brackets could be used for mounting in this position.
Slide Mount (Source: Lightforce website)
Blue protective film still on the Viper in these images. It was the test fit up and the hex brackets are not centered precisely.
After fitting
Cameron's (@CBN) double row here (the dual row 29 inch Viper draws 11.1 amps, so you cannot use the 10 amp bonnet circuit EXT1, but you could use the 25 amp bonnet circuit if you have the aux power option):
VIPER OUTBACK PERFORMANCE - OBSERVATIONS
The combination of the Grenadier’s high beam, spot lights and the 20 inch Viper bar is a powerful combination, giving a well balanced combination of spot and flood lighting. Flood lighting goes out 20-30 metres offroad, but more light is directed forward down the road.
The 4 LEDs on the each end of the Viper have reflectors to spread light and the centres LEDs use spot reflectors. The Viper compliments the lights already on the Grenadier. There is no noticeable variation in colour temperature between the Viper and the Grenadier’s lights. Both are easy on the eye for long drives.
Last edited:


