The Grenadier Forum

Register a free account today to become a member! Once signed in, you'll be able to contribute to the community by adding your own topics, posts, and connect with other members through your own private inbox! INEOS Agents, Dealers or Commercial vendors please use the contact us link at the bottom of the page.

Rear internal light connector

Grumpy

Grenadier Owner
Lifetime Supporter
Local time
2:50 PM
Joined
Oct 17, 2024
Messages
124
Location
Glasgow, UK
Hi,

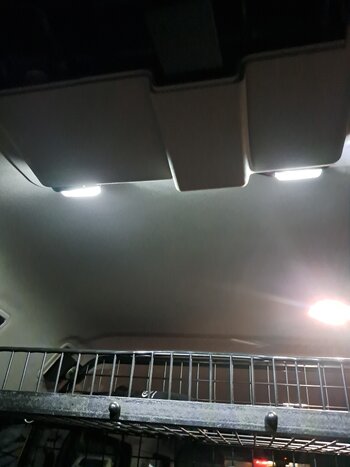
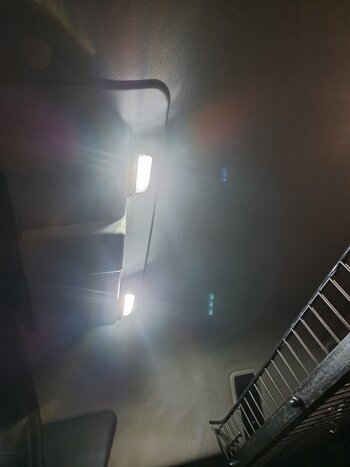
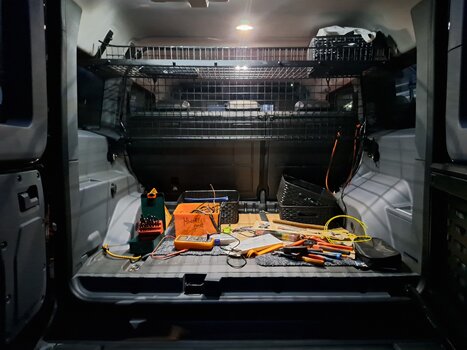
Does anyone know what type of electrical connectors are used to plug into the internaL roof lights, especially the one in the rear.
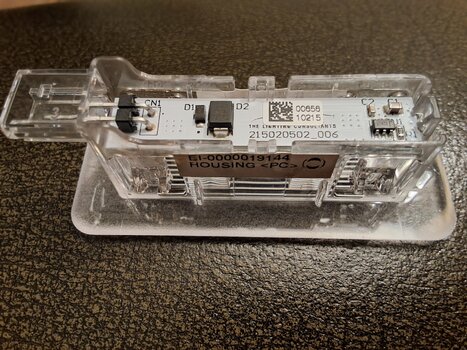
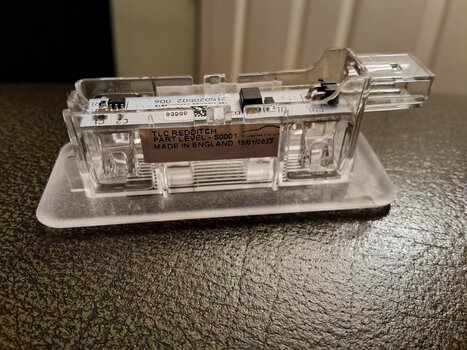
Photos attached of the lamp.

I've emailed the company but just wondered if anyone has been down this road already?

Thanks

G.
 

Attachments

  • 20260102_220652.jpg
    20260102_220652.jpg
    3 MB · Views: 148
  • 20260102_220741.jpg
    20260102_220741.jpg
    2.7 MB · Views: 141
Thanks for that.

Will endeavor to update once completed my wee project.

G.
 
Okay, update, and a couple lessons learnt.
Ended up buying the connectors from A. Bought more than required as still learning, thought there would be causualties along the learning curve. Lights were also A, LED number plate lights.
Made a short infill loom and took a feed from there to two new lights, feed the wires through the space between the roof and head liner popping out at the cover over the rear door latch cover.
Lights are 3m adhered to the back of that cover and wire just looped back in for now.

Connectors - what a PITA they are! Having fingers like sausages and not the best eyesight, not a good mix! Thought DTP were fiddly!

Cover to rear door latch removal - not advised at temperature below zero, managed to snap one of the legs holding the plastic clips, off!
Also manged to blow that circuit somehow and now know the 5 amp fuse also contols the battery level display in the offroad menu.

All back together now and pretty happy with it. Will tidy wiring up later once used a few times.

G.
 

Attachments

  • 20260108_163125.jpg
    20260108_163125.jpg
    4 MB · Views: 119
  • 20260108_163110.jpg
    20260108_163110.jpg
    3.5 MB · Views: 113
  • 20260108_162823.jpg
    20260108_162823.jpg
    4.7 MB · Views: 117
Okay, update, and a couple lessons learnt.
Ended up buying the connectors from A. Bought more than required as still learning, thought there would be causualties along the learning curve. Lights were also A, LED number plate lights.
Made a short infill loom and took a feed from there to two new lights, feed the wires through the space between the roof and head liner popping out at the cover over the rear door latch cover.
Lights are 3m adhered to the back of that cover and wire just looped back in for now.

Connectors - what a PITA they are! Having fingers like sausages and not the best eyesight, not a good mix! Thought DTP were fiddly!

Cover to rear door latch removal - not advised at temperature below zero, managed to snap one of the legs holding the plastic clips, off!
Also manged to blow that circuit somehow and now know the 5 amp fuse also contols the battery level display in the offroad menu.

All back together now and pretty happy with it. Will tidy wiring up later once used a few times.

G.
Great Job ! Looks cool !
 
Okay, update, and a couple lessons learnt.
Ended up buying the connectors from A. Bought more than required as still learning, thought there would be causualties along the learning curve. Lights were also A, LED number plate lights.
Made a short infill loom and took a feed from there to two new lights, feed the wires through the space between the roof and head liner popping out at the cover over the rear door latch cover.
Lights are 3m adhered to the back of that cover and wire just looped back in for now.

Connectors - what a PITA they are! Having fingers like sausages and not the best eyesight, not a good mix! Thought DTP were fiddly!

Cover to rear door latch removal - not advised at temperature below zero, managed to snap one of the legs holding the plastic clips, off!
Also manged to blow that circuit somehow and now know the 5 amp fuse also contols the battery level display in the offroad menu.

All back together now and pretty happy with it. Will tidy wiring up later once used a few times.

G.
If you made a plug n play kit for this, I’m sure you’d sell 30-40 easily….
 
If you made a plug n play kit for this, I’m sure you’d sell 30-40 easily….
If you think i'm going to play with those wee TE light connectors again your onto plums. I've had bigger skelf's!

I must have lost 50% of the ones I bought, likely distributed up the road somewhere as they fall out of crevices in the back of the truck!

I wish anyone wanting to play with them the best of luck!

G.
 
Okay, update, and a couple lessons learnt.
Ended up buying the connectors from A. Bought more than required as still learning, thought there would be causualties along the learning curve. Lights were also A, LED number plate lights.
Made a short infill loom and took a feed from there to two new lights, feed the wires through the space between the roof and head liner popping out at the cover over the rear door latch cover.
Lights are 3m adhered to the back of that cover and wire just looped back in for now.

Connectors - what a PITA they are! Having fingers like sausages and not the best eyesight, not a good mix! Thought DTP were fiddly!

Cover to rear door latch removal - not advised at temperature below zero, managed to snap one of the legs holding the plastic clips, off!
Also manged to blow that circuit somehow and now know the 5 amp fuse also contols the battery level display in the offroad menu.

All back together now and pretty happy with it. Will tidy wiring up later once used a few times.

G.
Hi Grumpy
You bought the components from A? Not sure what that bit means. I fancy doing similar.
 
I did the same but I simply fed the 16 or 18ga wires for the light into the existing harness. There was enough room to jam 2 more wires in the factory harness and tape them so they don’t come out. Makes all the difference having a light into the far back.
 
Hi Grumpy
You bought the components from A? Not sure what that bit means. I fancy doing similar.
Connectors - 1
Lights - 2
Spare clips - 3
the clips are slightly too large in the throat to attach to the roof cover, but a little sanding/ filing will sort that.

G.
 
I was thinking of using Tap-it connections.
Im certainly no electrickery guru, far from it, but i was advised previously cutting into looms isnt a good idea. Admitedly that was the headlight loom so a lttle more important than a rear light.
But having found that the boot lights are linked into other more obscure circuits, when i blue the circuit, the piece in loom was the path i took.

Certainly tge tapits will be easier.

G.
 

been down that rabbit hole . :)

this is the plug that mates with the light .

Have not ordered it yet but based on part numbers this is the one .


this is the male plug ( same as the light fixture above)

Again not bought them yet , just sitting in my cart untill i have time to do my project

I can confirm the above connectors are the correct ones for getting power from the dome light at the back
Yes the connectors are very small , having the correct crimping tool makes a hell of a difference ( Can be found on ebay for 20-30 GBP ). install takes a couple of hours .
has been well documented here did not bother to replicate . A bit of cable management left and i think this project is done .
LED bar light can be found in Italy only place i could find it outside Australia or China bulk buy .

If anyone need specific links happy to provide what i have used .

Light Bar rear 1.jpg

Light Bar rear 2.jpg
Light Bar rear 3.jpg
Light Bar rear 4.jpg
 
Back
Top Bottom