
Hi everyone - a quick post re: installing the LeTech ladder. I ordered this from ExpeditionHQ late on Monday afternoon and it arrived yesterday (Wednesday) which is unheard of for Central Queensland - very speedy delivery.
I was going to do a post fully outlining the install but LeTech themselves do a much better job than I could of. See here -> LeTech Ladder Installation Instructions . That said, I have a couple of tips.
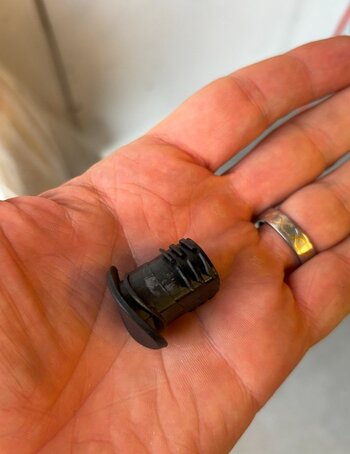
1 - There's no pleasantries included with the ladder - no instructions, information, stickers etc - you just get the ladder. The online instructions reference a plastic wedge for removing the dust caps - this is also not included. Which is all fine, just fyi.
2 - That said, you don't need the plastic wedge. The instructions say to "unscrew" the dust caps but they are a push in style cap and finger strength is sufficient to pry them out. Doing this does distort the shape but don't need to re-use them for the Le Tech Ladder.
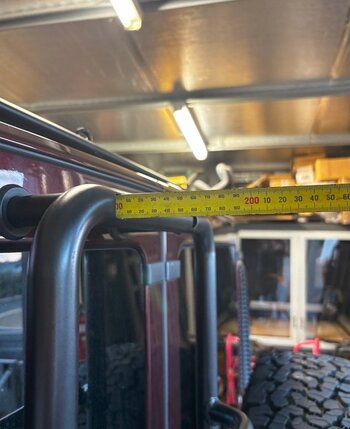
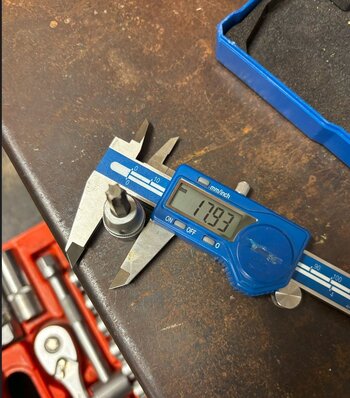
3 - One issue that had the potential to delay what should be an easy job is the bolts attaching the factory ladder to the rear panel require a T40 Torx fitting with a reach of at least 100mm to undo them. The tool also cannot be too wide (e.g. a socket fitting). I unfortunately didn't measure the diameter of the cut out in the ladder, however my socket fitting with a diameter of 17.93mm was too wide.
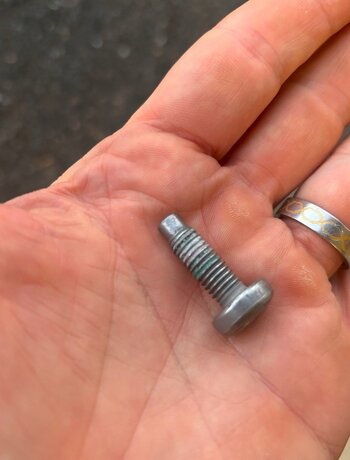
4 - The factory bolts are secured with medium strength thread locker which take a moderate amount of effort to release.
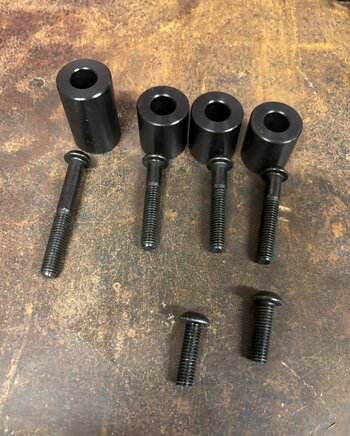
5 - The spacer kit has one odd length spacer, refer to the LeTech instructions for correct placement. Three of my spacers sat flush with the trim when installed but one sat proud by a couple of millimeters. I couldn't determine a reason for this other than the panel trim may not have been sitting flush in that area. When the bolts were torqued up it appears to sit neatly though.
6 - The two top bolts on the LeTech ladder are not the easiest to locate. In hindsight it may be easier to locate these two bolts first. I did the other four bolts (loosely) first which left the top ladder holes misaligned with the panel threads. The offset made it feel like the bolts were threading in but they weren't and I see how you could catch a cross thread and cause yourself a bunch of grief here. That said, a firm pull on the ladder in the downwards direction properly aligned the ladder holes with the panel thread holes for me.
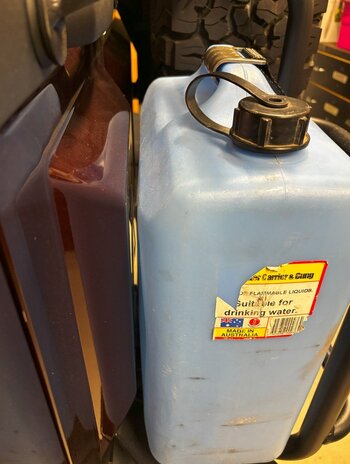
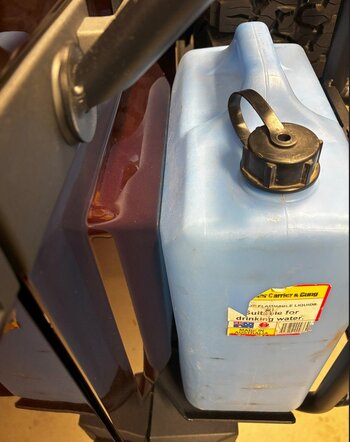
7 - The unsecured clearance with a standard jerry can I had lying around it not great - it rubs on the rear panel as it's being put into the holder and while it is just sitting there. However, you wouldn't be travelling like this - and once secured there is a small amount of clearance. I still have concerns about rubbing on this panel though and may look at some sort of rub protection but time will tell. A reduced width jerry can is also an option.
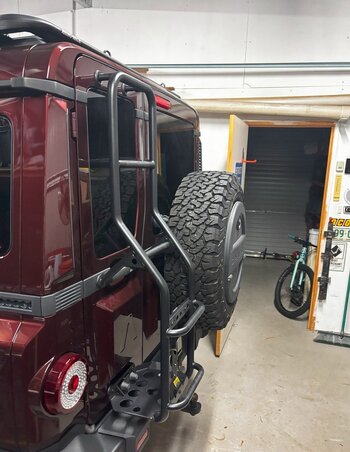
Overall i'm impressed with the quality of the ladder and components, The securing/latching mechanism seems robust and tightens as you lock it down which is nice - it is easy to get a solid securing of the jerry can. Overall it took me two hours to install - with a 1.5hr break for dinner - it's a simple and satisfying upgrade to do yourself.
I was going to do a post fully outlining the install but LeTech themselves do a much better job than I could of. See here -> LeTech Ladder Installation Instructions . That said, I have a couple of tips.
1 - There's no pleasantries included with the ladder - no instructions, information, stickers etc - you just get the ladder. The online instructions reference a plastic wedge for removing the dust caps - this is also not included. Which is all fine, just fyi.
2 - That said, you don't need the plastic wedge. The instructions say to "unscrew" the dust caps but they are a push in style cap and finger strength is sufficient to pry them out. Doing this does distort the shape but don't need to re-use them for the Le Tech Ladder.
3 - One issue that had the potential to delay what should be an easy job is the bolts attaching the factory ladder to the rear panel require a T40 Torx fitting with a reach of at least 100mm to undo them. The tool also cannot be too wide (e.g. a socket fitting). I unfortunately didn't measure the diameter of the cut out in the ladder, however my socket fitting with a diameter of 17.93mm was too wide.
4 - The factory bolts are secured with medium strength thread locker which take a moderate amount of effort to release.
5 - The spacer kit has one odd length spacer, refer to the LeTech instructions for correct placement. Three of my spacers sat flush with the trim when installed but one sat proud by a couple of millimeters. I couldn't determine a reason for this other than the panel trim may not have been sitting flush in that area. When the bolts were torqued up it appears to sit neatly though.
6 - The two top bolts on the LeTech ladder are not the easiest to locate. In hindsight it may be easier to locate these two bolts first. I did the other four bolts (loosely) first which left the top ladder holes misaligned with the panel threads. The offset made it feel like the bolts were threading in but they weren't and I see how you could catch a cross thread and cause yourself a bunch of grief here. That said, a firm pull on the ladder in the downwards direction properly aligned the ladder holes with the panel thread holes for me.
7 - The unsecured clearance with a standard jerry can I had lying around it not great - it rubs on the rear panel as it's being put into the holder and while it is just sitting there. However, you wouldn't be travelling like this - and once secured there is a small amount of clearance. I still have concerns about rubbing on this panel though and may look at some sort of rub protection but time will tell. A reduced width jerry can is also an option.
Overall i'm impressed with the quality of the ladder and components, The securing/latching mechanism seems robust and tightens as you lock it down which is nice - it is easy to get a solid securing of the jerry can. Overall it took me two hours to install - with a 1.5hr break for dinner - it's a simple and satisfying upgrade to do yourself.
Attachments
-
 01_Dust Cover.jpg229.5 KB · Views: 73
 -
 02_Depth for T40.jpg344.8 KB · Views: 65
 -
 03_too wide.jpg523.7 KB · Views: 62
 -
 04_med strength thread locker.jpg244.6 KB · Views: 56
 -
 05_spacer and bolt kit.jpg557.8 KB · Views: 86
 -
 06_installed.jpg421.8 KB · Views: 86
 -
 07_jerry can clearance secured.jpg434.6 KB · Views: 88
 -
 08_jerry can clearance unsecured.jpg419.7 KB · Views: 76

