
WRITE UP IS IN PROGRESS...... 6-23-25 (Check back to the final version tomorrow, I will add many more detailed pics)
Here I installed a new Wolfbox 900 pro... I did the installation in a less conventional way. Ran it under the truck...
I figured if I needed to go under the truck with the front camera, I would do the rear camera the same....
I saw a guy at Owl Overland run power to his running boards via the hole in the floor board. It exits near the driver's body mount. So I drilled holes through the rubber plugs for my wiring,
I use a 1/4 plastic tubing as a fish tape...
See here, I pushed the tubing through the floor plug and used it as a fish tape.
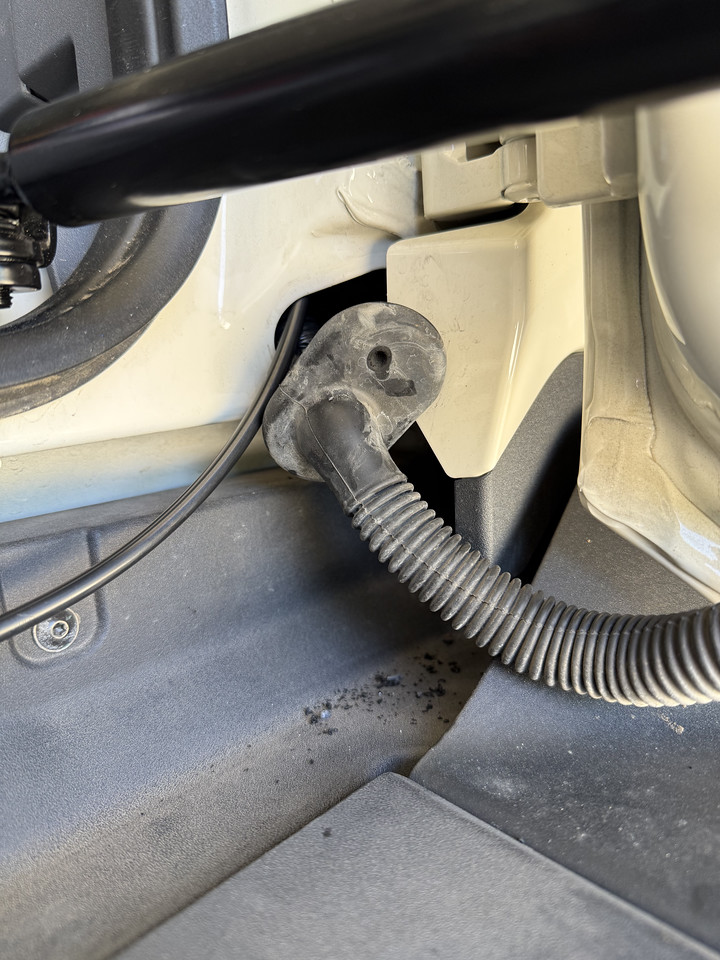
here is the plug on the other side....
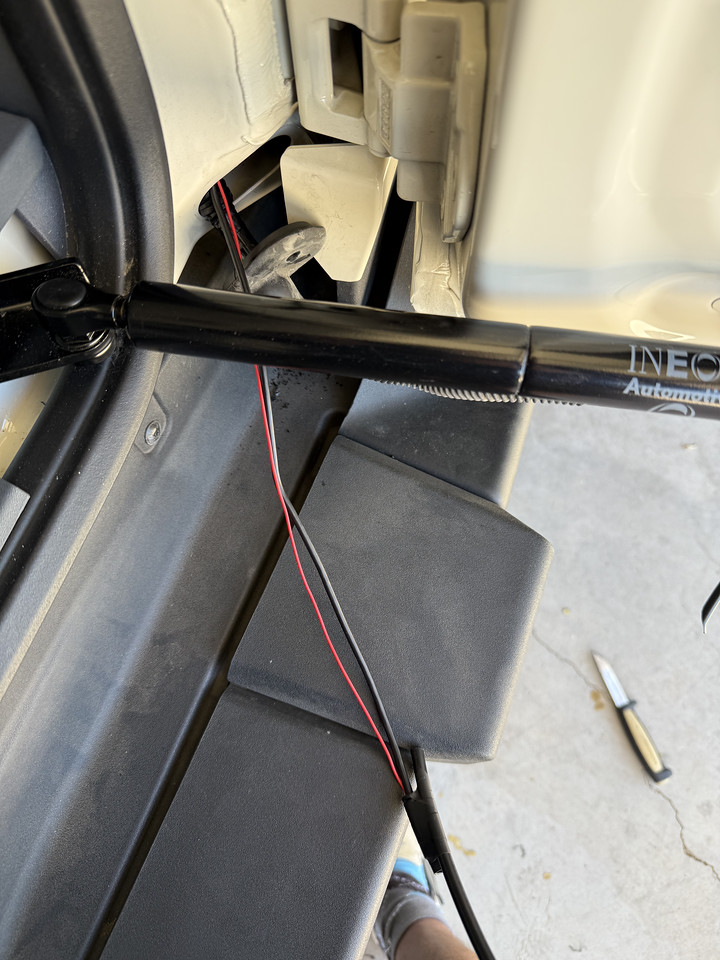
wired ran thru the plug ... while i was running wires , I added a red and black for future lights,
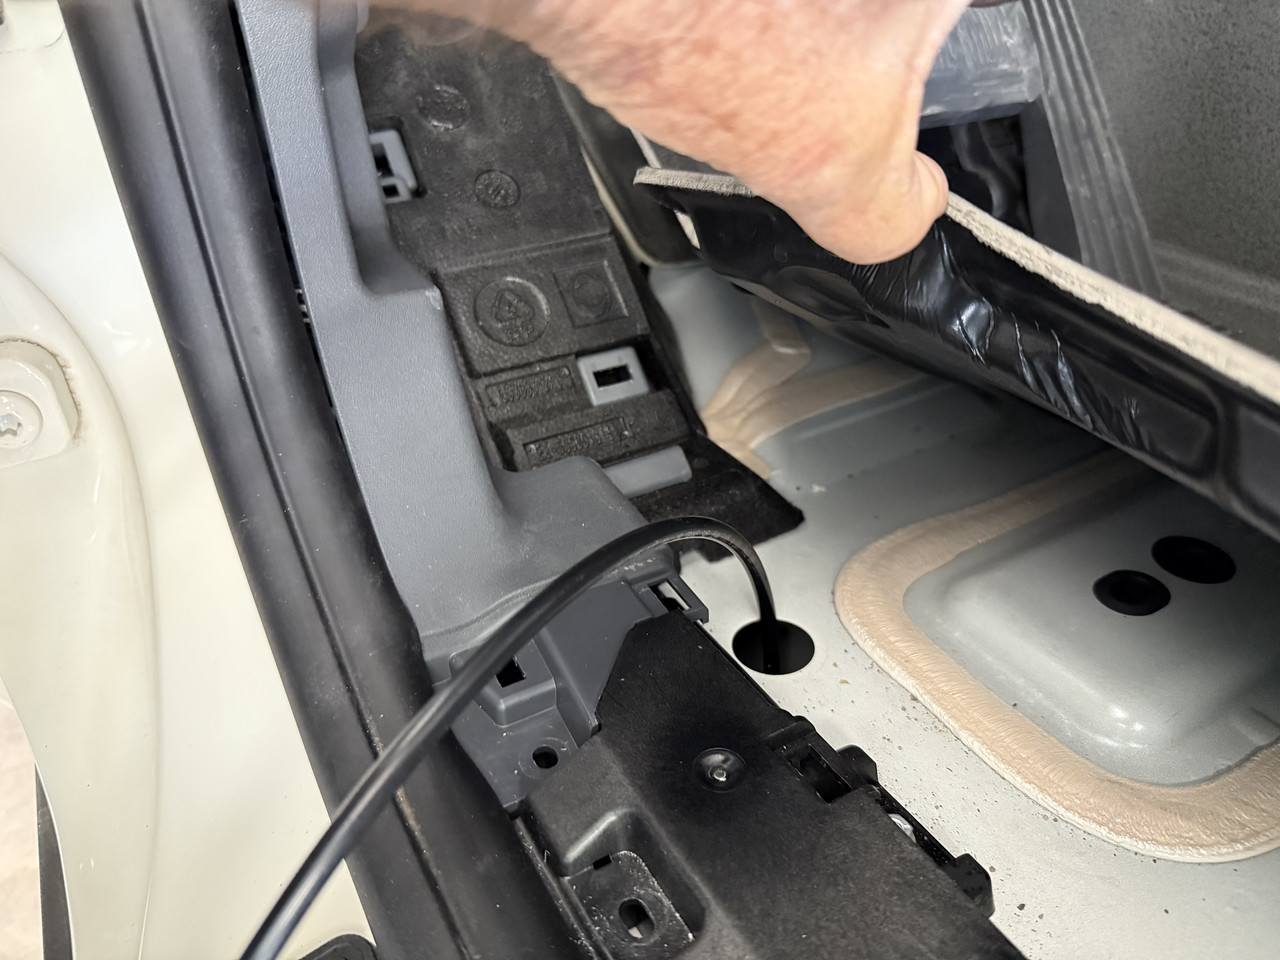
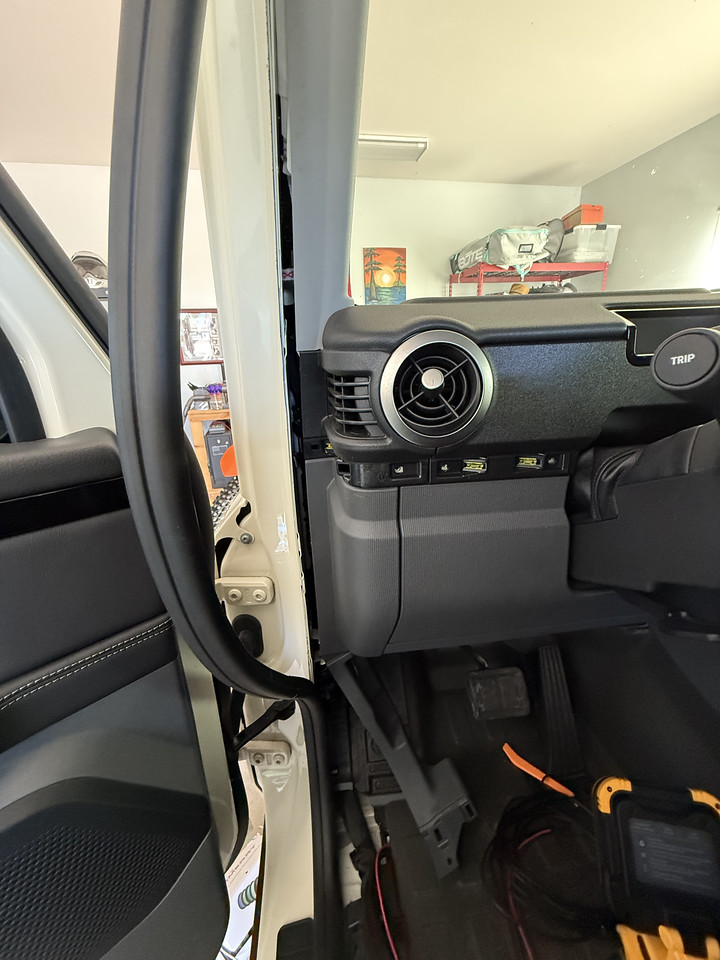
I then pulled the kick plate on the left, removed two screws, one nut, and one bolt, removed the door seal rubber, and installed the wire through the crack.
i tied the power into the Aux switch, wires were taped to the main harness....

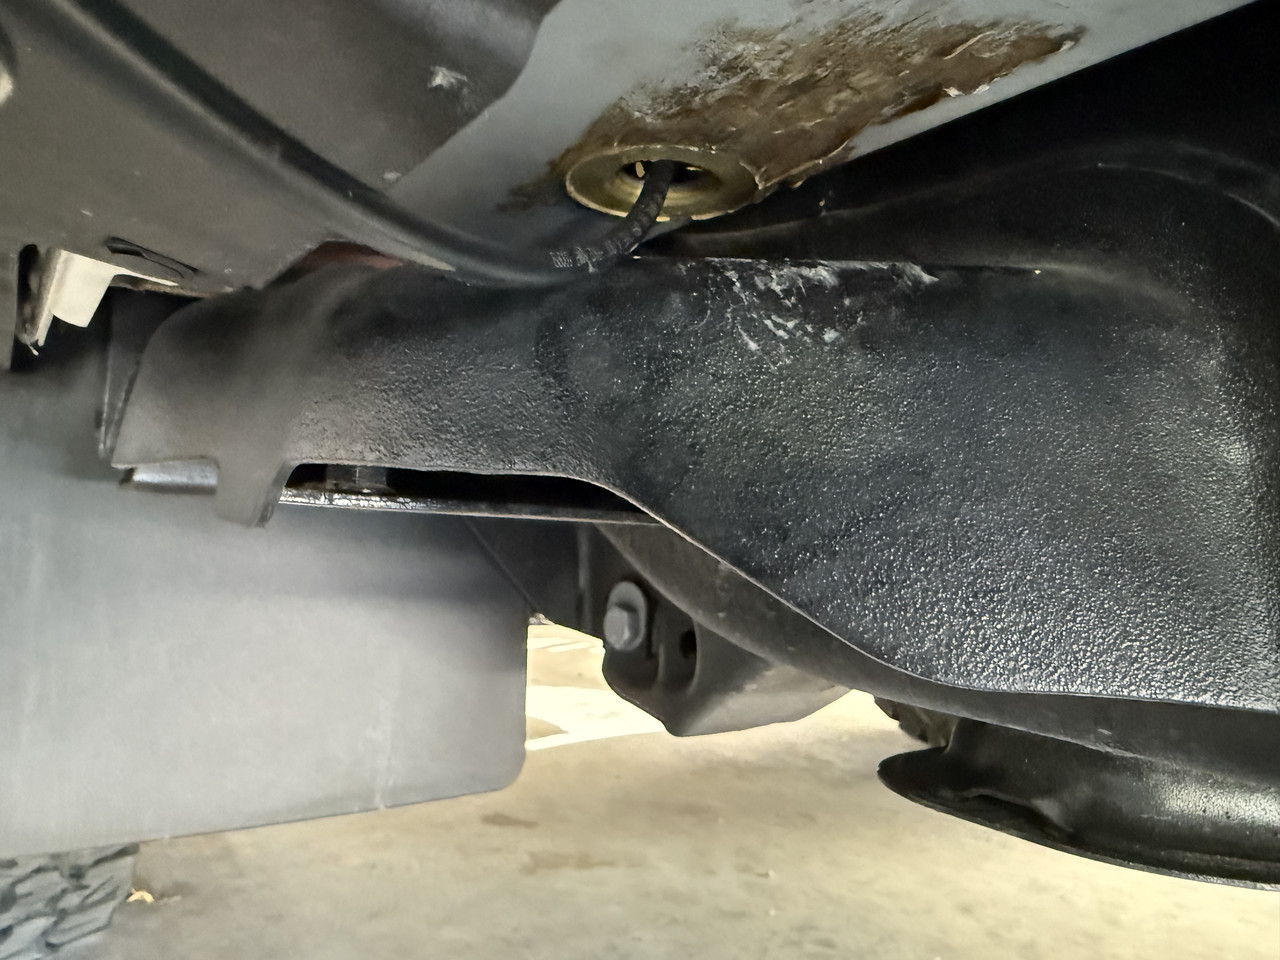
Once I got to the back it the truck , i went thru the same rubber plug this I wired my boat trailer module thru....
Once in the truck I rand a wire thru the rear door rubber hose interconnect....
You can see the hole I made... I ran the cable on the outside ( it was next to impossible to get it into the existing rubber hose)
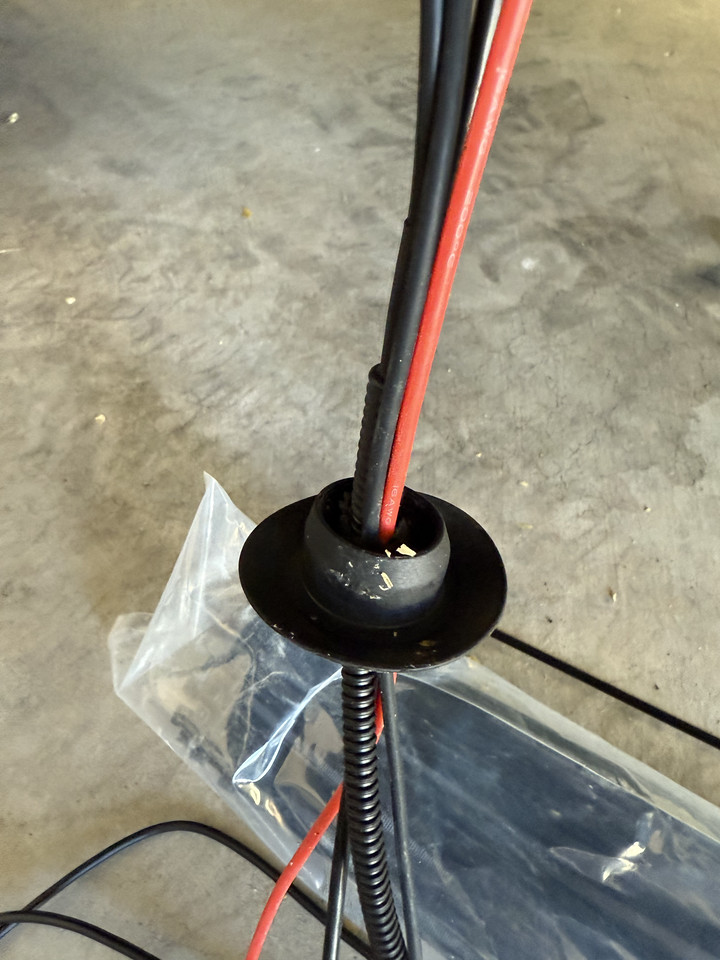
I used a little soap to reinstall the grommets (super easy)
I later realized there was no need to power the red. I did not want the reverse trigger to show the back reference marker on the screen.
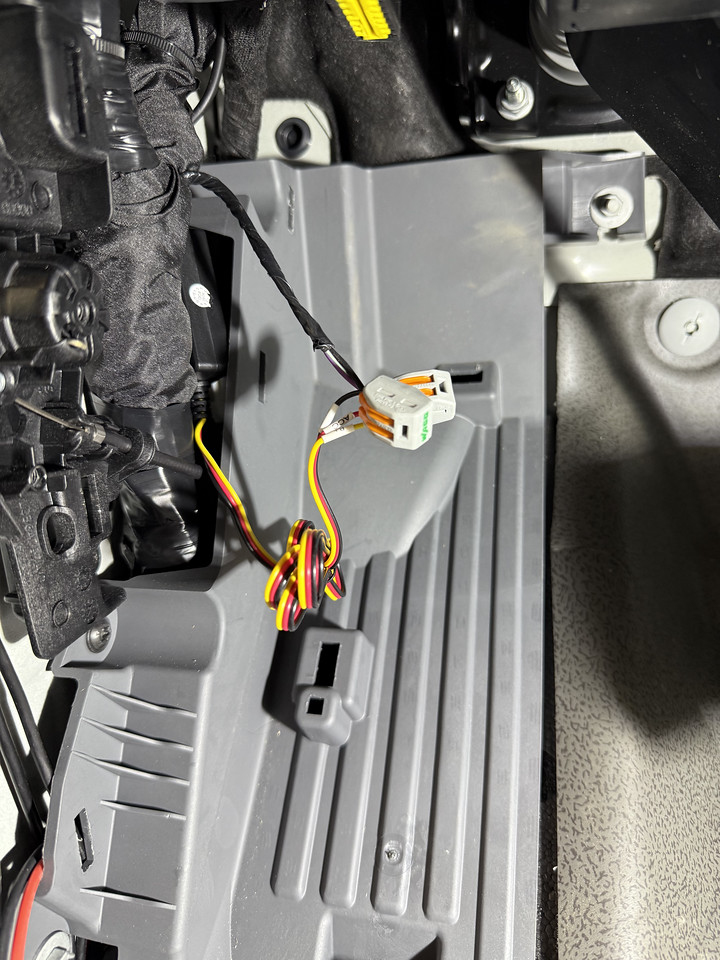
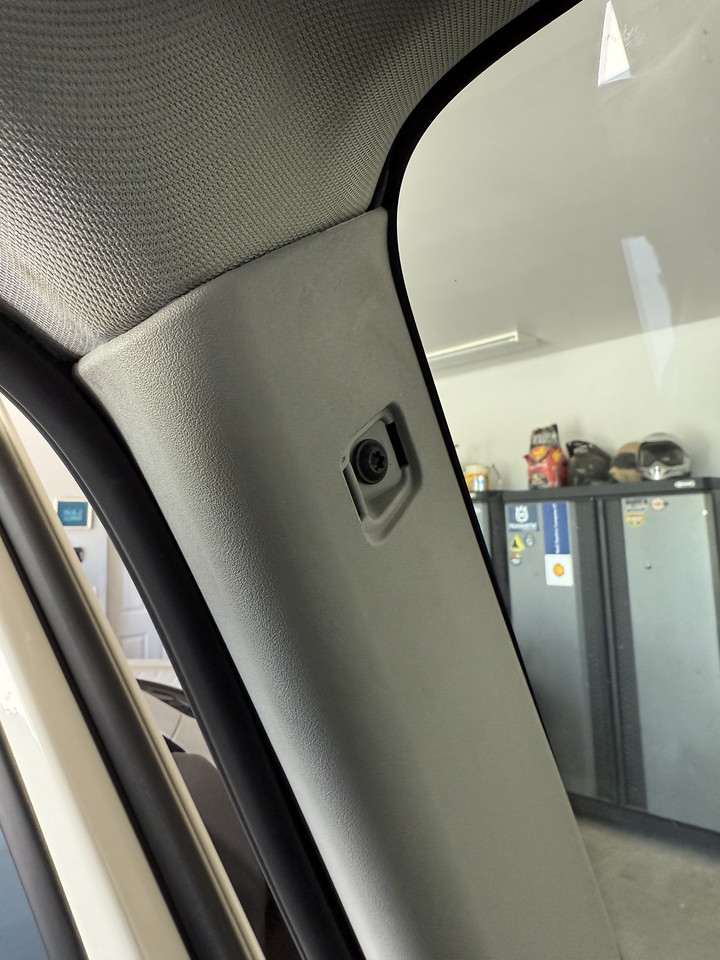
jumping back to the front , I removed the screw here to run the 3 wited behind the A piller trim piece. (front camera, rear, and USB C power cable)
Here I installed a new Wolfbox 900 pro... I did the installation in a less conventional way. Ran it under the truck...
I figured if I needed to go under the truck with the front camera, I would do the rear camera the same....
I saw a guy at Owl Overland run power to his running boards via the hole in the floor board. It exits near the driver's body mount. So I drilled holes through the rubber plugs for my wiring,
I use a 1/4 plastic tubing as a fish tape...
See here, I pushed the tubing through the floor plug and used it as a fish tape.
here is the plug on the other side....
wired ran thru the plug ... while i was running wires , I added a red and black for future lights,
I then pulled the kick plate on the left, removed two screws, one nut, and one bolt, removed the door seal rubber, and installed the wire through the crack.
i tied the power into the Aux switch, wires were taped to the main harness....
Once I got to the back it the truck , i went thru the same rubber plug this I wired my boat trailer module thru....
Once in the truck I rand a wire thru the rear door rubber hose interconnect....
You can see the hole I made... I ran the cable on the outside ( it was next to impossible to get it into the existing rubber hose)
I used a little soap to reinstall the grommets (super easy)
I later realized there was no need to power the red. I did not want the reverse trigger to show the back reference marker on the screen.
jumping back to the front , I removed the screw here to run the 3 wited behind the A piller trim piece. (front camera, rear, and USB C power cable)
Last edited:


