INTRODUCTION
Full credit goes to John from OWL Vans for his great video on installing the rubberised trim. Plus, member’s help in this thread.
I just made a few improvements to the process, mainly to preserve my hands and fingers.
View: https://youtu.be/D8iBlcKAhoA
STEPS
After installation, space is left around the rubberised trim, allowing water to drain away. There is no room to install the trim above the windscreen.
Install time from start to finish is around 15 minutes. I was being careful not to mess it up.
TOOLS AND PARTS NEEDED
Full credit goes to John from OWL Vans for his great video on installing the rubberised trim. Plus, member’s help in this thread.
I just made a few improvements to the process, mainly to preserve my hands and fingers.
STEPS
- Watch the OWL Van video, all of it.
- Read over these steps before starting.
- Get your rubberised trim and the tools listed below.
- Wash around the windscreen to remove dirt and any debris.
- Let it dry in the sun or use the curved trim tool, covered with the cloth, to dry and clean around the windscreen.
- Take the ISOCOL Rubbing Alcohol and your cloth. Clean a 2cm or 1-inch area around the edge of the windscreen. This is where the 3M tape on the rubberised trim will stick to the windscreen. The windscreen must be clean and free from any film to get good adhesion.
- I started on the passenger side of the car (RHD car), like the OWL video.
- Without removing the plastic tape over the adhesive strip, I placed the rubberised trim on the windscreen’s edge, using the masking tape to hold it in place. The purpose was to work out where the trim was to start and how to best place the trim correctly on the windscreen – without having to worry about it adhering! Work out your technique before the trim is sticky.
- I then removed the plastic cover and put the rubberised trim in place. I used the trim tool to push the trim as close as I could to the side of the windscreen. Once in place, I pushed down on the rubberised trim so the adhesive contacted the windscreen, using the palm of my hand.
- I placed the trim around the corner of the windscreen, as in the OWL video. You may need those gloves if you heated up the rubber trim too much.
- Quality control: once the trim was in place I used the heat gun to go over all the trim, in sections. Make the rubberised trim quite warm, but not so hot as to burn you. Then I used:
- the curved trim tool to make sure the rubberised trim was as close to the windscreen's edge as I could get it;
- the Dynamat roller to get maximum adhesion onto the glass (you can use your fingers instead, but put on the gloves).
After installation, space is left around the rubberised trim, allowing water to drain away. There is no room to install the trim above the windscreen.
Install time from start to finish is around 15 minutes. I was being careful not to mess it up.
TOOLS AND PARTS NEEDED
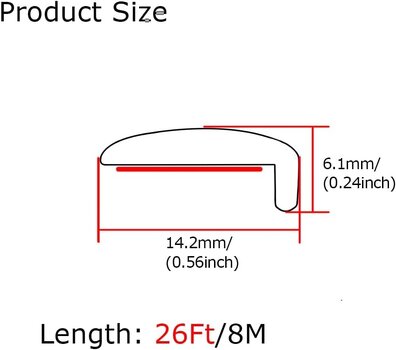
- Tintvent Automotive Door Edge Trim Molding Kit with Tape, L Shaped Lip Guard AU link here, US link here and UK link here. Cross section of trim below.
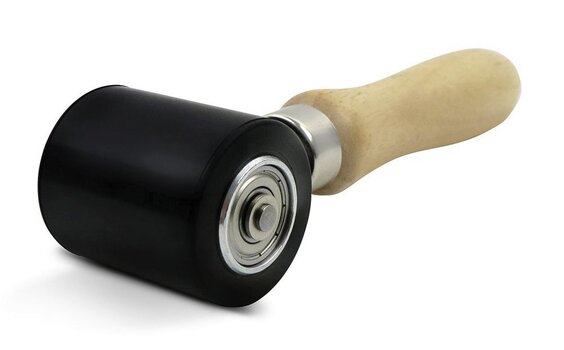
- Dynamat roller (or your fingers). See image below.
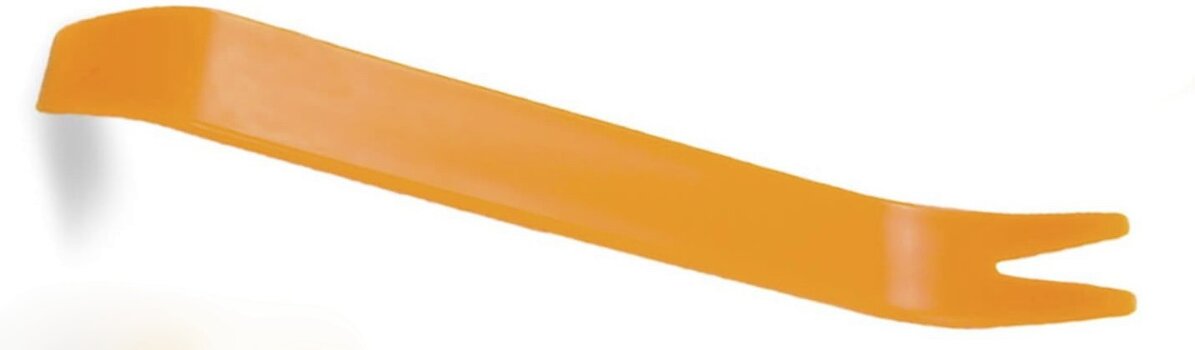
- Curved trim tool (or your fingers). I used the solid end. See image below.
- A cloth.
- A pair of gloves if using your fingers.
- Knife or scissors to cut the rubber trim to size.
- ISOCOL Rubbing Alcohol. It cleans the windscreen glass but leaves no film to improve adhesion of the trim. Some Methylated Spirits (Metho) added to water would also work.
- Masking tape.